Create Panel
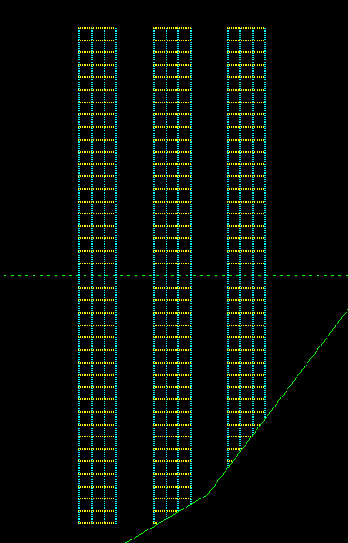
Use Create Panel to create headings and crosscuts survey lines for areas containing regular patterned roadways. The headings and crosscuts that are generated are based on a template (set through the Define Panel Type option).
Each heading survey line is stored as an object. You specify the name of the first heading and all subsequent headings will be named sequentially from the first heading name. For example, if the name of the first heading is A, then the next headings will be B, C, D, etc.
Each crosscut survey line is also stored as an object. The name of a crosscut is derived from the heading to which it is attached, that is, the heading from which it starts, plus a number. The number is incremented by one for each crosscut attached to the heading line. For example, A-1, A-2, A-3, B- 1 etc.
Panel objects are stored inpanelgroups. These groups are used exclusively for panel objects just asdrivagegroups are used exclusively for drivage objects. The panel objects are assigned the feature HEAD$CLPAN for headings, and CCUT$CLPAN for crosscuts.
The angular units (either degrees or gradians) used in this option depend upon the settings that have been specified through the Tools > Preferences > Miscellaneous option.
Instructions
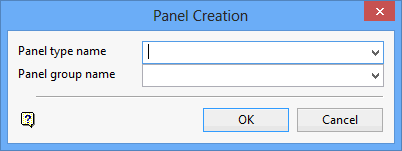
On the Underground menu, point to Coal Development, and then click Create Panel to display the Panel Creation panel.
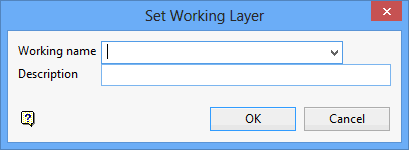
(If a working layer was not defined prior to selecting this option, then the Set Working Layer panel is displayed first.)

Working name
Enter, or select from the drop-down list, the name of the working layer. The chosen layer will be set as the active working for underground coal operations. It does not affect the layer set through the Layer option (under the Design > Create submenu)
To create a new layer, enter the layer name. The layer name...
- may contain up to 40 characters.
- must begin with an alphanumeric character [0 - 9] or [a - z].
- cannot include spaces.
- can include hyphens [ - ], plus signs [ + ], underscores [ _ ], periods/dots [. ].
- can include the special characters of ÁÂÃÀÇÉÊÍÓÔÕÚÜÑ that are used in the Spanish and Portuguese languages.
Description
Enter a description to further describe the contents of this layer. The description can be up to 80 alphanumeric characters and may include spaces. If a description is not entered, then a default description will be used instead. If the chosen layer already has an assigned description, the description will be displayed when the layer is selected. Existing layer descriptions can be overwritten.
To add to an existing working layer, the layer must be loaded onto the screen. If a working layer by the same name already exists in the currently open database, but has not been loaded, then you will be asked whether you want to select the layer or replace it.
Click OK.
Select OK.

Panel type name
Enter, or select from the drop-down list, the name of the template.
Panel group name
Enter, or select from the drop-down list, the name of the panel group. All panel objects (headings and crosscuts) are assigned to this group. The group name can contain up to 40 alphanumeric characters.
Click OK.
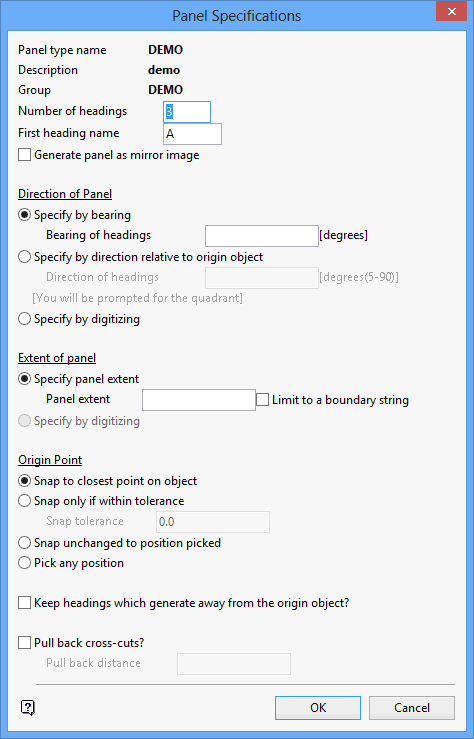
The following panel displays. The entries on this panel determine the panel's orientation.

The panel type, description and group name are displayed at the top.
Number of headings
The default number of headings is derived from the panel template. This can, however, be overwritten. The maximum number of headings per panel is 99.
First heading name
The first heading name is derived from the panel template if this is the first time that headings are created for the specified panel group. This is a default only and can be overwritten (maximum size 3 alphanumeric characters). Subsequent headings will be named sequentially.
If the specified group already contains headings, then the default first heading name will be one greater than the current highest in the group. For example, if headings A, B, C already exist, then the default name shown as the first heading will be D.
Generate panel as mirror image
Select this check box to create panels in mirror image. If checked, then the panels will be generated from right to left rather than left to right. It can be used to complement panels created on the opposite side of an origin object.

1 -- Mirror Image Panels
Direction of panel
The direction of the panel can be defined absolutely (by bearing), relative to another object or by digitising.
Extent of panel
The panel extent can be defined as an absolute value or by digitising (the latter only if the direction of the panel will also be digitised). Specifying an absolute value as the panel extent also to limit the panel generation to a boundary, for example a fault line, another roadway, site limit boundary etc. See Diagram 1.
Origin Point
The origin of panel generation can be any position on the screen or snapped to an object. The latter is more common as the origin of a panel is usually from a chainage point of another roadway. There are three snapping methods that can be used:
- Snap to closest point on object (for example another roadway).
- Snap only to a point on the object if in a specified tolerance.
- Snap to any position on the object.
Keep headings which generate away from the origin object
Normally, when generating a panel, if headings do not intersect with the origin object, then they will not be generated. For example, you have specified 10 headings but the fifth one would lie beyond the end of the origin object, consequently only the first four would be generated and panel generation would then halt.
Checking this box will override this behaviour, forcing all specified headings to generate. Usually, headings are clipped/extended to the origin object. When created away from the origin object they occur as default lengths.
Pull back cross cuts
Select this check this box to terminate the cross cuts before they connect with the second heading. This allows the creation of blind headings as cross cuts, and can be useful in Wongawilli and similar types of workings.

