Modify Panel
Use Modify Panel to change the number of headings, as well as reread the panel structure template. The latter is useful when a template has been changed since its initial creation.
Note: Pillars and roadway blocks derived from the panel will be deleted by a panel modification.
Instructions
On the Underground menu, point to Coal Development, and then click Modify Panel.
Select an object to modify.
(If a working layer was not defined prior to selecting this option, then the Set Working Layer panel is displayed first.)
Working name
Enter, or select from the drop-down list, the name of the working layer. The chosen layer will be set as the active working for underground coal operations. It does not affect the layer set through the Layer option (under the Design > Create submenu)
To create a new layer, enter the layer name. The layer name...
- may contain up to 40 characters.
- must begin with an alphanumeric character [0 - 9] or [a - z].
- cannot include spaces.
- can include hyphens [ - ], plus signs [ + ], underscores [ _ ], periods/dots [. ].
- can include the special characters of ÁÂÃÀÇÉÊÍÓÔÕÚÜÑ that are used in the Spanish and Portuguese languages.
Description
Enter a description to further describe the contents of this layer. The description can be up to 80 alphanumeric characters and may include spaces. If a description is not entered, then a default description will be used instead. If the chosen layer already has an assigned description, the description will be displayed when the layer is selected. Existing layer descriptions can be overwritten.
To add to an existing working layer, the layer must be loaded onto the screen. If a working layer by the same name already exists in the currently open database, but has not been loaded, then you will be asked whether you want to select the layer or replace it.
Click OK.
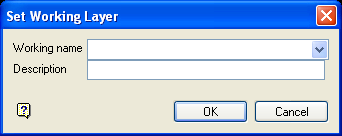
Set Working Layer panel
Working name
Enter, or select from the drop-down list, the name of the working layer. The chosen layer will be set as the active working for underground coal operations. It does not affect the layer set through the Layer option (under the Design > Create submenu).
To create a new layer, enter the layer name. The layer name:
- may contain up to 40 characters.
- must begin with an alphanumeric character [0-9] or [a-z].
- cannot include spaces.
- can include hyphens [ - ], plus signs [ + ], underscores [ _ ], periods/dots [. ].
- can include the special characters of ÁÂÃÀÇÉÊÍÓÔÕÚÜÑ that are used in the Spanish and Portuguese languages.
Description
Enter a description to further describe the contents of this layer. The description can be up to 80 alphanumeric characters and may include spaces. If a description is not entered, then a default description will be used instead. If the chosen layer already has an assigned description, the description will be displayed when the layer is selected. Existing layer descriptions can be overwritten.
To add to an existing working layer, the layer must be loaded onto the screen. If a working layer by the same name already exists in the currently open database, but has not been loaded, then you will be asked whether you want to select the layer or replace it.
Select OK.
You will then be asked to confirm your selection. Upon confirmation, the Panel Modification panel is displayed.
Change only the number of headings
Select this check box to change the number of headings. The default shows the current number of headings in the panel. The maximum number of headings per panel is 99.
Reread the panel type specifications
Select this check box to re-read the panel type specifications in case it has been changed. The changes will be reflected in the panel as soon as the Panel Modification panel has been accepted.
Keep headings which generate away from the origin object
Normally, when generating a panel, if headings do not intersect with the origin object, then they will not be generated. For example, if you have specified 10 headings but the fifth one would lie beyond the end of the origin object, then consequently only the first four would be generated and panel generation would then halt.
Checking this box will override this behaviour, forcing all specified headings to generate. Usually, headings are clipped/extended to the origin object. When created away from the origin object they occur as default lengths.
Pull back cross cuts?
Select this check box to terminate the cross cuts before they connect with the second heading. This allows the creation of blind headings as cross cuts, and can be useful in Wongawilli and similar types of workings.
If this check box is selected, you will need to specify the pull back distance. The pullback distance is the distance between the ends of the cross cut and the survey string of the second heading. When determining the pull back distance, care should be taken to account for the distance between the survey string and the actual edge of the roadway in the second heading.
Note: The distance is measured along the line of the cross cut. This may be an issue when designing pillars between the cross cuts and the second headings.
Click OK.
You are asked whether or not to regenerate the panel. If the modifications do not result in the required changes, delete the panel and recreate it.

