Clip Blocks
Use the Clip Blocks option to clip blocks. Usually all clipping of blocks is carried out automatically by the system. Sometimes, however, the system is unable to determine what needs to be clipped against what, due to more than one object being at the same level in the design hierarchy. For example, when two drivage headings converge, or when a particularly complex design is used.
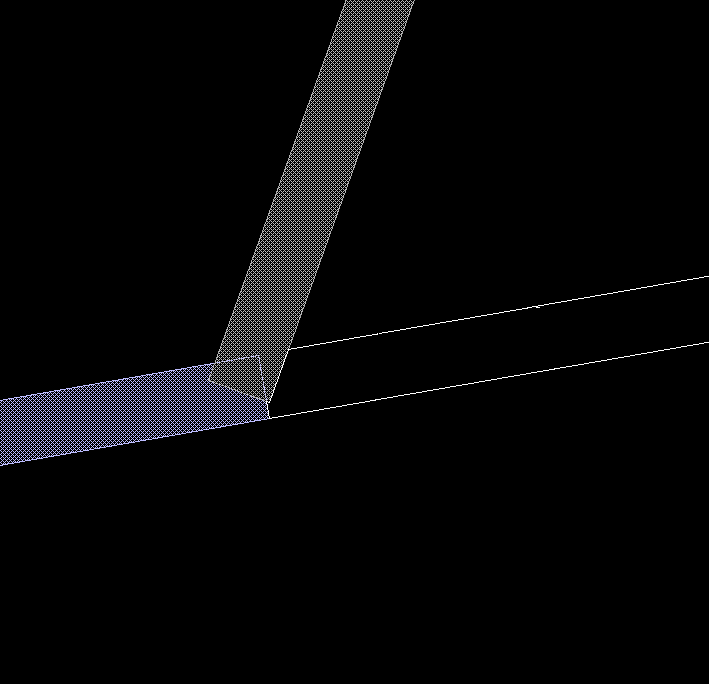
In Diagram 1, the roadway blocks are generated from the survey lines where two drivage headings converge. No automatic clipping is carried out because the system cannot determine, which is the top of the hierarchy. This must be done in the Clip Blocks option.
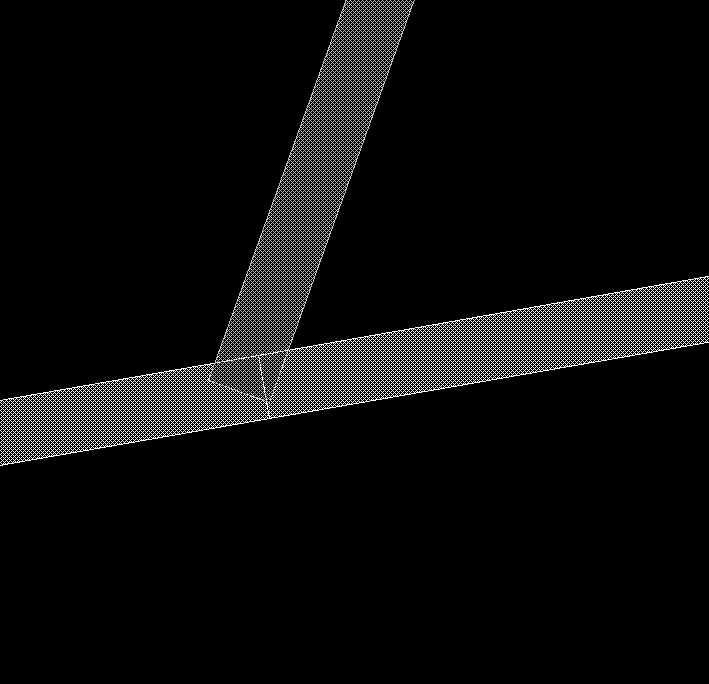
Figure 1 : Roadway Blocks/No Clipping
Clipping can be performed in two ways:
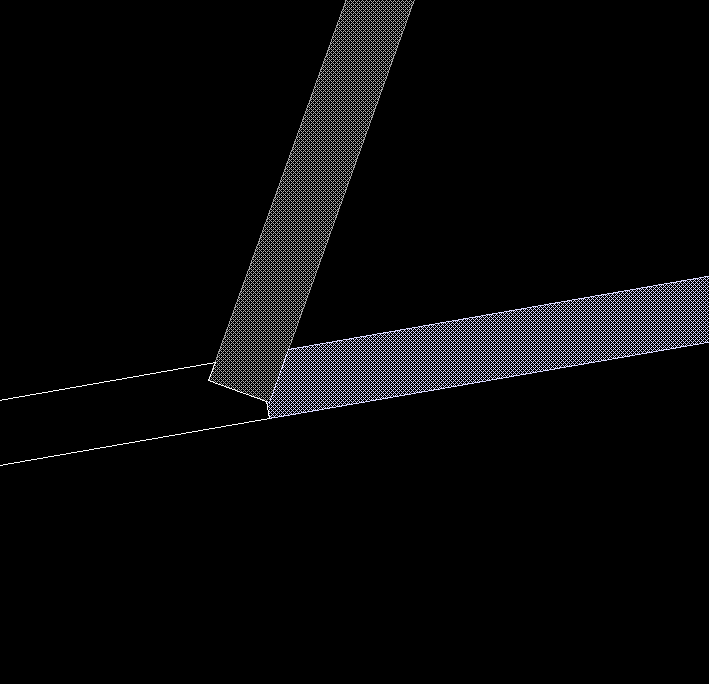
- A single block can be clipped by one or more other blocks (Diagram 2a, 2b, 2c)
- A single block can be used to clip one or more other blocks (Diagram 3a, 3b, 3c, 3d).
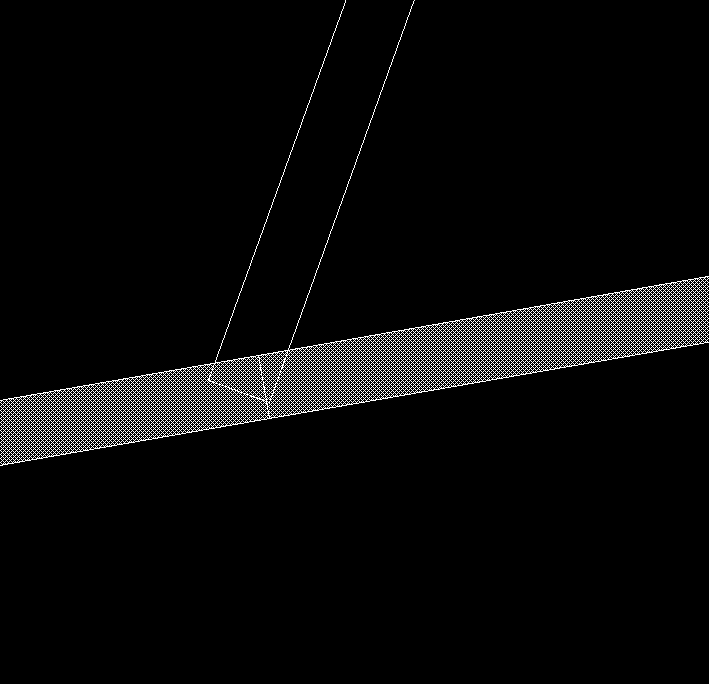
2a - Block to be Clipped (surrounded by polygon)
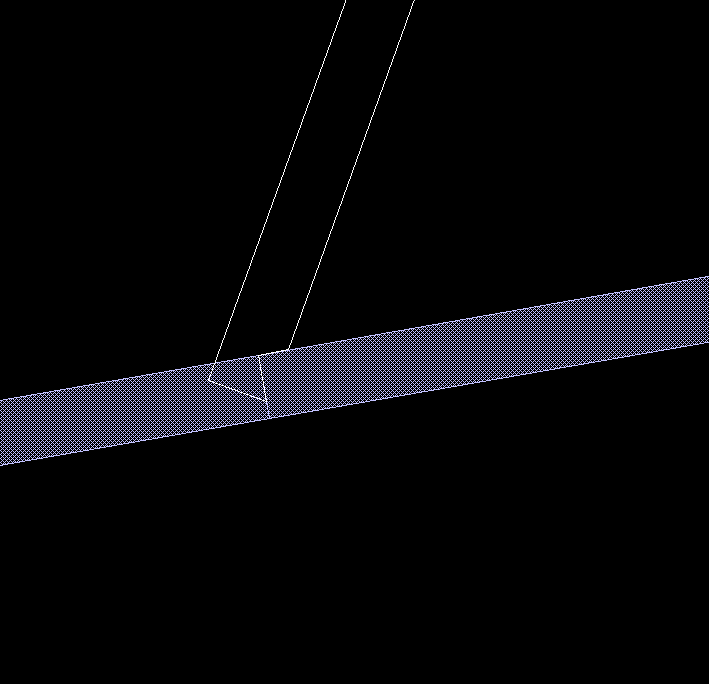
2b - Blocks Against which to Clip (bottom blocks)
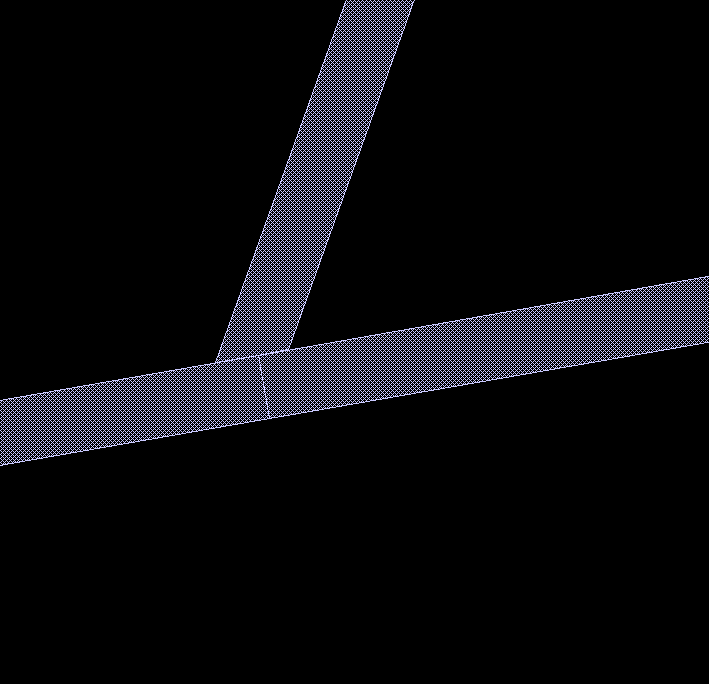
2c - After Clipping
3a - Block Defining the Clip (top block)
3b - Blocks to be Clipped by Block Defining the Clip
3c - Blocks to be Clipped by Block Defining the Clip

3d - After Clipping
Instructions
On the Underground menu, point to Coal Development, and then click Clip Blocks to display the Block Clipping panel.
(If a working layer was not defined prior to selecting this option, then the Set Working Layer panel is displayed first.)
Working name
Enter, or select from the drop-down list, the name of the working layer. The chosen layer will be set as the active working for underground coal operations. It does not affect the layer set through the Layer option (under the Design > Create submenu)
To create a new layer, enter the layer name. The layer name...
- may contain up to 40 characters.
- must begin with an alphanumeric character [0 - 9] or [a - z].
- cannot include spaces.
- can include hyphens [ - ], plus signs [ + ], underscores [ _ ], periods/dots [. ].
- can include the special characters of ÁÂÃÀÇÉÊÍÓÔÕÚÜÑ that are used in the Spanish and Portuguese languages.
Description
Enter a description to further describe the contents of this layer. The description can be up to 80 alphanumeric characters and may include spaces. If a description is not entered, then a default description will be used instead. If the chosen layer already has an assigned description, the description will be displayed when the layer is selected. Existing layer descriptions can be overwritten.
To add to an existing working layer, the layer must be loaded onto the screen. If a working layer by the same name already exists in the currently open database, but has not been loaded, then you will be asked whether you want to select the layer or replace it.
Click OK.
Set Working Layer panel
Working name
Enter, or select from the drop-down list, the name of the working layer. The chosen layer will be set as the active working for underground coal operations. It does not affect the layer set through the Layer option (under the Design > Create submenu).
To create a new layer, enter the layer name. The layer name:
- may contain up to 40 characters.
- must begin with an alphanumeric character [0-9] or [a-z].
- cannot include spaces.
- can include hyphens [ - ], plus signs [ + ], underscores [ _ ], periods/dots [. ].
- can include the special characters of ÁÂÃÀÇÉÊÍÓÔÕÚÜÑ that are used in the Spanish and Portuguese languages.
Description
Enter a description to further describe the contents of this layer. The description can be up to 80 alphanumeric characters and may include spaces. If a description is not entered, then a default description will be used instead. If the chosen layer already has an assigned description, the description will be displayed when the layer is selected. Existing layer descriptions can be overwritten.
To add to an existing working layer, the layer must be loaded onto the screen. If a working layer by the same name already exists in the currently open database, but has not been loaded, then you will be asked whether you want to select the layer or replace it.
Select OK.

Clip one block with one/many other blocks
Select this option to clip only one block.
Use one block to clip one/many other blocks
Select this option to clip only one block.
Click OK.
D epending on the clipping method chosen, you are prompted to select either the block to clip followed by the block against which to clip or vice versa.
If the clipping results in more than one polygon, all resultant polygons displays with a number on their centroid.
You are then asked to select, by number, which of the polygons to keep.
This applies to both types of clipping.
Once the blocks are clipped, you are then asked whether or not to save the result.
Save the result saves the newly generated block (that is, shape of the clipped highlight).
Do NOT save maintains the original blocks.

