Define Ring
Use Define Ring to apply expansion widths to a shape such as a stope or drive.Due to different geological conditions or other factors, the expansion width may need to be varied around the shape perimeter. This option to assign different expansion widths to different sections of the shape perimeter.
Instructions
On the Underground menu, point to Development, and then click Define Ring.
Select the shape (that is, stope or drive). Once select, the chosen shape is highlighted.
You will then be prompted to select the start segment, followed by the end segment. If the same expansion width is required for the entire shape, then select the segment preceding (in the digitised sequence) the start segment. If the direction of digitising is not known, then use the Point Label to Text option (under the Analyse > Label submenu).
In Diagram 1, segment 1-2 is the start and segment 1-4 the end. As a result, the same expansion width is applied to the entire shape.
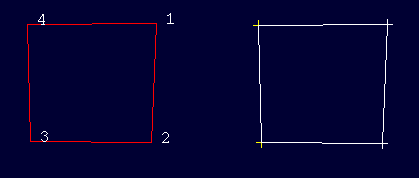
Figure 1 : Same Expansion Width
To apply different expansion widths to separate sections of the shape, select the required end segment. In Diagram 2, segment 3-4 is the start and segment 4-1 the end. The expansion width will be applied only to those segments.
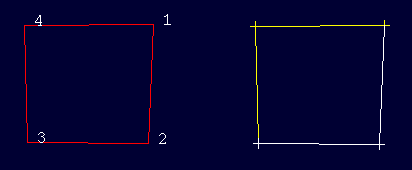
Figure 2 : Different Expansion Widths
To apply an expansion width to just one segment, select the same segment as the start and end. Once the segments have been selected, the following panel displays.
Enter the expansion width.
Any segment that is not assigned an expansion width, will have the default width assigned (refer to the Expand Ring option). The unit of measurement is set in the.dg1 file.
Click OK.
You can then select another start and end segment. The expansion width is saved as part of the W tag assigned to each point in the shape. This can be checked by labelling the points through the Point Label option (under the Analyse > Label submenu).

