Point(s) Annotation
Use Point(s) Annotation to annotate points according to the settings defined through the Point Annotations and Font Settings tabs of the Set Up option. As the annotations are stored in a nominated layer, which is specified through the Set Up option, they can also be plotted.
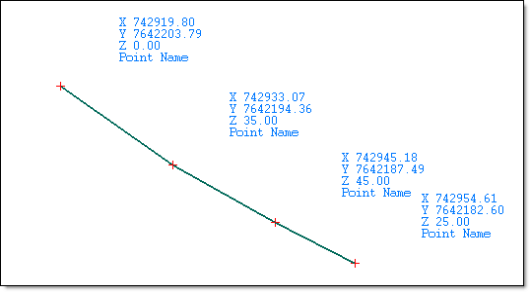
Figure 1 : Point Annotations
Instructions
On the Underground menu, point to Development, and then click Point(s) Annotation.
Select the object to annotate. Once selected, the object is highlighted and all of the points contained in it are displayed (as crosses).
Select the point that you want to annotate. Once chosen, you will be prompted to select another point. Cancel when you have finished annotating points.
If you have chosen to annotate more than one point, that is, you have selected the Multiple point label option under the Point Annotations tab, then you will be required to specify the annotation start and end points. Points in between and inclusive of these nominated points will be annotated.
The annotations are then displayed. If you chose to position the annotations manually, that is, you have selected the Interactive placement option, then you will be required to indicate the position at which to post the annotations. This position represents the top left corner of the annotation box.
Select another object to annotate. Cancel when you have finished annotating objects.
The annotations will be stored as text objects in the layer nominated through the Point Annotations tab of the Underground Development Setup panel. Refer to the Set Up option for more information.
The annotations can be edited in the same manner as regular 2D text objects. The annotations can also be deleted through using any of the following methods:
- using the Delete option (under the Design > Object Edit submenu).
- selecting the Delete
 from the Modify and Delete toolbars.
 - highlighting the annotations and pressing the [Delete] key.
- right-clicking on the annotation selecting Delete objects from the display context menu.

