Manual Name
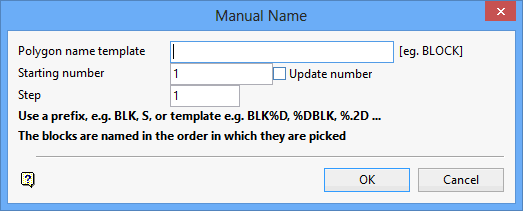
Use Manual Name to manually name the cross cuts that are created. This is useful for easily naming triangulations of the cross cuts, reserve reporting and scheduling. This option assigns the names according to a given pattern by order of picking or if your cross cuts are contained in the same layer or group, it will name them all by sequence.
Instructions
On the Underground menu, point to Development, and then click Manual Name to display the Manual Name panel.

Polygon name template
Enter the object name template. The name template may be text, in which case numbers are added to the end of the name, or it can be text plus a format string (%D = cross cut number, %.2D = cross cut number with leading zeroes and a precision of 2). Format strings allow you to put the cross cut number anywhere in the name.
|
Object Name Template |
Result |
|---|---|
|
XCUT |
XCUT1, XCUT2, XCUT3... |
|
XC%D |
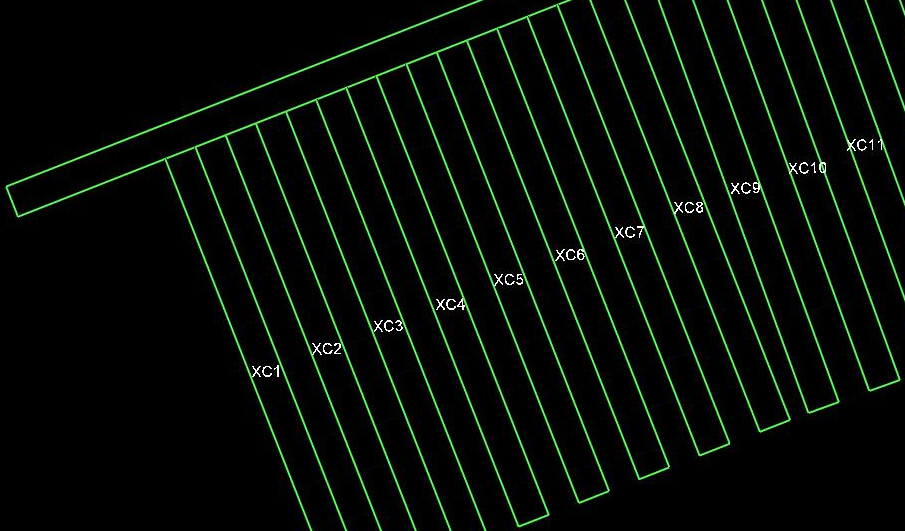
XC1, XC2, XC3... |
|
%DXC |
1XC, 2XC, 3XC... |
|
XC%.2D |
XC01, XC02, XC03... |
Starting number
Enter the number for the first cross cut. Cross cut names are incremented by the number of steps in the order in which they are picked. Enable the Update number check
box if you want the starting number to be updated after the cross cuts have been named.
Example: If you had a starting number of '1' and a step of '1', and you named 14 cross cuts, then this number would be updated to 15. This means that if you then choose to name more cross cuts, then your original pattern is maintained.
Step
Enter the step to be used to increment the cross cut names (see above).
Click OK.
The Multiple Selection box is then displayed. This to select the cross cuts by category. Cancel when finished selecting objects. The new names are then displayed.

Figure 1 : Cross Cut Names

