Calculate Ring Reserves
Once you have created a ring layer with ring profiles, you are able to calculate ring reserves. Use the Ring Reserves option to calculate the available mineable material in a stope triangulation, based on grade specifications for the stope or the mine as whole.
Tutorials
View the Underground Ring Design tutorials
Instructions
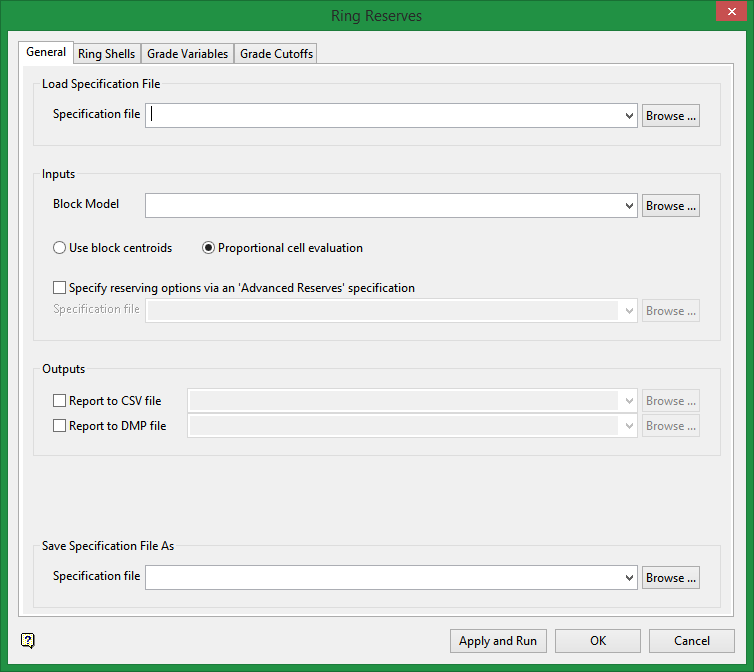
In the General panel, configure inputs and outputs for the ring reserve calculation process.
- For Load Specification File, load a specification (.rr_spec) file from the drop-down list or enter a name for the file.
- Load the Block model of the stope with the reserves you are calculating. This is in a.bmf file format.
- Check the Specifying reserving options via an 'Advanced Reserves' specification option if using the specifications file created in Block > Advanced Reserves > Advanced Reserves Editor. Grade Variables and Grade Cutoffs options will then be unavailable.
- Select the format for the output. For example, select Report to CSV file to output a file suitable for viewing in Excel. Select Report to DMP file to output a report in a format for use in Vulcan.
- In Save Specification File As, to save the ring reserves specification file, select a name for the file from the drop-down list, or enter a name for the file. Click Apply and Run or OK.
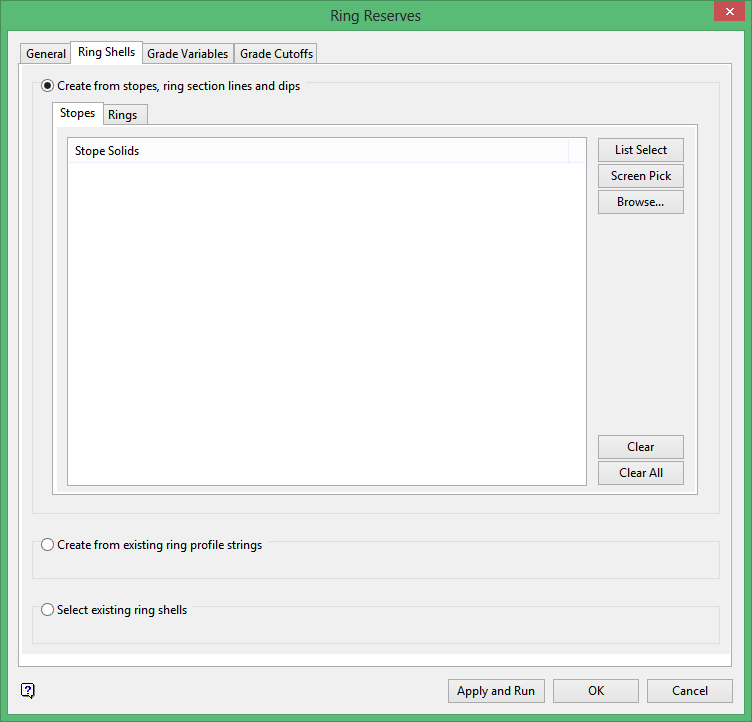
In the Ring Shells panel, select a method of ring shell creation to use for reserve calculation.
- Create from stopes, ring section lines and dips - for first-time shell creation based on stopes and rings
- Create from existing ring profile strings - for shell creation based on slices of a stope
- Select existing ring shells - used when repeating shell creation
In the Grade Variables panel (if not using an Advanced Reserves specification), select grade, zone and density variables.
- Select grade variables from the drop-down lists.
- Optionally select a zone variable from the drop-down list.
- For Density Calculations, either configure a density value, or select an existing density variable from the drop-down list.
In the Grade Cutoffs panel (if not using an Advanced Reserves specification), configure the grade cutoff variable.
- Optionally, enable grade cutoffs and select or enter a grade cutoff variable.
- Define the grade cutoff variable either by setting a minimum and maximum value, with increments between these, or by setting one or more possible values for the variable.
Click OK. The results of the reserve calculation should now be available in the output file(s) configured in the General panel.
General
Load Specification file
Load a specification (.rr_spec) file from the drop-down list or enter a name for the file.
Inputs
Load the Block model of the stope containing the reserves to be calculated. This is in a.bmf file format.
Use block centroids
Select this option to include a block if the block's centroid is in the region. Note the entire block is included. "Block centroid" means that a block is selected or note selected based on the centroid point being inside or outside of the stope. The entire block is either selected or rejected, resulting in either the full volume contribution, or a 0 volume contribution.
Block centroid is subject to biases. For example, if the blocks have a height of 10m and the top of a surface is at 116m, the blocks at the top of the surface will be selected because the centres of the blocks along the top are at 115m which is below the surface. This causes a bias since the blocks on top of the surface are only partially inside the stope, but the full volume of the block is contributed to the reserve.
Proportional cell evaluation
Select this option to include those blocks that touch the region. When selecting blocks, all blocks that touch the region are selected. "Proportional" means that the volume of intersection of the stope with the block is computed. If the volume of intersection is 0, then the block is not selected. Otherwise the volume contributed is the volume of intersection, which can range continuously from 0 to the volume of the block. Proportional uses a method of decomposition into prisms, which gives a highly accurate computation of the volume of intersection. For proportional reserves, the sum of the block intersection volume is the same as the volume of the stope, provided the stope is entirely inside the block model.
Specify reserving options via an "Advanced Reserves" specification
Check the Specifying reserving options via an 'Advanced Reserves' specification option if using the specifications file created in Block > Advanced Reserves > Advanced Reserves Editor. Once this is selected, the Grade Variables and Grade Cutoffs tabs are unavailable, and Advanced Reserves specifications are not configurable.
Outputs
Select the format for the outputting the report. For example, select Report to CSV file to output a file suitable for viewing in Excel. Select Report to DMP file to output a report in a format for use in Vulcan.
Save Specification File As
To save the ring reserves specification file, select a name for the file from the drop-down list, or enter a name for the file.
Ring Shells
To calculate ring reserves, ring shells need to be created. There are three ring shell creation options.
- Create from stopes, ring section lines and dips - used for first-time shell creation based on stopes and rings
- Create from existing ring profile strings - used for shell creation based on slices of a stope
- Select existing ring shells - used when repeating shell creation
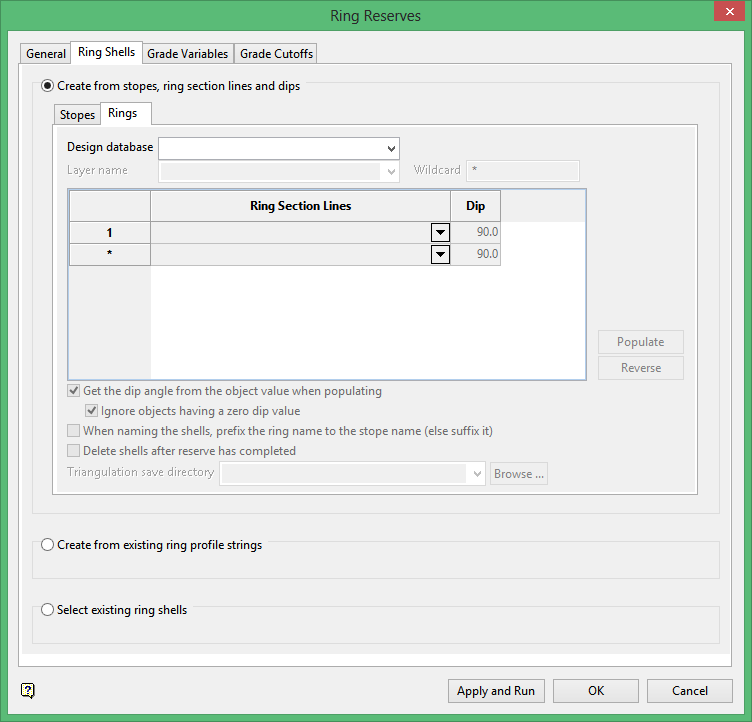
Create from stopes, ring section lines and dips
To set up ring shells in this option, both stopes and rings need to be loaded.
Create from stopes, ring section lines and dips - Stopes
In this panel, load the stopes containing the ring sections used for reserve calculation.
Create from stopes, ring section lines and dips
Choose this option to create ring shells from both stope triangulations and blast rings. Both Rings and Stopes windows must be completed.
For more information on the Ring window, see Rings.
For more information on the Stopes window, see below.
List Select
To load stope triangulations from a list of.tri files on your computer, click List Select to display the Select Triangulations dialog box.
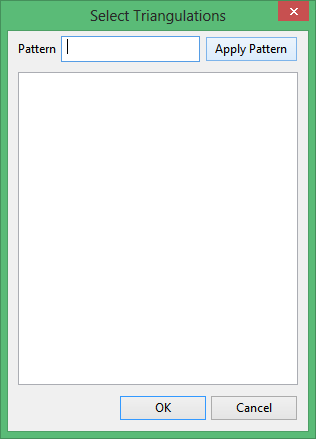
Pattern, Apply Pattern
Enter a wildcard expression (for example stope*.tri) and click Apply Pattern to filter results in the screen below.
Screen Pick
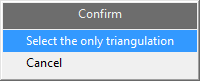
To load a stope triangulation on your screen, click Screen Pick.
If only one triangulation is loaded on your screen, the following prompt appears.
If more than one triangulation is loaded on your screen, you are prompted to pick one or more triangulations for reserve calculation.
When you have finished selecting triangulations, right-click to cancel and return to the Ring Shells panel.
Browse
To load a stope triangulation from a folder, click Browse.
Create from stopes, ring section lines and dips - Rings
In this panel, load a design database and layer containing the ring sections used for reserve calculation.
Create from stopes, ring section lines and dips
Choose this option to calculate reserves using both stope triangulations and ring lines. Both Rings and Stopes windows must be completed.
For more information on the Stopes window, see Stopes.
For more information on the Rings window, see below.
Rings
Design Database
Select the design database containing the ring layer which you are using to calculate reserves.
Layer Name
Select the layer containing the rings which you are using to calculate reserves.
Wildcard
Use the wildcard to filter the list of ring section lines. For example, use the wildcard expression *EASER to only display rings specified as easers in this layer.
Ring Section Lines
Once you have specified the design database and layer name, click Populate to complete the Ring Section Lines table. Otherwise, to manually populate the list, select a ring from the drop-down list.
Dip
The Dip column displays a ring's dip angle. By default, Get the dip angle from the object value when populating is selected, and clicking Populate automatically loads the dip angles for rings in the specified layer. A ring's dip angle can also be manually edited through this column.
Populate
Click this button to automatically fill the Ring Section Lines column with rings from the specified layer. This button also acts as a refresh button when changes are made to the settings in this section.
Reverse
Click this button to reverse the order of the rings in the Ring Section Lines column. This will affect the naming of any resulting ring shells.
Get the dip angle from the object value when populating
By default, this option is selected, so that the Dip column shows the dip angle of rings specified in the Ring Section Lines column.
Ignore objects having a zero dip angle
Click this option to avoid listing objects that are not rings, as rings should have a non-zero dip value. This option is only available if Get the dip angle from the object value when populating is selected.
When naming the shells, prefix the ring name to the stope name (else suffix it)
By default, shell names are made up of the stope name and the ring name, in that order. Select this option to make the ring name come before the stope name.
Delete shells after reserve has completed
By default ring shells are saved for the next reserve calculation. Select this option if you are intending to use new ring shells in your next reserve calculation.
Create from existing ring profile strings
In this panel, load a design database and layer containing slices (ring profile polygons) of the reserves to be calculated.
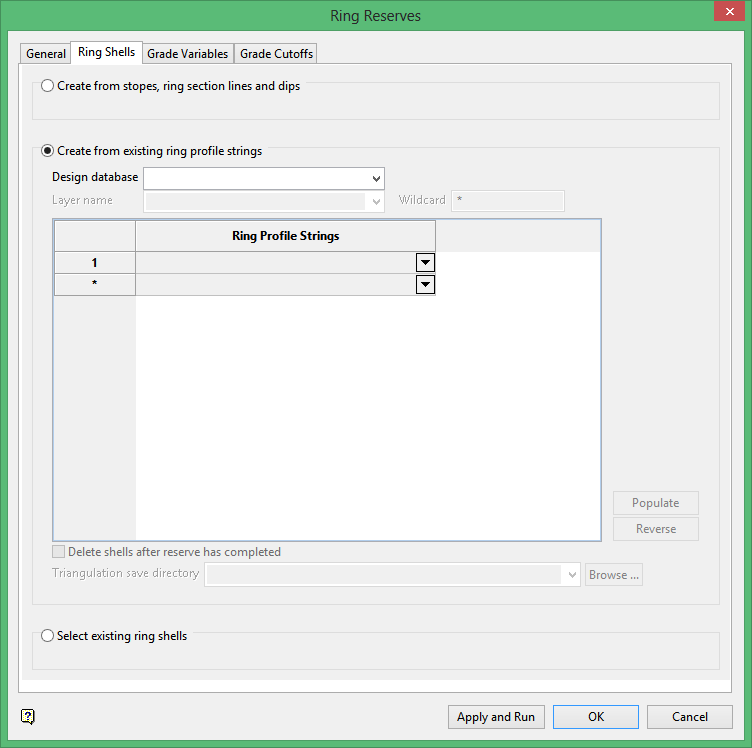
Create from existing ring profile strings
Use this option to calculate ring reserves based on ring profiles. Ring profiles strings are polygons or polygon-like strings representing a slice of the stope. For more information on creating ring profiles, see Create Ring Profiles.
Design Database
Select the design database containing the ring profile layer which you are using to calculate reserves.
Layer Name
Select the ring profile layer which you are using to calculate reserves.
Wild Card
Use the wildcard to filter the list of ring profile strings. For example, use the wildcard expression *EASER to only display rings specified as easers in this layer.
Ring Profile Strings
Once you have specified the design database and layer name, click Populate to complete the Ring Profile Strings table. Otherwise, to manually populate the list, select a ring profile string from the drop-down list.
Populate
Click this button to automatically fill the Ring Profile Strings column with rings from the specified layer. This button also acts as a refresh button when changes are made to the settings in this section.
Reverse
Click this button to reverse the order of the rings in the Ring Profile Strings column. This will affect the naming of any resulting ring shells.
Delete shells after reserve has completed
By default ring shells are saved for the next reserve calculation. Select this option if you are intending to use new ring shells in your next reserve calculation.
Select existing ring shells
In this panel, use either List Select, Screen Pick or Browse to locate and load existing Ring Shells.
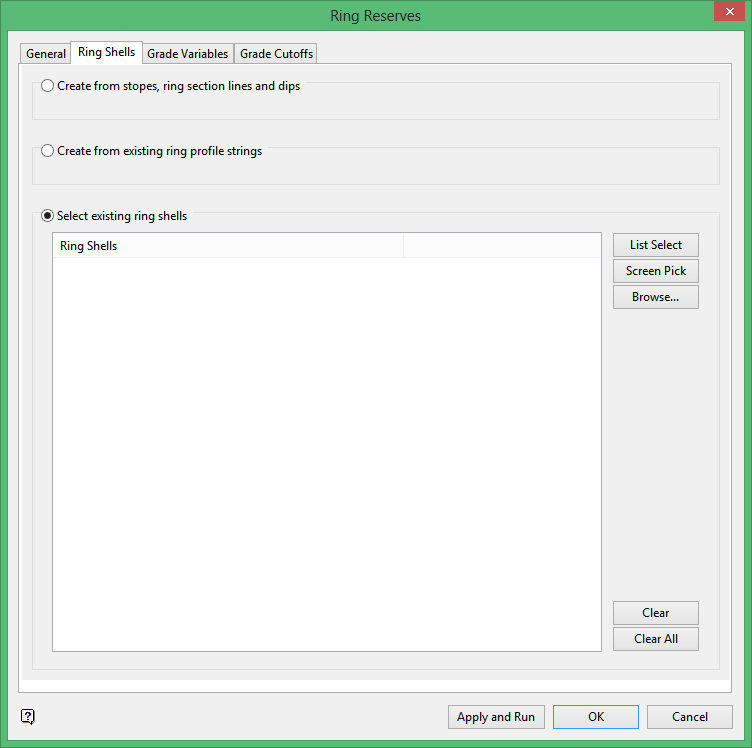
Select existing ring shells
Use existing ring shells to calculate ring reserves.
List Select
To load stope triangulations from a list of.tri files on your computer, click List Select to display the Select Triangulations dialog box.
Pattern, Apply Pattern
Enter a wildcard expression (for example stope*.tri) and click Apply Pattern to filter results in the screen below.
Screen Pick
To load a stope triangulation on your screen, click Screen Pick.
If only one triangulation is loaded on your screen, the following prompt appears.
If more than one triangulation is loaded on your screen, you are prompted to pick one or more triangulations for reserve calculation.
When you have finished selecting triangulations, right-click to cancel and return to the Ring Shells panel.
Browse
To load a stope triangulation from a folder, click Browse.
Grade Variables
Use this panel to select and set variables to determine the quality of the ore to be mined. The options in this panel are unavailable if an Advanced Reserves specification file has been loaded under the General tab.
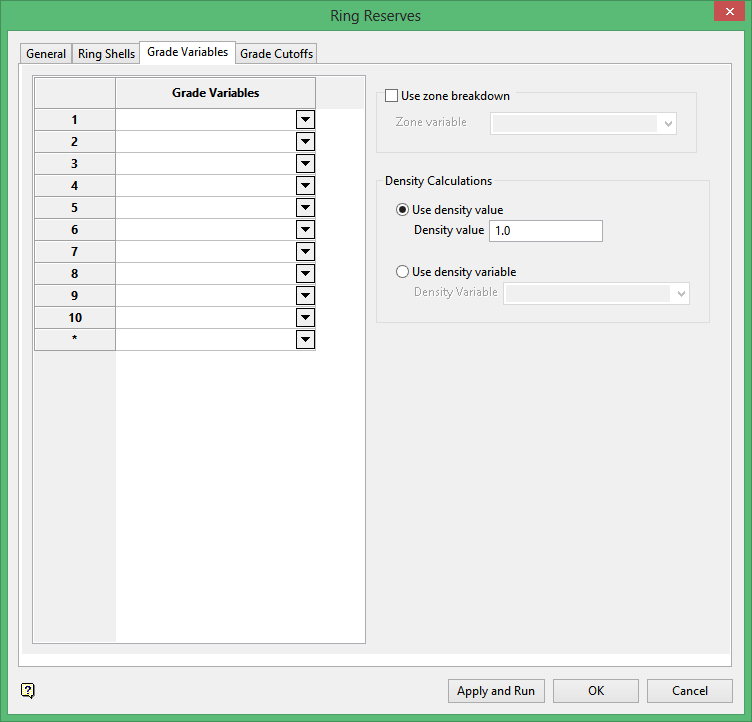
Grade Variables
The Grade Variables list is automatically populated with the variables available from the specification (.rr_spec) file. Select the variable(s) you are using to determine the grade of the reserves.
Use zone breakdown
Zone variables are defined in Block Model > Advanced Reserves > Advanced Reserves Editor and are typically used to distinguish the ore grade, for example, high and low grade, or ore, waste, and air. Select the zone variable from the list of available variables in the drop-down list.
Density Calculations
To determine the density of the ore to be mined, you can either enter a constant value in Use density value, or select an existing density variable in Use density variable.
Click OK. The Reserves Cutoffs panel appears.
Grade Cutoffs
The grade cutoff option lets you set an acceptable proportion of ore to non-ore in the material to be mined by defining a grade cutoff variable. Material below the grade cutoff is considered waste, while above the grade cutoff may be minable.
The options in this panel are unavailable if an Advanced Reserves specification file has been loaded under the General tab.
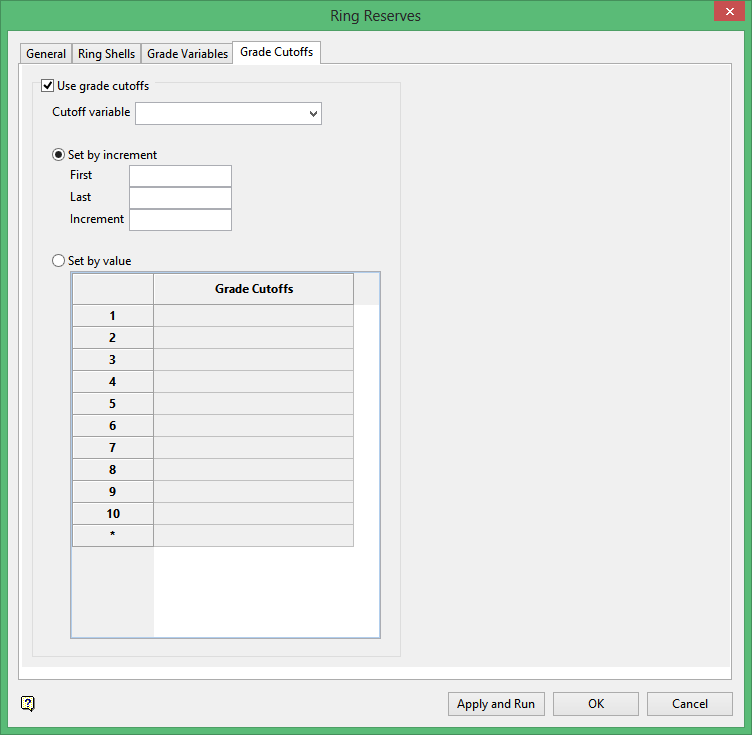
Use grade cutoffs
Select this check box to use grade cutoffs and to allow configuration of the grade variable.
Cutoff variable
The cut-off variable represents the percentage of ore in the material to be mined. To create a new cutoff variable, enter a name. Alternatively, select an existing variable from the drop-down list.
Set by increment
This option to define possible values for the cutoff variable by setting a range from First to Last with Increment defining the difference in values in that range.
Set by value
This option to define the cutoff variable by setting one or more values. The percentage represents the amount of ore in the material to be mined.

