Move Hole 
Use the Move Hole option to change a blasthole's position.
There are three ways of modifying the hole's location:
- Move the entire blasthole.
- Move the hole's collar point.
- Move the hole's toe point.
This option can also be accessed by selecting the ![]() Move Hole button from the UG Ring Design toolbar.
Move Hole button from the UG Ring Design toolbar.
Instructions
On the Underground menu, point to Ring Design, and then click Move Hole to display the Move Hole panel.
If you have not already loaded a blast database, you will be prompted to do so. For instructions on how to do this, see Open Blast Database .
If you have not already set a current ring, you will be prompted to do so. For instructions on how to do this, see Display Rings .
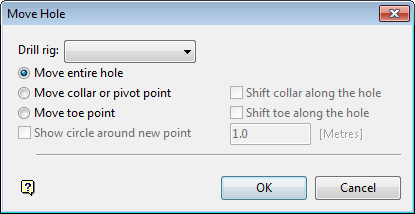
Move Hole panel
Drill rig
Select a drill rig from the drop-down list.
Move entire hole
Select this option to move one or more blastholes dynamically (for example, using Graphics or Digitise tools) to another position on the screen.
Move collar or pivot point
Select this option to move the collar or pivot point to a new indicated location. If the pivot point is moved, then you will be asked to select the drive polygon so that the new collar point can be calculated.
Check the Shift collar along the hole check box if want the collar to remain on the blasthole. When a new point is selected, the point on the blasthole closest to the indicated point is calculated and used as the new collar location. You will be prompted for both the pivot point and the drive polygon.
Move toe point
Select this option to move the toe position to a new indicated location. If a pivot point exists, then the toe point will rotate around the pivot point instead of the collar point. You will be asked to select the drive polygon to calculate the new collar point, when the pivot point is involved.
Check the Shift toe along the hole check box if you want the toe point to remain on the blasthole. As a new point is selected, the point on the blasthole that is closest to the indicated point is calculated and used as the new toe point location. You will be prompted for both the pivot point and the drive polygon.
Check the Shift circle around new point check box to display a circle around the new toe or collar location. This circle can be used to verify the toe spacing between blastholes.
Select OK.
When only moving blastholes, you will need to select the required hole and to drag it to the new position.
When moving a collar or toe point you will be prompted to indicate the new position, this can be indicated repeatedly.
Right-click to cancel when satisfied with the new position, and confirm your edits in the Confirm dialog box shown below..
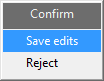
Confirm dialog box

