Shuffle Holes
Use the Shuffle Holes option to move the toe or collar points of blastholes individually or as a group.
Instructions
On the Underground menu, point to Ring Design, and then click Shuffle Holes To display the Shuffle Holes panel.
(If you have not already loaded a blast database, you will be prompted to do so. For instructions on how to do this, see Open Blast Database .)
Shuffle hole collar points
Select this option to shuffle the collar positions of the holes around a drive polygon.
Keep toe position fixed
Select this check box to fix the toe point, so that the hole length and direction is automatically adjusted.
Shuffle hole toe points
Select this option to shuffle the toe positions of the holes using the collar position as a pivot point. You will need to enter the distance to shuffle along a drive polygon. For toe point shuffling, this is the distance between the new and original toe positions with respect to the working plane.
Extend hole lengths to a stope and clipping lines
Select this check box to extend the blastholes to a stope boundary or other clipping lines.
Select OK.
If you are shuffling collar points, then you will be prompted to select the drive polygon about which to shuffle.
If you are extending hole lengths to a stope and clipping lines, then you will be prompted to select the stope polygon and clipping lines.
The Select Holes dialog box is then displayed.
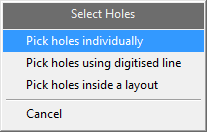
Pick holes individually
Select this option to individually pick the blasthole.
Pick holes using a digitised line
Select this option if you only want to select the blastholes that cross a digitised line within the working plane. The line will need to be digitised once this option has been selected.
Pick holes inside a layout
Select this option to select all of the blastholes in a layout by using a single hole from the screen. All blastholes within the layout that are associated with the chosen hole will be selected.
The Hole Shuffling dialog box then appears.
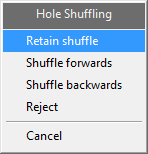
Hole Shuffling dialog box
Retain Shuffle
This option confirms your changes and closes the Hole Shuffling dialog box.
Shuffle forwards
This option shuffles the hole based on the configuration of the Shuffle Holes panel.
Shuffle backwards
This option shuffles the hole based on the configuration of the Shuffle Holes panel
Reject
This option cancels any changes you made to the location of the hole in the current Shuffle Holes procedure.
To complete the Shuffle Hole operation, either select Retain Shuffle to save your changes, or select Reject or Cancel to cancel any changes you have made.
You are then prompted to make another hole selection to continue the shuffle procedure. Right-click to cancel line selection and bring up the Select Holes dialog box.
Right-click again to cancel the Select Holes dialog box and complete the Hole Shuffling operation.

