Writing a more complex workflow - connector configuration
In the section Writing a simple workflow, we created a workflow which performed the following operations:
-
Prompts the user to select a CSV File
-
Opens a CSV File
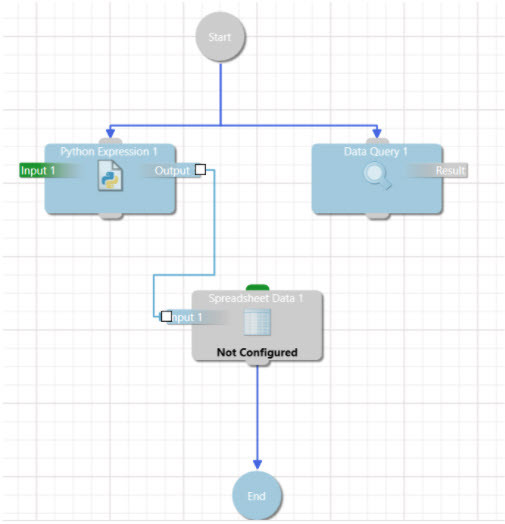
We will now use our knowledge about connectors to create a more complex workflow. This workflow will not only select and open a CSV File, but will also:
-
Perform a calculation using a Python expression component
-
Write the value calculated by the expression to the CSV
To create the workflow:
-
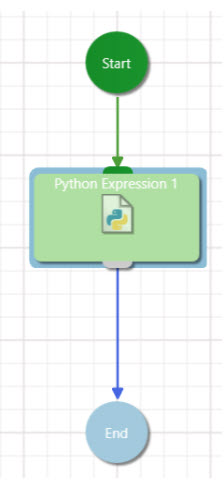
Initialise a blank workflow by opening the Workflow Editor or clicking New.
-
Add a Python Expression component to the workflow by either:
-
Searching for "Python Expression" in the Toolbox Filter.
-
Navigating to Script Engine > Python Expression in the Toolbox.
-
-
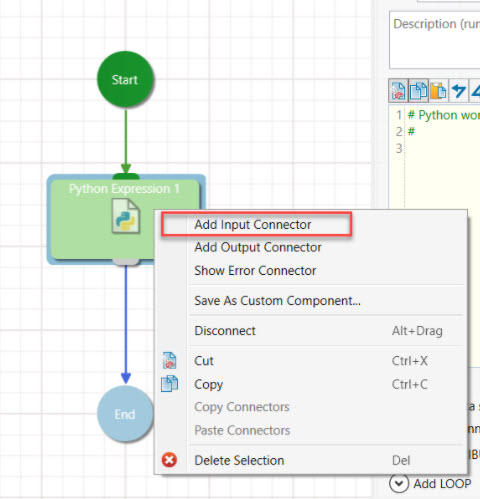
Add an input connector to the component by right-clicking the component and selecting Add Input connector.
-
Click on the input connector to configure it. To configure the connector:
-
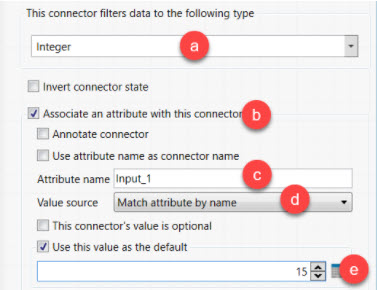
Set the connector’s type to Integer.
-
Select the Associate an attribute to this connector checkbox. Remember, the connector is a vessel which transports data. Data can contain multiple attributes. Each connector is assigned one attribute to carry.
-
Set Attribute name to Input_1. This is important because it will be referenced within the Python Expression.
-
Ignore the Value source drop-down field in this example. This only matters if there is incoming data.
-
Select the Use this value as a default checkbox and set its value to 15.
-
-
Create an output connector by right-clicking the component and selecting Add output connector.
-
Configure the output connector by completing the following steps:
-
Set its type to Integer.
-
Select the Associate an attribute to this connector checkbox.
-
Set its attribute name to Output_1. This is important because it will be referenced in the Python Expression.
-
Set its Value source to Match by name.
-
-
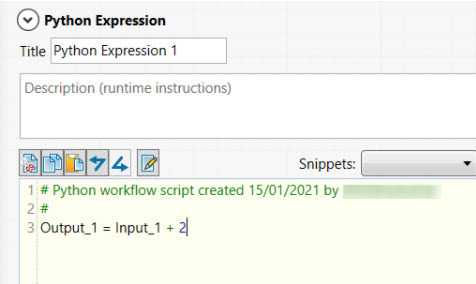
Click on the Python Expression component to open up the panel on the right. Within that panel will be a script field.
-
In the script field, write the following equation:
Output_1 = Input_1 + 2
-
Add a Data Query component to the workflow by searching for "Data Query" in the Toolbox Filter (see step 2).
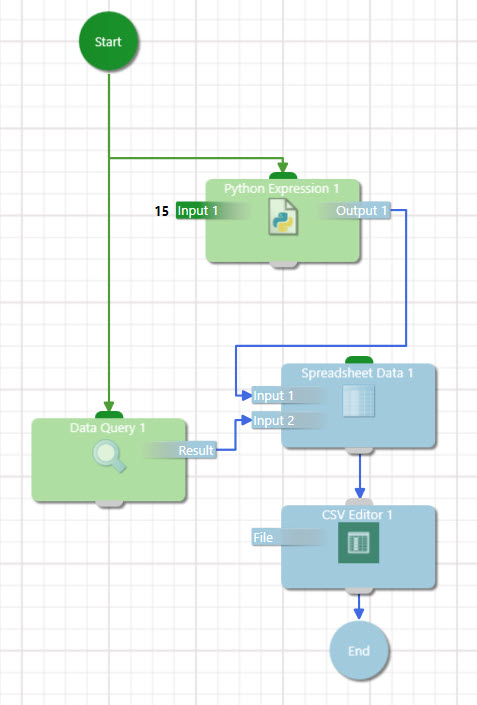
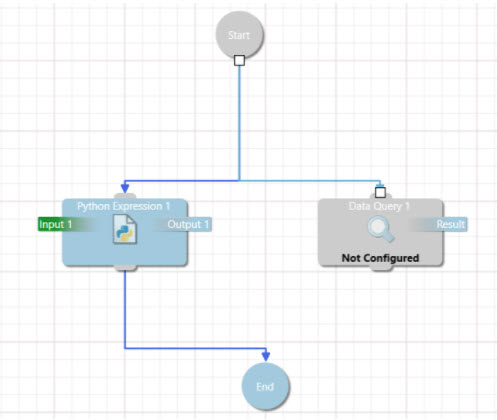
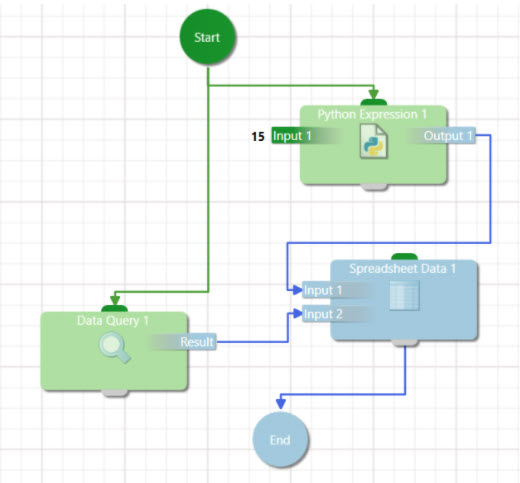
Disconnect the Data Query component from the workflow, as the workflow should run this component at the same time as the Python Expression component and not before or after. Connect the top of the component to the Start component. Your workflow should look like this:
-
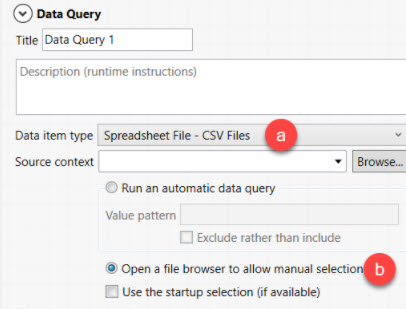
Click the middle of the Data Query component to configure it. To configure the component:
-
In the Data item type drop-down, navigate to File > Spreadsheet > CSV Files.
-
Enable manual selection of the file via a file browser by selecting the Open a file browser to allow manual selection radio button.
-
-
Click on the Result connector to configure it. To configure the connector, set the type to CSV Files.
-
Add a Data > Spreadsheet Data component to the workflow.
-
Add an input connector to the Spreadsheet Data component.
-
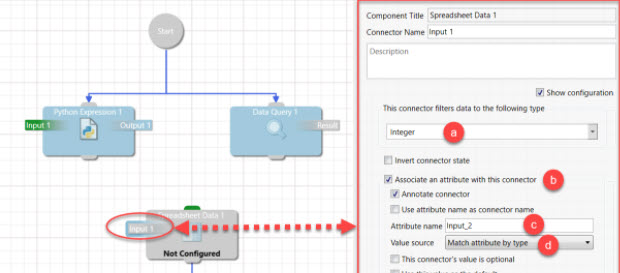
Click on the input connector to open the configuration panel. Configure the input connector by completing the following steps:
-
Set the type to Integer.
-
Enable the Associate an attribute with the connector checkbox.
-
Set the attribute name to Input_1.
-
Set the value source to Match by type.
-
-
Join the output of the Python Expression component to the newly created input.
-
Add another input connector to the Spreadsheet Data component.
-
To configure the input connector:
-
Set the type to Spreadsheet - CSV File.
-
Select the Associate an attribute to this connector checkbox.
-
Set the value source to Match by type.
-
-
Join the output of the Data Query component with the input you have just created.
-
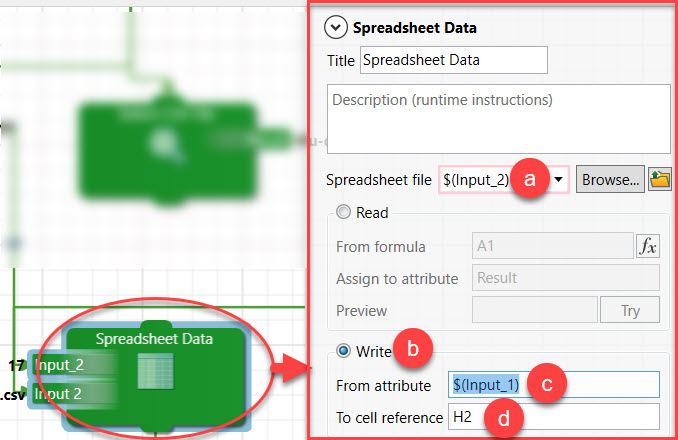
Click on the Spreadsheet Data component to open the configuration panel. Configure the component by completing the following steps:
-
Set the spreadsheet file to $(Input_2). Note that you are referring to a variable set in a previous component.
-
Select the Write radio button.
-
Set From attribute to $(Input_1).
-
Set To cell reference to H2. This means you are writing the variable Input_1 to cell H2.
-
-
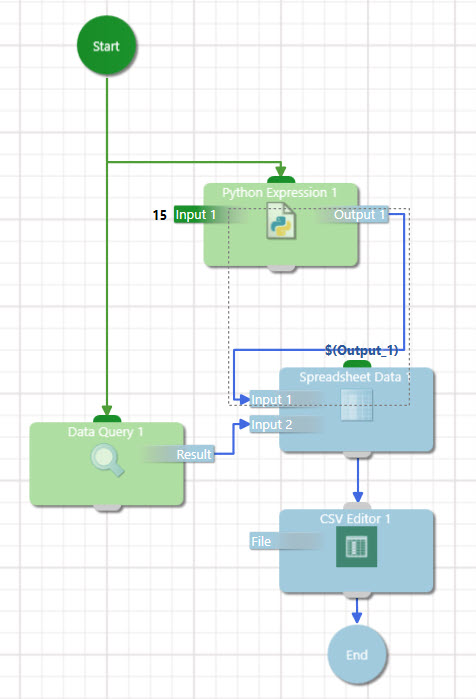
Add an Application Commands > Workbench > CSV Editor component. The final workflow should look like this:
-
Run the workflow. You should be able to:
- Calculate a value from the Python Expression component.
- Write the value to a CSV.
- Open the CSV.
Next topic: Getting Started - Building on Key Concepts - How components work