Writing a simple workflow
Now that you have learnt the fundamentals, you can create a simple workflow. This workflow will perform the following steps:
-
Prompt the user to select a CSV file.
-
Open the selected CSV file.
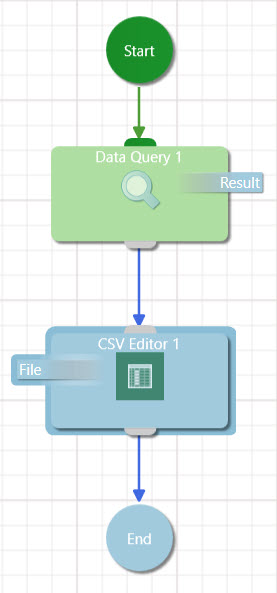
To create the workflow, complete the following steps:
-
Initialise a new workflow by opening the Workflow Editor or going to File > New.
-
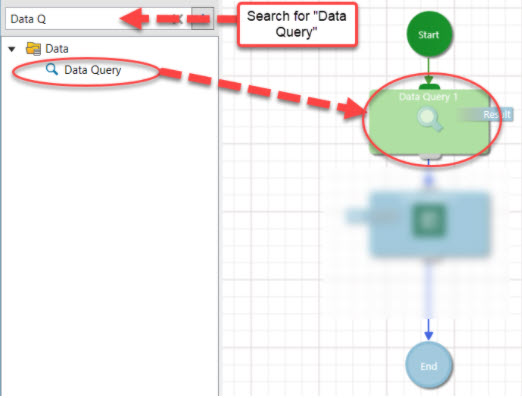
Add a Data Query component by searching for "Data Query" in the Toolbox Filter. The Toolbox Filter is located at the top of the Toolbox. When you have located the Data Query component, add it to the workflow by dragging it from the toolbox and dropping it onto the connection between the Start and End components in the workflow diagram.
-
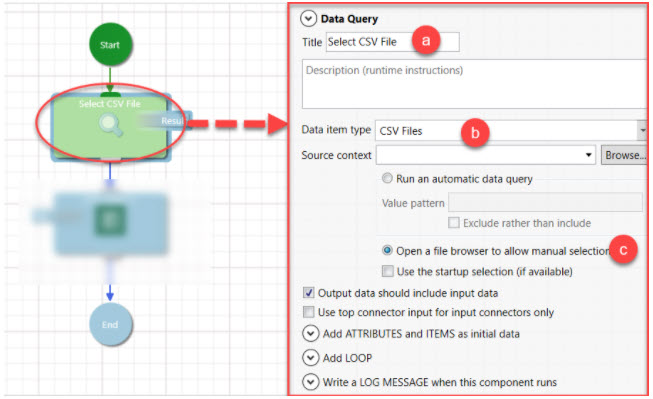
Select the Data Query component. Its configuration panel should appear on the right-hand side of the Editing Area. Configure the Data Query component by completing the following steps (refer to diagram):
-
Rename the Title field of the Data Query component to "Select CSV File" to better describe its operation.
-
Set the Data item type to CSV Files.
-
Enable manual file selection by selecting the Open a file browser to allow manual selection radio button.
-
-
Add a CSV Editor component to the workflow by searching for "CSV Editor" in the Toolbox Filter (refer to step 1).
-
Run the workflow. If the workflow is correctly configured, you should be prompted to select a CSV file. Choose any existing CSV file. The workflow will open the CSV file in the Workbench CSV Editor.
Next topic: Getting Started - Building on Key Concepts - Anatomy of a workflow