4. Generate and View the Schedule
Now that you have successfully validated your setup, you can move on to generating and viewing your schedule. To generate a schedule, Epoch uses a client-side evaluator. You can then view the schedule in the Viewer tab and gain a deeper understanding of the schedule using the Gantt View tab and the Live Dashboard. Epoch also provides you with several view options so you can customise the schedule view to your preferences.
Generating a schedule
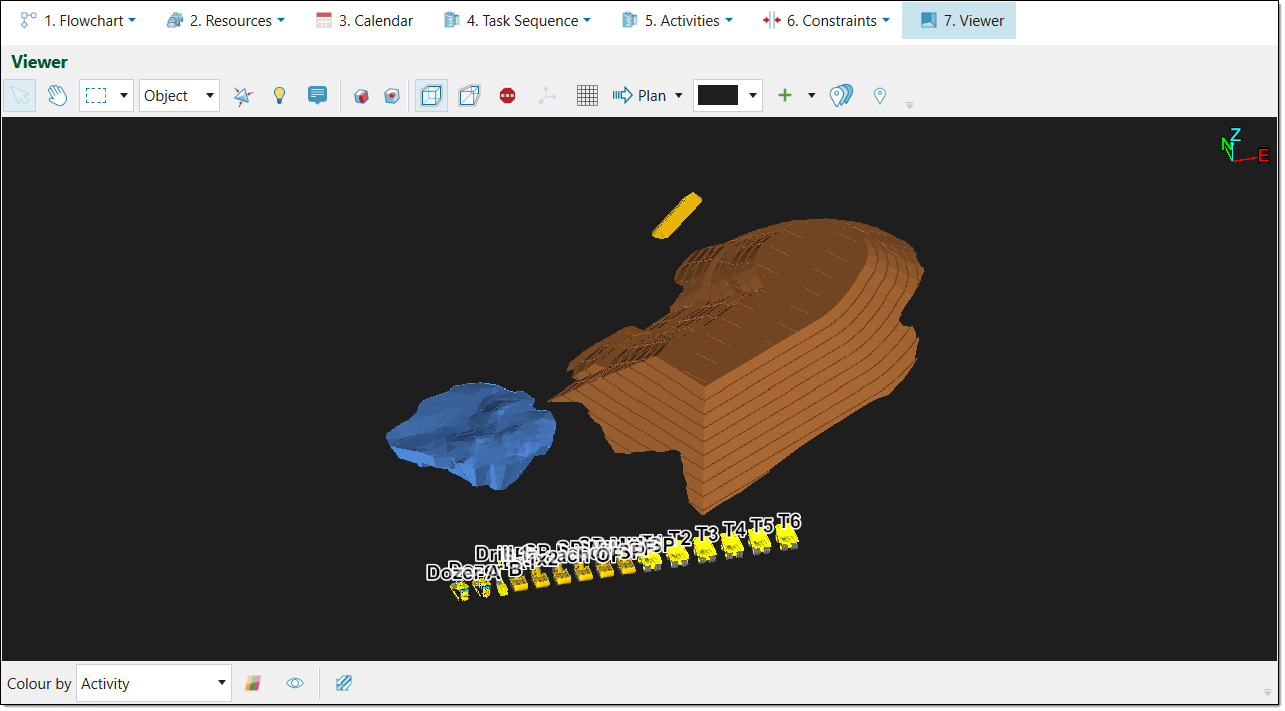
To generate a schedule, open the Viewer tab. This tab will display a model of the schedule.
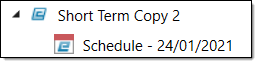
Opening a saved schedule
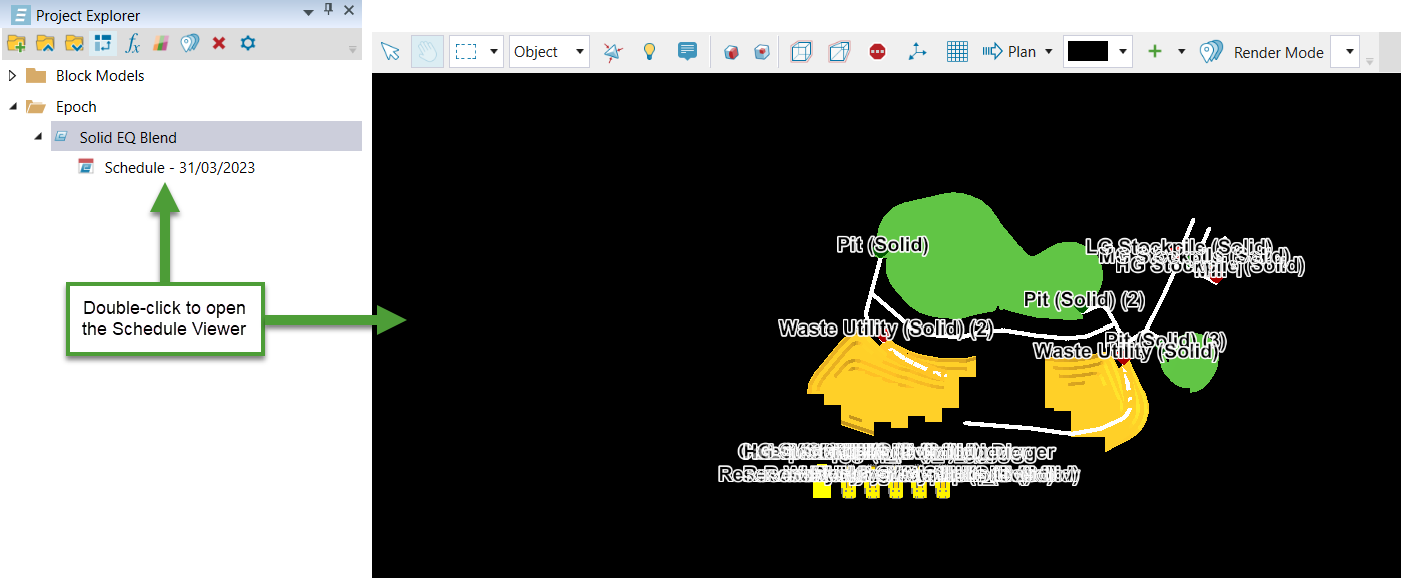
To open a saved schedule, double-click on the saved Epoch schedule in the project explorer. Epoch will open the schedule in the Viewer tab in the workspace.
Viewing the schedule
Viewing the schedule allows you to understand the activities and events in your schedule. To view the schedule, open the Viewer tab. You can then view and edit aspects of the schedule view using the following:
Gantt View
The Gantt View tab displays the following within the schedule:
-
Evaluated tasks. The evaluated tasks are the tasks which have occurred before the current time in the Schedule Playback tab. The term evaluated signifies that the evaluator has scheduled these tasks. For evaluated tasks, you can view the following:
- The time it takes to complete each task
- The resources used to complete each task
- The order in which the tasks are completed
-
Non-evaluated tasks. The non-evaluated tasks are yet to occur with respect to the current time in the Schedule Playback tab. The term non-evaluated signifies that the evaluator has yet to process these tasks. Non-evaluated tasks have a default duration of 24 hours.
To open the Gantt View tab, navigate to the Viewer tab and select the Gantt View tab from the Report Window tabs.
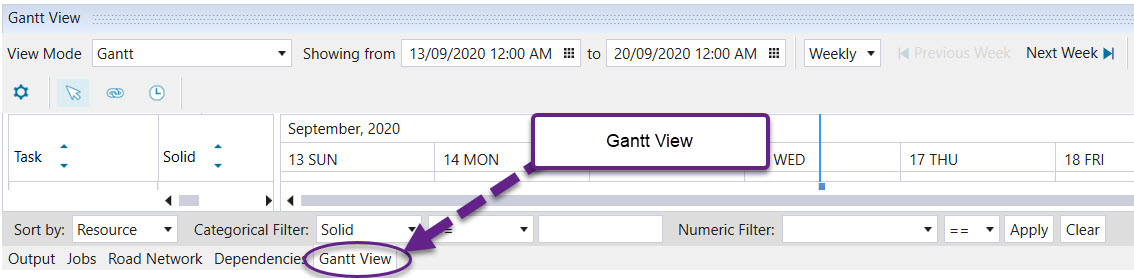
The Gantt View represents the data in the form of a table and a Gantt chart. The table details each task in the schedule and the Gantt chart displays the schedule.
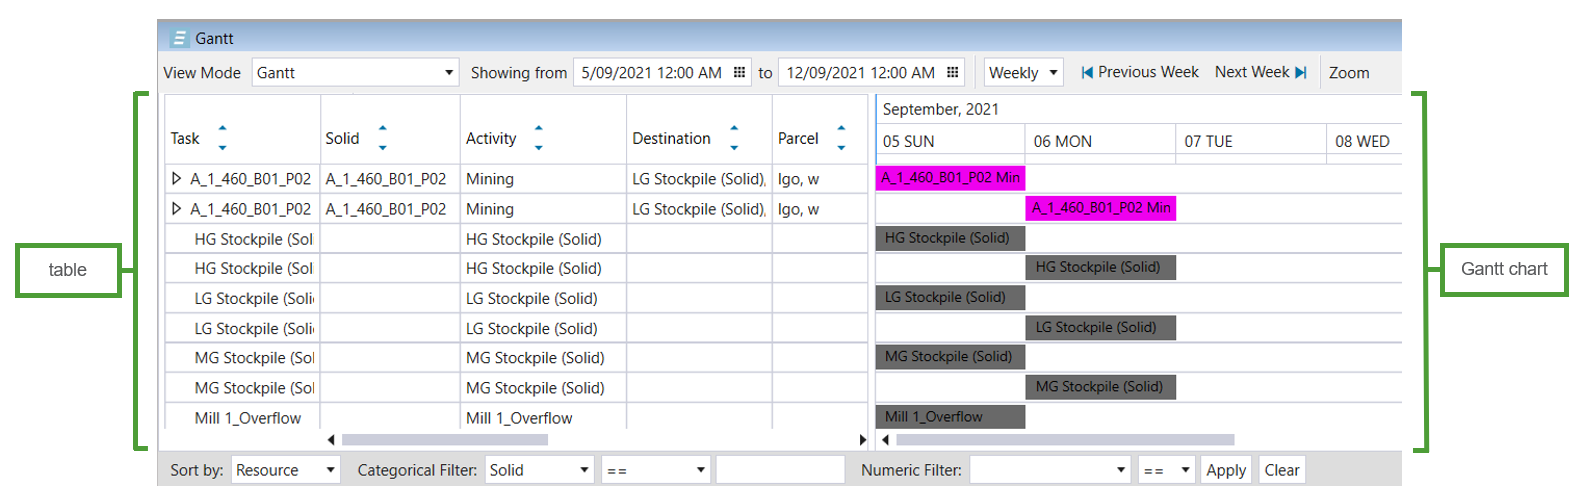
The arrow icons next to the first two tasks in the image above indicate the tasks are summary tasks. You can expand these summary tasks by selecting the arrow icons. Epoch will display a child task for each parcel, destination and equipment combination in your setup. For example, if two parcels were mined from a single solid, then Epoch would display two child task entries.
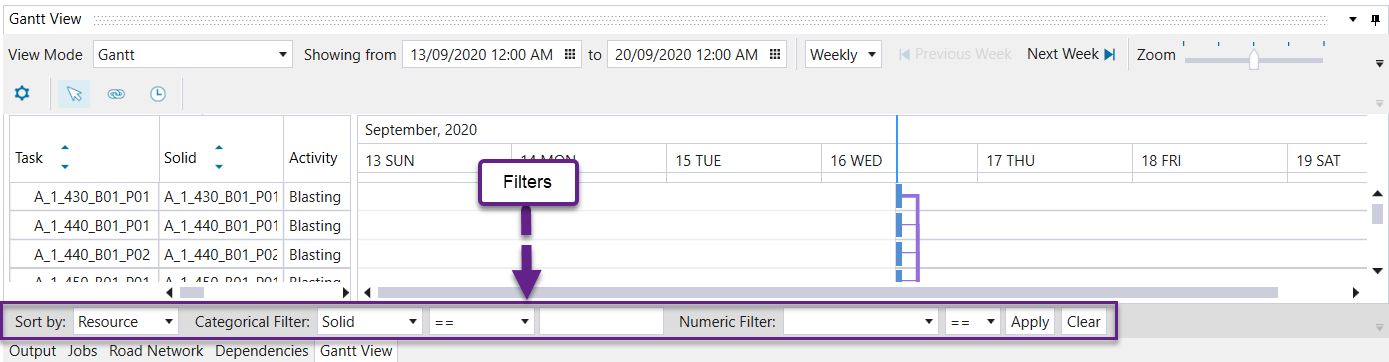
You can filter the results using the Category drop-down or the Numeric drop-down. You can also search for primary equipment by selecting the Equipment filter from the Category drop-down and typing in the Primary Fleet Name.
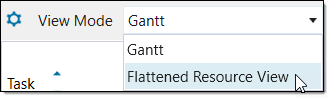
You can also change the view to the Flattened Resource View mode in this tab. This mode contains an equipment based timeline which displays the actions of each resource throughout the schedule. To access this view, select the View Mode drop-down and click Flattened Resource View.
Live Dashboard
To open and use a live dashboard, see Live Dashboard.
Customising the schedule view
You can customise the schedule view using the Viewer toolbar.

To do this, use the following operations:
-
To customise the colours of the solids, follow these steps:
-
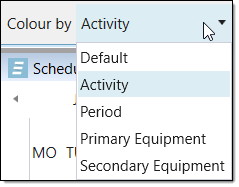
Select the Colour by drop-down in the Viewer toolbar.
-
Select the option you wish to colour the solids by. You can select from the following:
-
Activity. This option colours the solids according to what activity has been performed on the solids. This is the default option.
-
Period. This option colours the solids according to what period the solids were mined in.
-
Primary Equipment. This option colours the solids according to what primary equipment Evolution has selected for use. Primary equipment includes diggers, drills and custom equipment.
-
Secondary Equipment. This option colours the solids according to what secondary equipment is selected for use. Secondary equipment refers to trucks.
-
-
-
To change the colour settings, follow these steps:
-
Click
 from the Viewer toolbar. The Colour Settings panel will appear.
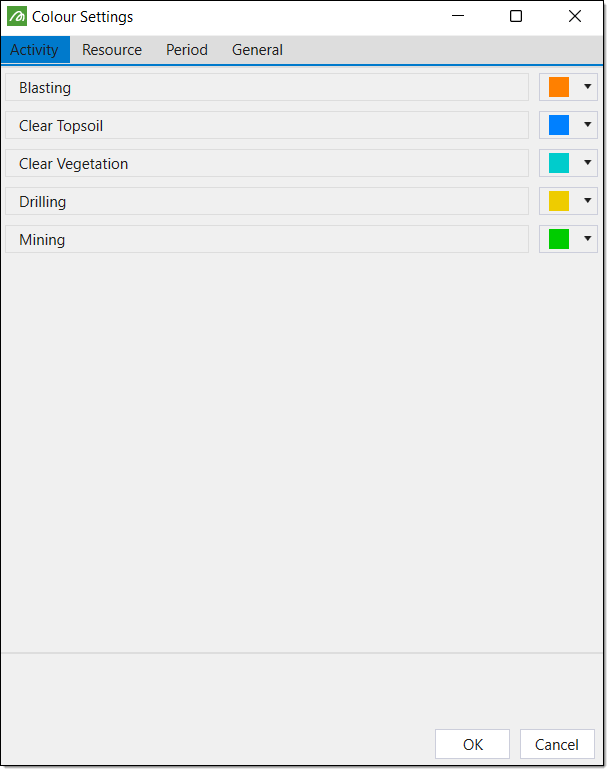
-
Select the desired colour category tab. You can select from the following tabs:
- Activity
- Resource
- Period
- General
-
Follow the steps below which correspond to the tab you wish to edit:
- Activity. Select a colour from the colour picker on the right of the activity. When you step through the schedule, Epoch will highlight the solid using the selected colours.
-
Resource. Select a colour from the colour picker on the right of the resource. When you step through the schedule, Epoch will highlight the solid using the selected colours.
-
Period. Enter a value into the Number of colours field and Selecta colour scheme. When you step through the schedule, Evolution will colour the solid according to the period it is mined, based on the selected colour scheme.
-
General. Select a colour from the colour picker on the right of Active Face. When you step through the schedule, Epoch will colour the current solid being mined according to the selected colour.
- Click OK .
-
-
To show all of the completed solids in the Viewer, select
 from the Viewer toolbar. Alternately, to hide the completed solids, select
  .
.
Changing the reporting time
To change the reporting time of the schedule, follow these steps:
-
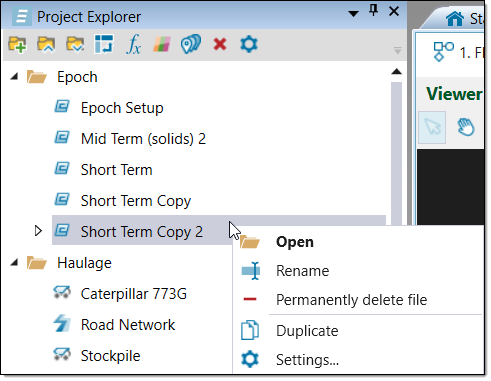
In the project explorer, right-click on the desired Epoch schedule. The following context menu will appear.
-
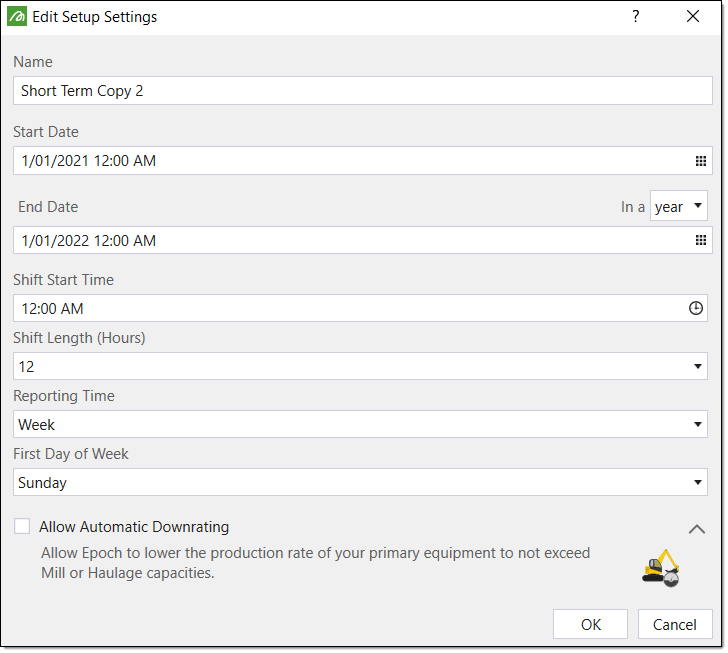
Select Settings... from the context menu. The Edit Setup Settings panel will appear.
-
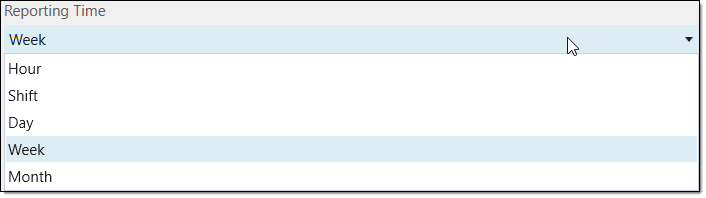
Select a new reporting period from the Reporting Time drop-down.
-
Click OK. The Schedule Playback tab will prompt you to re-validate the setup.
-
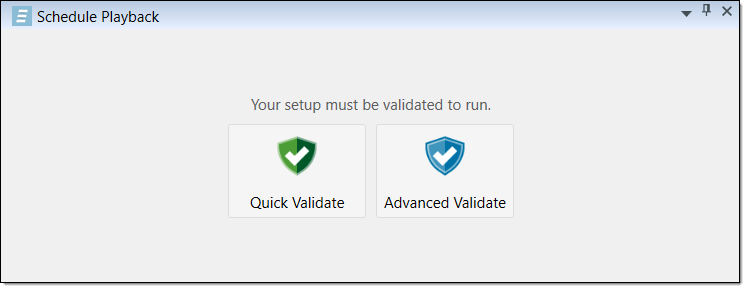
Re-validate the setup by selecting Quick Validate or Advanced Validate. For more information on validation, see 3. Validate the Setup.
Saving the schedule
Optionally, you can save the schedule in Epoch. To do this, follow these steps:
-
Select the Schedule Playback tab from the Report Window tabs.
-
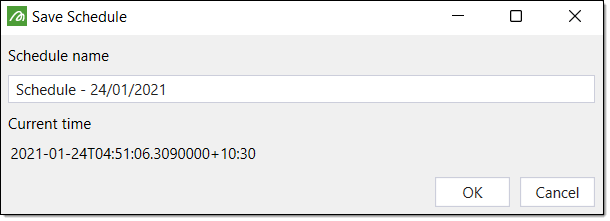
Select Save from the Schedule section of the Schedule Playback tab.

The Save Schedule panel will appear.
-
Optionally, edit the schedule name in the Schedule name field.
-
Click OK. Evolution will save the schedule to the Epoch setup folder in the project explorer.