Configuration
Source file: origin-block-setups-flowchart-configuration.htm
The ![]() Configuration subtab is used to define static parameters for each process flow component added using the
Configuration subtab is used to define static parameters for each process flow component added using the ![]() Material Flow subtab.
Material Flow subtab.
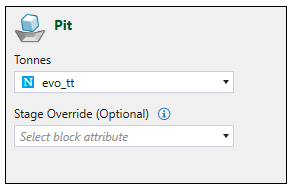
 Pit (block)
Pit configuration requires a tonnage value representing the total tonnes of the pit. To set it, select the corresponding attribute from the Tonnes drop-down. Use the optional Stage Override drop-down to assign a stage attribute. This allows you to have different stage attributes for setups with the same pit models.
 In-pit crusher
In-pit crusher reduces the size of the chunks of mined material by crushing them into smaller chunks directly in the pit, which facilitates the transport to the processing nodes.
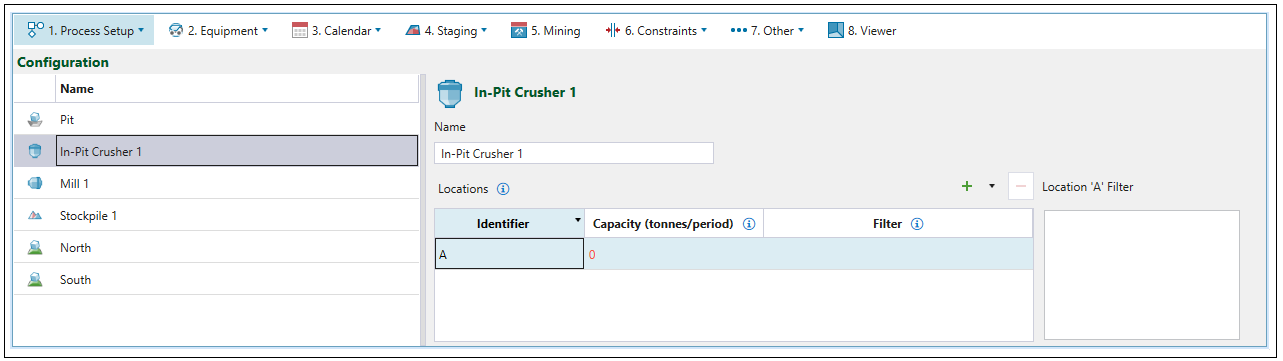
You need to specify the locations the in-pit crusher can be moved to. Each location is represented by an identifier and must be linked to an in-pit crusher waypoint in the viewer.
Note: Each identifier that you add to the Locations table will be assigned with a consecutive letter (A, B, C (...)).
-
Select
 to add another identifier to the table.
-
To add multiple identifiers at once, press
 and select the number you wish to add.

-
To remove an identifier, select the one you want to remove and click
 (Remove selected location) or
 delete.Note: As there has to be at least one location associated with an in-pit crusher, Evolution will disable deletion if there is only one item on the Locations list.
-
Double-click the name of an identifier to rename it.
For each identifier you have added to the Locations table, enter the capacity (in tonnes) and the appropriate script in the Filter column. 
For information on designating identifiers in the viewer, see Assigning in-pit crusher’s identifiers and their waypoints.
Note: Once you add the location of the in-pit crusher, a dedicated constraint named In-Pit Crusher Location Dependency will be added to the available constraints. See In-Pit Crusher Location Dependency for more information.
 Mill
Mill
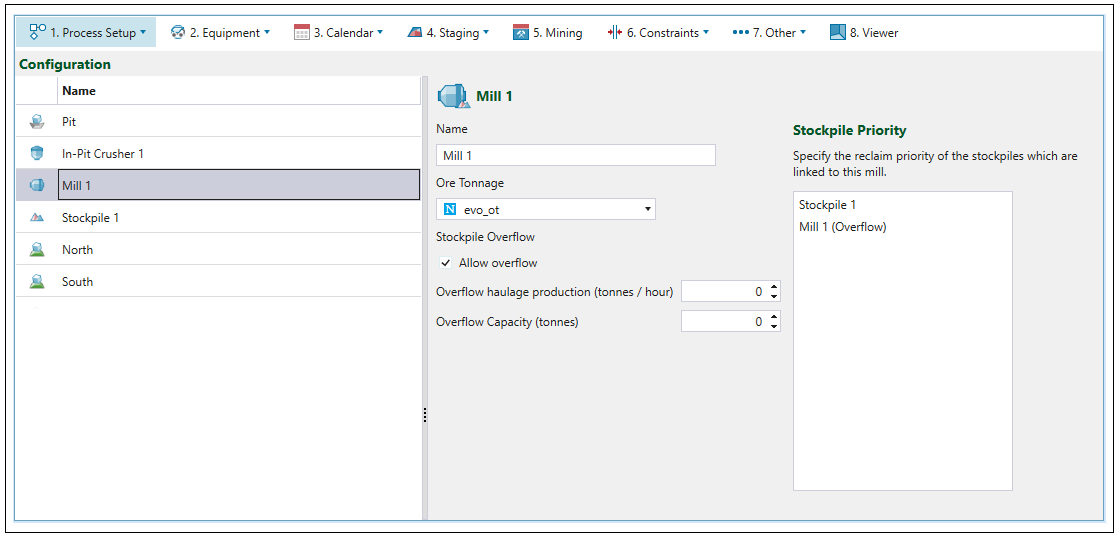
The ![]() Configuration subtab allows you to define the following mill parameters:
Configuration subtab allows you to define the following mill parameters:
-
Name: Provide a name to the mill of your choosing. The default name is Mill <number>, where number represents the number of mills in the setup.
-
Ore Tonnage: Provide an attribute from the imported pit that best represents the amount of ore a block contains in tonnes.
-
Stockpile Overflow: Select the Allow Overflow checkbox if you would like to have a stockpile adjacent to the mill. Overflow stockpiles act as simple stockpiles that accept all material above the capacity of the process in a given period, that can later be reclaimed to meet capacity in periods of low ore mining.
-
Overflow haulage production (tonnes/hour): Specify this value to calculate the reclaim rate per hour.
-
Overflow Capacity: Enter the capacity of the overflow stockpile adjacent to the mill.
-
Stockpile Priority: Provide the stockpile order by dragging and dropping list items. Material is sent to the stockpile that appears first on the list. Evolution automatically gives the priority to the overflow stockpile.
 Virtual stockpile
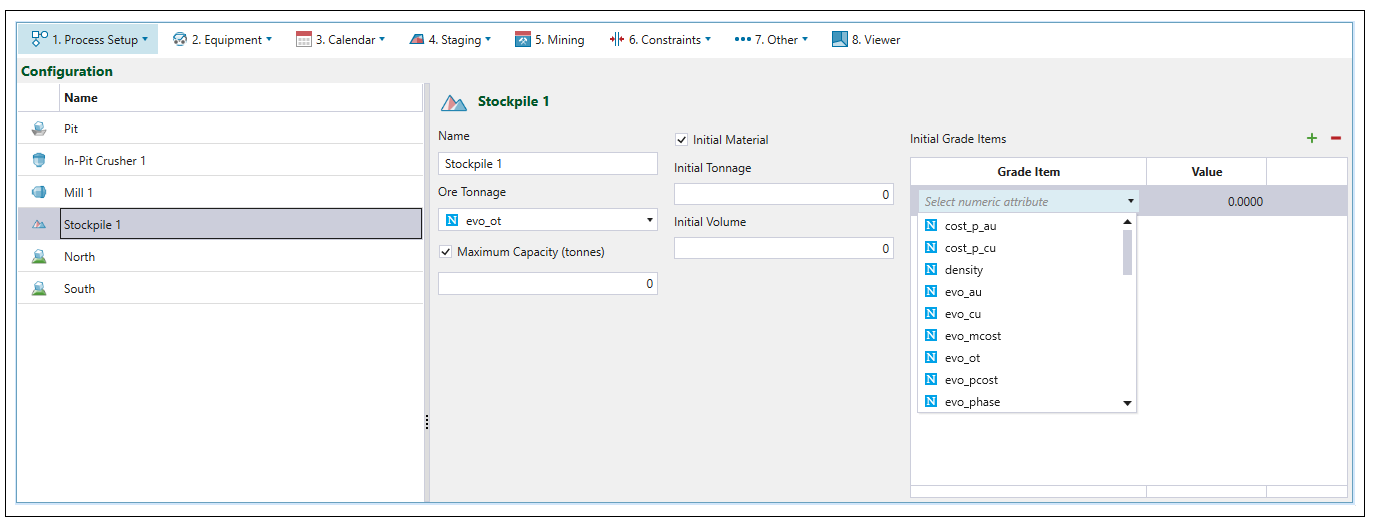
Virtual stockpiles only require an ore tonnage column to be selected, the other fields (Maximum Capacity (tonnes), Initial Tonnage and Initial Volume) are optional. To set ore tonnage, select the appropriate variable from the corresponding drop-down menu.
Selecting the Initial Material checkbox allows you to set the values for initial tonnage and volume, as well as the initial grade items.
Note: Grade items represent the grade of a metal, contaminants (etc.) in a given mass of material. For example, according to the formula where metal = grade * mass, a block of rock that weighs 1 tonne and has 100g of gold in it, has a grade of .0001. Grade items are weight-averaged by mass.
Note: The reclaim mode for stockpiles in Origin Block setups is FIFO (First In First Out), where the first block sent to the stockpile is the first block to be reclaimed.
 Imported waste dump (block)
Important: Imported waste dumps cannot be used in Material Movement setups.
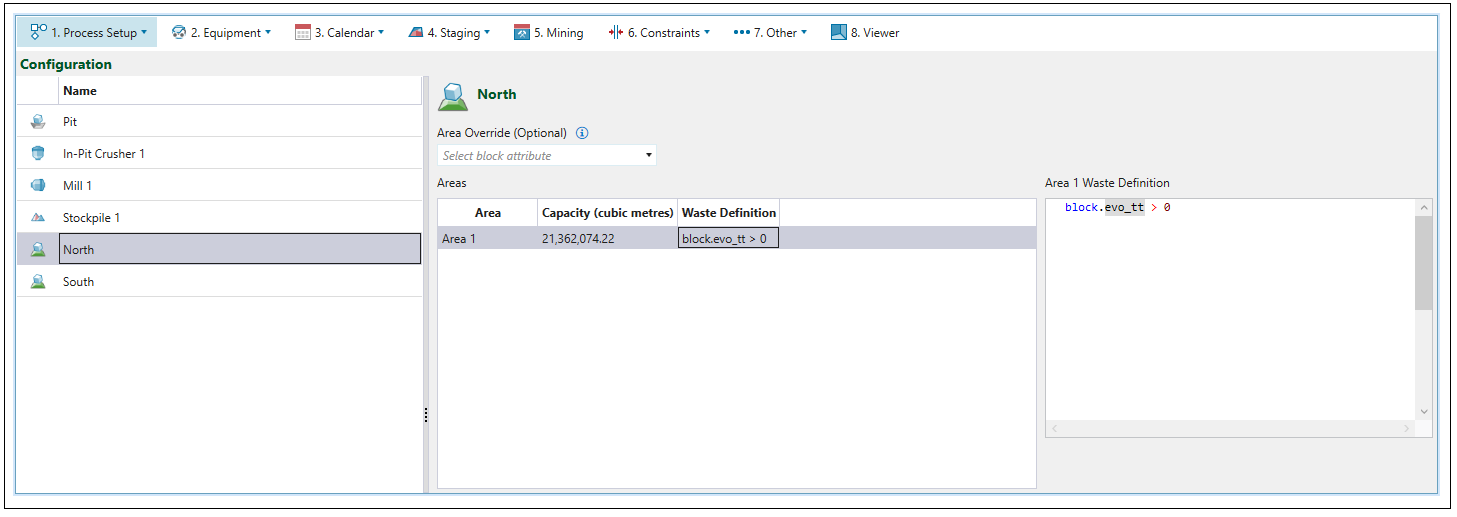
The capacity featured on the imported waste dump configuration page corresponds to the prespecified parameters of your imported model. See Importing a Waste Dump (Block) for more information.
The ![]() Configuration subtab allows you to specify you the following:
Configuration subtab allows you to specify you the following:
-
Area Waste Definition: You can specify the waste definition by entering the appropriate script..
-
Area Override (Optional): Select the block attribute from the drop-down menu. By default, the area value provided on import of the model is used within a setup. Modifying the area value in the
 Configuration subtab will only impact the current setup.
 Note: To modify the default value, right-click the model in the project explorer and select
 Change area attribute....
 Virtual waste dump
A virtual waste dump has no associated geometry (there is no block, nor is there a solid model that represents it).
To configure your virtual waste dump, specify its capacity, and, optionally enter a name of your choosing. The default name is Waste Dump <number>, where number represents the number of virtual waste dumps in the setup.
Important: Virtual waste dumps are only available in Material Movement setups.
