Parcel Reporting
Source file: origin-reserve-setups-flowchart-parcel-settings.htm
Creating parcels allows you to define the material properties of different material types within each solid. You can sort mined material into parcels in the ![]() Parcel Reporting subtab. To enter it, go to the
Parcel Reporting subtab. To enter it, go to the ![]() Process Setup tab and select
Process Setup tab and select ![]() Parcel Reporting from the drop-down list.
Parcel Reporting from the drop-down list.
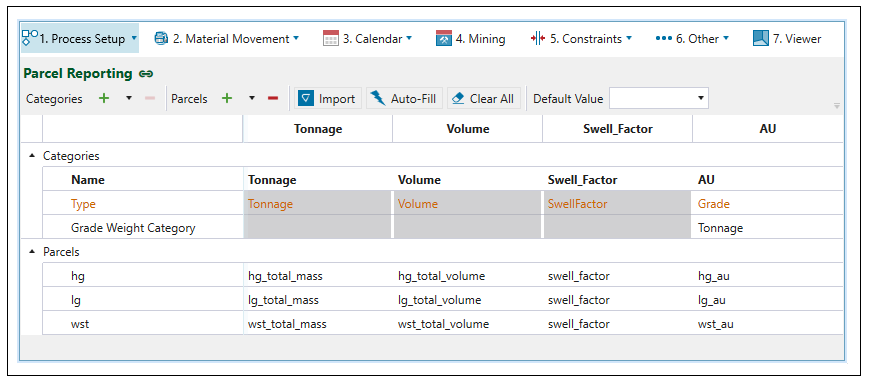
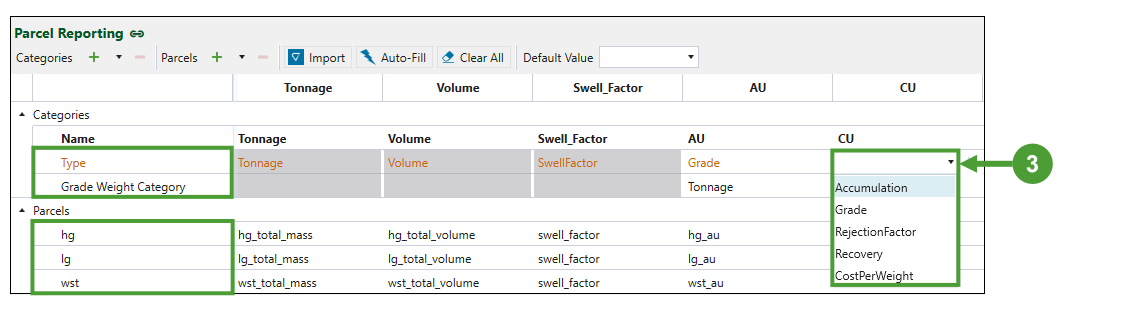
The ![]() Parcel Reporting subtab contains a table with the following headings:
Parcel Reporting subtab contains a table with the following headings:
-
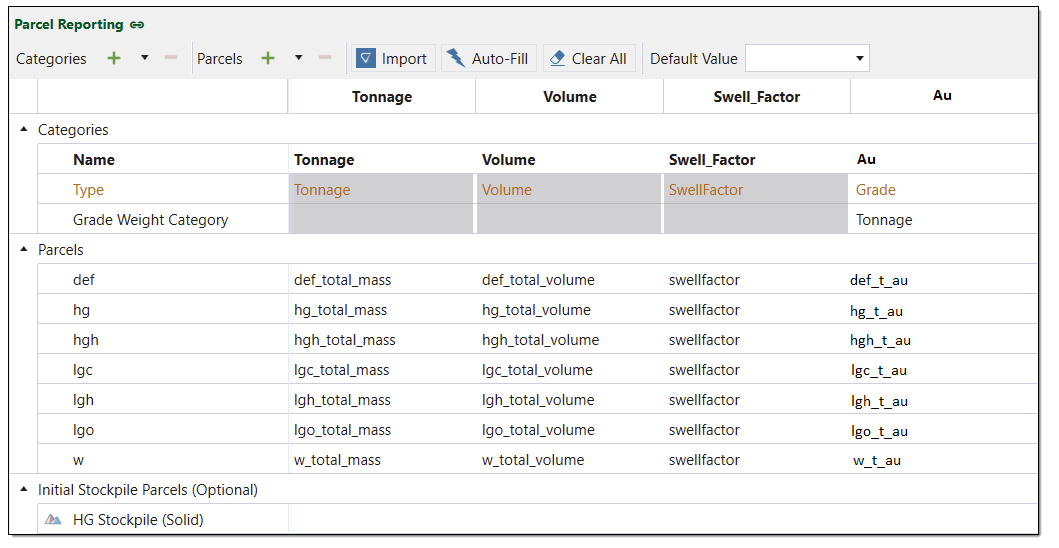
Parcels
Parcels are user-defined components of a solid. For example, you could add a parcel called hg that will represent the portion of each solid which is high grade material. See Adding a category or parcel for more information.
-
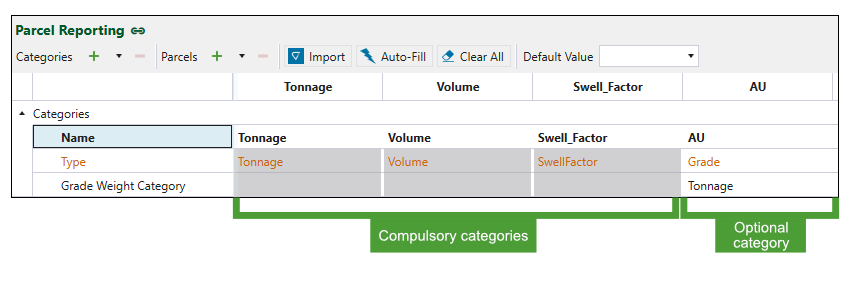
Categories
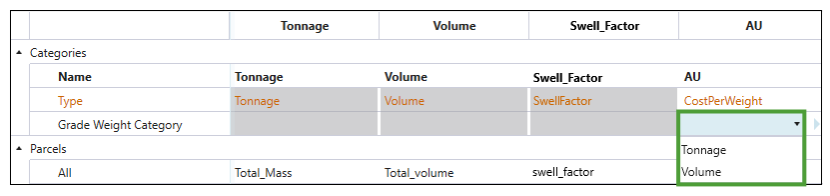
The categories Tonnage, Volume and Swell_Factor are compulsory and must be defined for each parcel. To customise the parcel definitions, you can add optional categories, such as grades, to define the properties of each parcel of material (see Adding a category or parcel for more information).
Note: Swell factor percentage is indicated in decimal fractions, where a value of 1 correlates to no swelling. For example, a swell factor of 1.2 would represent a 20% increase in volume during mining.
Note: You can rename the compulsory categories so that the Auto-Fill can better match your attribute naming conventions. To do so, double-click on the cell in the Name row of the corresponding category and enter a new name. Click enter to apply the changed name.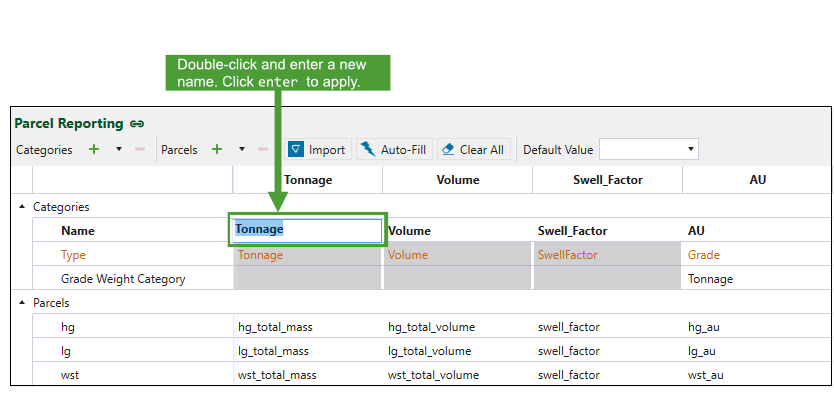
-
Evolution accounts for the volumetric expansion of solids by including Swell_Factor in the table. This expansion occurs after the material has been removed from the ground and put into storage.
-
The combined Tonnage and Volume values for every parcel must equal the total Tonnes and Volume set in the
 Process Setup >
  Configuration tab for the mining pit.
Adding a category or parcel
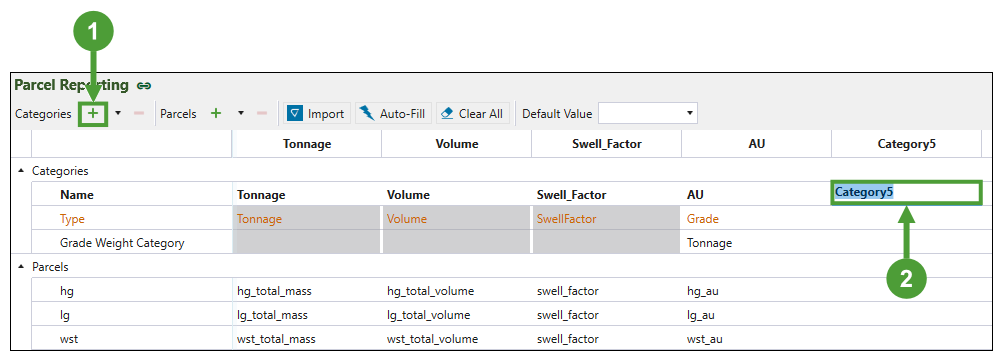
Follow these steps to add a category to the table:
-
Click
 next to the Categories label in the Parcel Reporting ribbon. A column with a new category will be added to the table.
 -
Double-click the cell in the Name row to set the name of your new category.
-
Using the drop-down menus in each row, select the appropriate attributes for the added category.
Tip: To add multiple categories at once, select ![]() next to the
next to the ![]() icon and enter the number of categories you wish to add.
icon and enter the number of categories you wish to add. 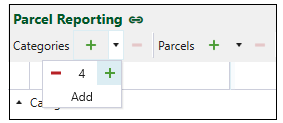
The table below shows the usage of each category in the Origin Solids setup:
| Accumulation | A total quantity or value that is summed in a parcel, such as contained metal tonnes or net cash flow. |
| Grade |
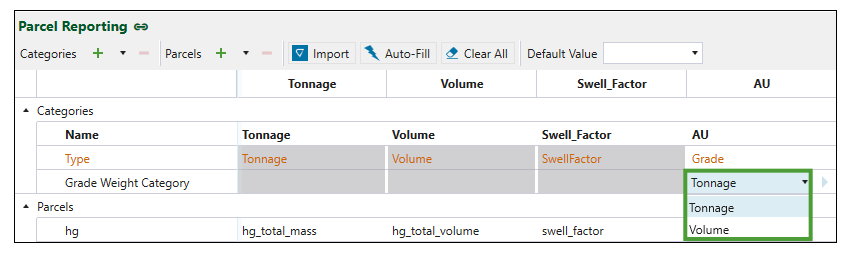
Concentration or unit rates, such as grams per tonne, tonnes per cubic metre, or dollars per tonne. If the Grade category is assigned to a parcel, then it can be used as a numerator in the Blend tab. In the Blend tab, if the Use Blend Ratio checkbox is checked, a parcel with a category of grade can also be used as the denominator. See Blend for more information.
When you set this category, make sure you specify the Grade Weight Category by selecting from Tonnage and Volume. |
| Rejection Factor | A value between 0 and 1 that defines how each parcel is split when processed at a screening station. See Screening Stations for more information. |
| Recovery | Weighted average that is calculated for the recovered material when it is delivered to the mill. This variable is used to calculate the net present value (NPV). For more information, see Net Present Value.
When you set this category, make sure you specify the Grade Weight Category by selecting from Tonnage and Volume. 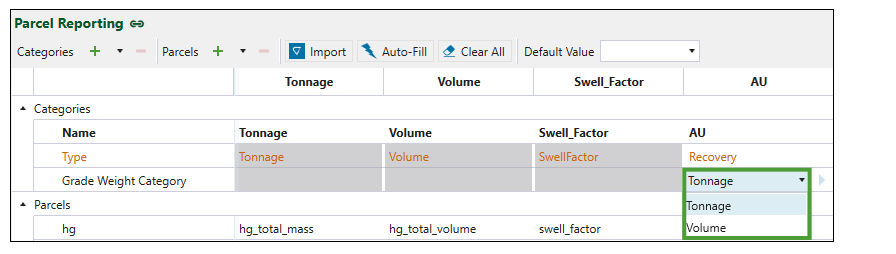 |
| CostPerWeight |
Weighted average of the cost per mass or volume of the material processed at the mill. When you set this category, make sure you specify the Grade Weight Category by selecting from Tonnage and Volume.
This variable is used to calculate the NPV. See Net Present Value for more information. Note: This category is relevant for Solids only. |
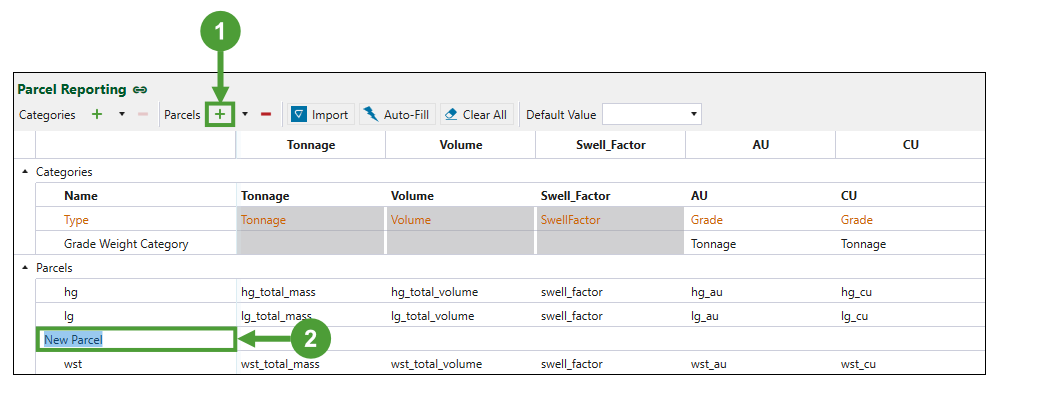
Follow these steps to add a parcel to the table:
-
Click
 next to the Parcels label in the Parcel Reporting ribbon.
 -
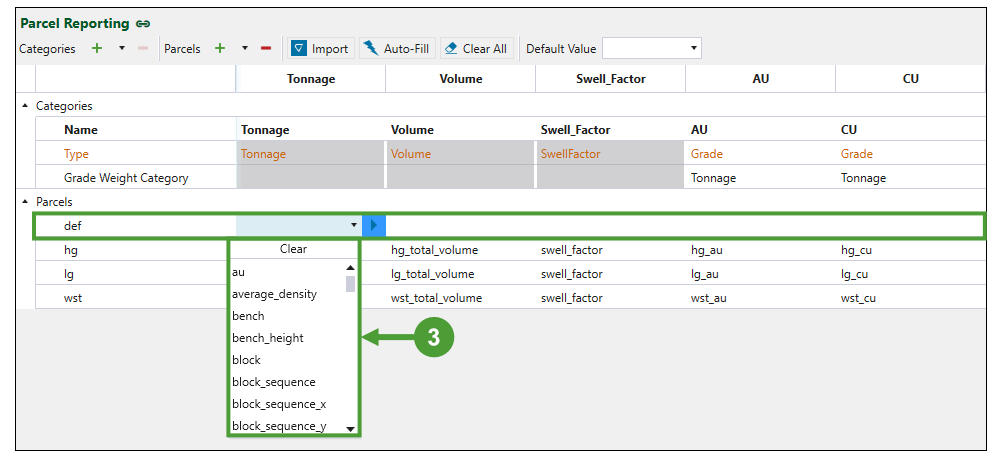
Click on the cell named New Parcel to set the name of your new parcel.
-
Using the drop-down menus, specify parcel variables for the Tonnage, Volume and Swell_Factor category, and, optionally, for any other category that you have added.
Tip: To add multiple parcels at once, select ![]() next to the
next to the ![]() icon and enter the number of parcels you wish to add.
icon and enter the number of parcels you wish to add.
Note: Some parcels might not need to track the values of certain categories. Consequently, instead of creating distinct attributes for each of them, you can use the Default Value drop-down to apply the same attribute to all cells that are left blank in the table.
Deleting a category or parcel
To delete a category or a parcel from the table, proceed as follows:
-
To delete a category, select the category column in the Parcel Reporting table and click
 to the right of Categories in the ribbon.
 -
To delete a parcel, select the parcel in the Parcel Reporting table and click
to the right of Parcels in the ribbon.
Importing parcel categories
You can import a Vulcan reserve specification file (.res) to fill parcel categories.
To import a RES file, follow these steps:
-
Select
 Import in the Parcel Reporting ribbon. The file explorer will open.
 -
Select the RES file you wish to import and click Open.
Note: Importing a RES file only creates parcels defined in the Product Codes section of the RES file. Other methods of splitting up advanced reserves such as by bench, or by classification variable are not considered.
Note: If your RES file contains categories, but no parcel definitions, then only categories will be imported to the table. Similarly, if the RES file contains parcel definitions but no categories, then only the parcels will be imported.
Auto-filling parcel categories
You can use the Auto-Fill feature to let Evolution automatically fill in the Parcel Reporting table cells. Evolution fills the cells by searching for attributes in your project which match the cell's row and column headings.
For example, to fill the cell defined by parcel hg and category Volume, Evolution searches for hg_volume. The project attribute that matches the search, within a tolerance, will be selected to fill the cell. In this case, Evolution found hg_total_volume.
To use this option, click ![]() Auto-Fill in the Parcel Reporting ribbon.
Auto-Fill in the Parcel Reporting ribbon.
Note: Initial Stockpiles do not track parcels and are considered to be single parcels of their own definition. See Initial stockpiles for more information.
