Targets
Source file: origin-reserve-setups-calendar-targets.htm
Use the ![]() Targets subtab to define parameters for each period in the production cycle. You can specify the per-period targets and target values for each processing node, stockpile, and equipment in your setup.
Targets subtab to define parameters for each period in the production cycle. You can specify the per-period targets and target values for each processing node, stockpile, and equipment in your setup.
Note: If a schedule takes longer than the number of periods in the calendar, the values in the final calendar period will be used for all subsequent schedule periods.
Targets toolbar
The ![]() Targets subtab features the following controls:
Targets subtab features the following controls:


|
Start Date |
|
|
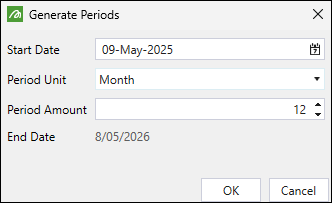
Generate Periods
Note: If there are any previously added periods in the calendar, the newly generated periods will be added after the existing periods. |
|
|
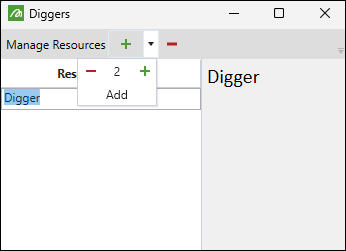
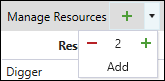
Manage Diggers
|
|
|
Add an extra period to the calendar
Note: This button will be dimmed if no periods have been added to your setup. Use the |
|
|
Add multiple periods to the calendar Adds multiple periods to the calendar when you click Note: This button will be dimmed if no periods have been added to your setup. Use the |
|
|
Delete currently selected period
Note: You can select multiple periods by pressing and holding Shift, then selecting the periods you wish to delete. |
|
|
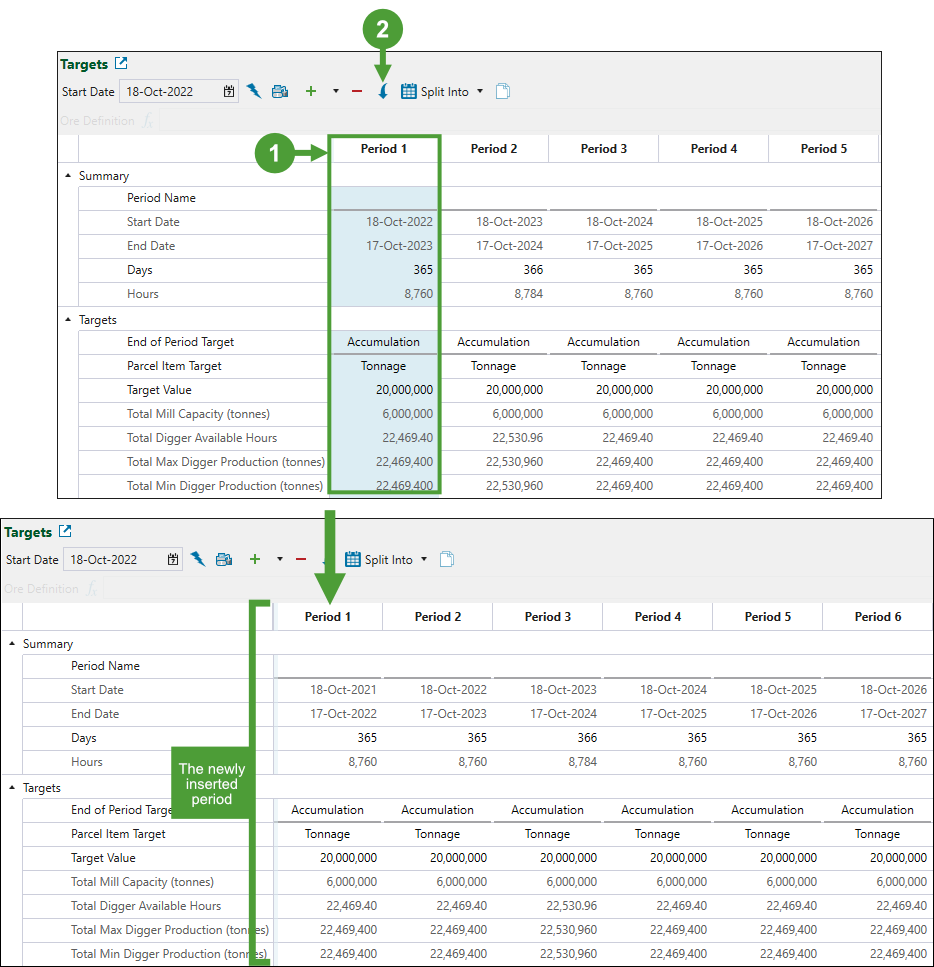
Insert period before selected period Note: The newly added period will have the same settings as the period it precedes.
To insert a new period, select the column corresponding to the period before which you wish a new period to be added. Next, click the |
|
|
Split into
Note: In Origin Solids setups, it is not necessary for all periods to be the same length. However, keep in mind that different period lengths will have an effect on the net present value (NPV). For more information on NPV, see Net Present Value and Objectives in Origin Solids. |
|
|
Copy calendar to clipboard
|
Target categories
The calendar in the ![]() Targets subtab consists of categories corresponding to the setup time frames and per-period targets, as well as to setting the per-period operation of equipment and utilisation of processing nodes.
Targets subtab consists of categories corresponding to the setup time frames and per-period targets, as well as to setting the per-period operation of equipment and utilisation of processing nodes.
In each editable row in the calendar, you can copy the entered values to the subsequent cells as follows:
Click the
 button once to copy the properties of the current period to the next period.
Double-click the
button to copy the properties of the current period to the subsequent periods until the end of the schedule.Alternatively, copy a cell's setting using Ctrl+C, then paste it into selected cells with Ctrl+V.
Summary
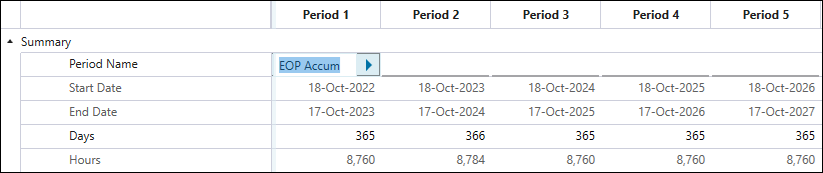
Summary features the time span of each setup period. You can specify the number of active days and enter a custom name for each period.
Targets
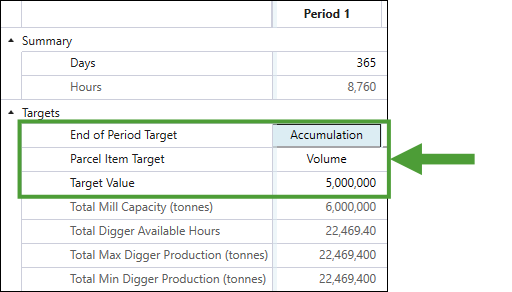
In the Targets section, you must specify the End of Period Target field for each period first. This target, when reached, will result in Evolution moving on to the next period. The additional fields that you will have to specify depend on the target that you select. You can set the following target types:
-
Accumulation. Specify the total amount of material that can be processed in the period.
Note: Accumulation includes both the material mined from pits and the material reclaimed from stockpiles.
Note: Selecting the Use excess digger hours for stockpile reclaim checkbox in the
 Mining tab might result in Evolution exceeding the accumulation target. See Mining for more information.
If you set Accumulation as your end of period target, you must also specify the following:
-
Parcel Item Target. Select either Volume or Tonnage from the drop-down.
-
Target Value. Enter the target accumulation value that, when reached, will cause Evolution to start a new period.
-
-
Process Accumulation. Set the period to end when the mill reaches its full capacity. If you set Process Accumulation as your end of period target, you must also specify the Parcel Item Target by selecting either Volume or Tonnage from the drop-down. To set the per-period mill capacity, go to the Mill section.

-
Equipment Time. When set, the end of period target will be different, depending on the type of your setup (Equipment or Material Movement), as follows:
-
In an Equipment setup, the actual target value is the total haulage hours. For information on how Evolution calculates the total haulage hours based on the data you input, see Equipment Calendar.
-
In a Material Movement setup, the actual target is the total available digger hours. For information on how Evolution calculates the available digger hours, see Digger, below.
-
Digger
For each digger fleet you add, specify the Delay Hours, Utilisation, Availability, and Unit Count (the number of diggers in the fleet).
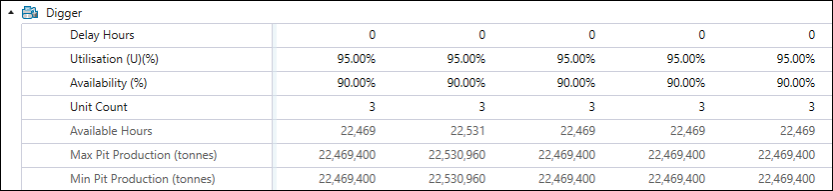
Based on the values you provide, Evolution will calculate the remaining parameters as follows:
-
Available Hours are calculated according to the following formula:

-
Max and Min Pit Production are calculated according to the following formula:
 Note
Note
Evolution calculates the minimum and maximum production rates as follows:Identifies which fleet code is associated with each solid in each pit.
Identifies which diggers (in Material Movement setups) or which digger and truck combinations (in Equipment setups) can be assigned to each solid (based on the data gathered in step 1).
For each parcel in each pit solid, calculates the productivity rate (in tonnes per hour) for each digger that can work in that solid. Evolution makes this calculation based on the relevant productivity script for that digger (in Material Movement setups) or digger and truck combination (in Equipment setups). The minimum and maximum values from these calculations are the minimum and maximum production rate.
Important: The Max and Min Pit Production fields require fleet code to be set and will be displayed as 0 if you have not set the fleet code or if you have allocated the digger fleet to only work in stockpiles. See Equipment Allocation in Equipment setups and Equipment Allocation in Material Movement setups for more information.
See also: Productivity in Equipment setups, Digger Productivity in Material Movement setups
Mill
For each mill in your setup, set the per-period capacity and ore definition. The ore definition dictates the type of material that can be sent to it.
According to the definition below, the mill can only process material with an ore grade greater than or equal to 2.2 grams per tonne.

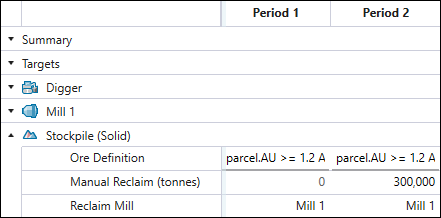
Stockpile
For each stockpile in your setup, specify the following:
-
Ore Definition: Define the type of material that can be sent to that stockpile.
Note: If a mill has an overflow stockpile enabled, then any ore matching that mill’s ore definition in excess of its capacity in a given period will be sent to that stockpile. In the following periods, if there is not enough pit material passing the mill’s ore definition to meet the target capacity, ore will be automatically reclaimed from the stockpile, unless there are not enough truck hours available in the end of period target that you have set. If you want to give Origin a better chance to meet mill targets, you need to ensure that the mills have overflow stockpiles, and that their ore definitions are broad enough that there is a surplus of material to build them up.
-
Manual Reclaim (tonnes): Set the compulsory amount of material that Evolution must reclaim from that stockpile and send it to the linked mill in a given period.
Note: If you set the manual reclaim to
0, Evolution will determine the optimal amount of material to be reclaimed from that stockpile in a given period when it generates the schedule for your setup.Note: If deemed necessary, Evolution will reclaim more material than the Manual Reclaim amount that you have specified.
-
Reclaim Mill: Specify the mill to which the material from the stockpile should be sent.