Resource Groups
Source file: epoch-setups-resources-resource-groups.htm
Use the ![]() Resource Groups subtab to specify the schedule of equipment and process flow components.
Resource Groups subtab to specify the schedule of equipment and process flow components.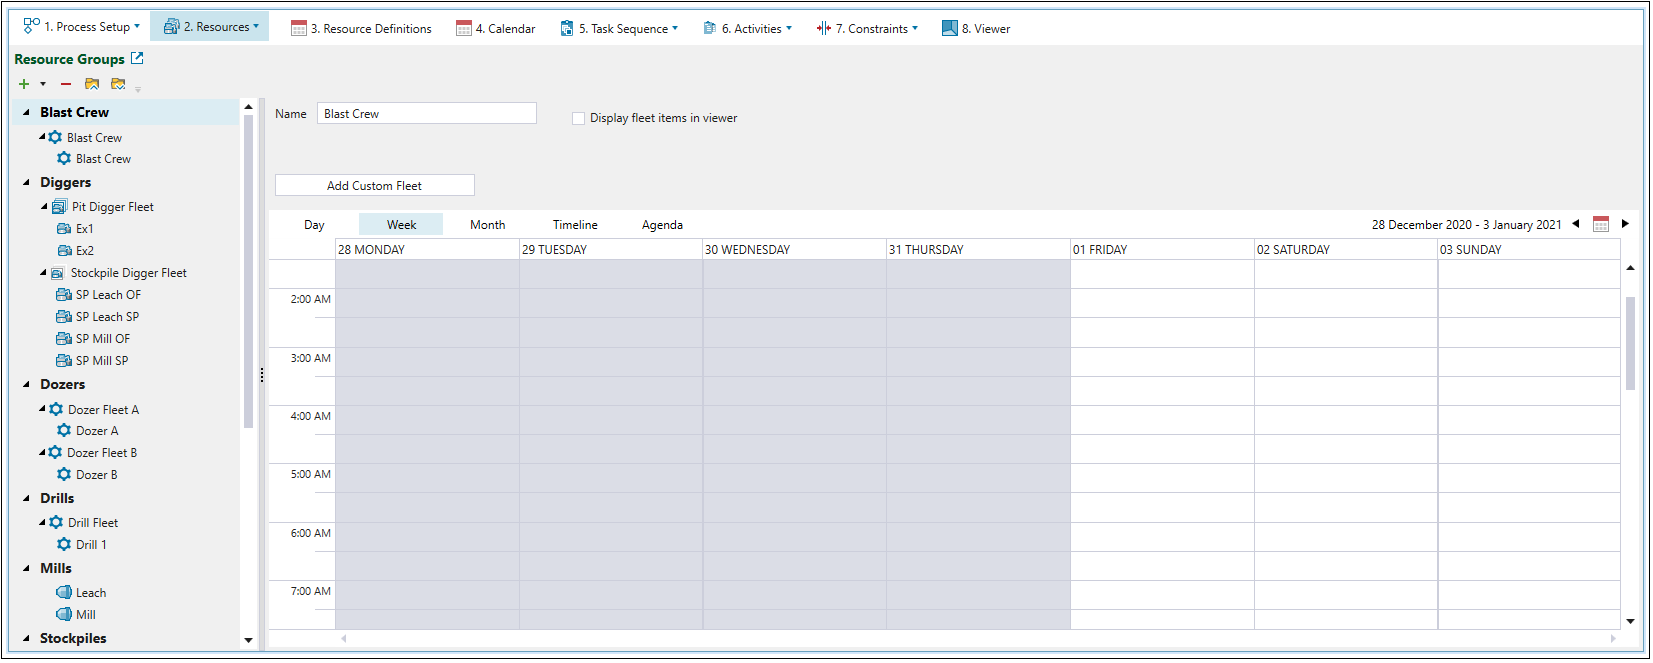
Resource group categories
Epoch considers the following categories as resource groups:
-
Diggers
-
Trucks
-
Drills
-
Custom Resources
-
Mills
-
Stockpiles (including Overflow Stockpiles)
-
Virtual Waste Dumps
-
Waste Dumps
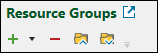
You can configure the resource groups in your setup by using the following controls:
|
|
Add Resource
Note: To prevent duplication, the resource categories that you have already added will be greyed out. Tip: For every custom equipment category that you have added, you can choose whether to display the associated fleet items in the viewer. To include these items in the viewer, click on the category name, select the Display fleet items in viewer checkbox, and then, using the Default viewer model drop-down, select the icon by which you want them to be displayed in the viewer. |
|
|
Delete Resources
Removes the selected item from the list. |
|
|
Collapse all
Hides all resource group items so that only category names are visible. 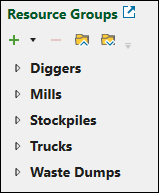 Tip: You can also hide the items included in an individual resource group or fleet by clicking the |
|
|
Expand all
Tip: You can also bring the previously hidden items included in an individual resource group or fleet by clicking the |

 button.
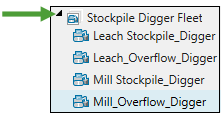
 button.
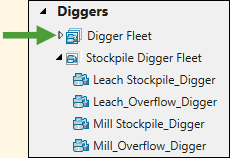
Adding resource group fleets and items
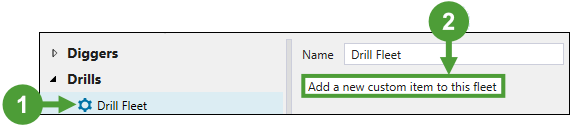
Once you have added a resource group to the list, you must add at least one resource fleet that will include items for your resource. To add a resource fleet, select the resource group from the list on the left-hand side of the screen and then click the Add <Resource Name> Fleet button (Add Drill Fleet in the example below).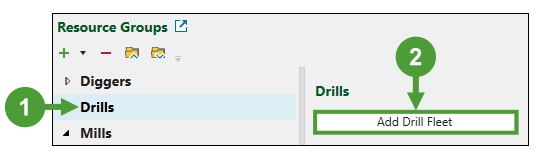
Note: You can only add fleets to equipment resource groups (Diggers, Drills, Trucks, and Custom). To add new items to process components’ resource groups (Mills, Stockpiles, and Waste Dumps), you have to add new process components in the ![]() Material Flow and configure them in the
Material Flow and configure them in the ![]() Configuration subtab. See Material Flow and Configuration for more information.
Configuration subtab. See Material Flow and Configuration for more information.
Important: You can only add truck fleets that you have already included in your project. If there are no truck fleets in your project yet, you will be prompted to add them. See Creating Trucks for more information on generating trucks in Evolution.
Note: The name of the newly added fleet will be assigned according to the <Resource Group name> Fleet convention. Fleets with the same name will be assigned with a consecutive number. You can rename the fleet by clicking on it and entering a new name.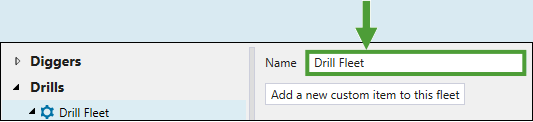
After adding the required fleet to your resource group, you must add items that will constitute the given fleet. To do so, select the fleet from the list on the left-hand side of the screen and then click the Add a new <item name> to this fleet button.
As in the example below, the button can be named Add a new custom item to this fleet in some resource groups.
Note: The newly added fleet item will be named according to the corresponding resource group, for example, Digger. You can rename the item by clicking on it and entering a new name.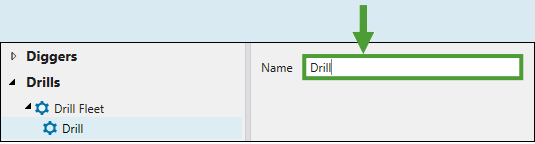
Configuring fleet items schedule
You can configure the schedule for each fleet item by adding events manually or importing them from a CSV file.
Adding calendar entries manually
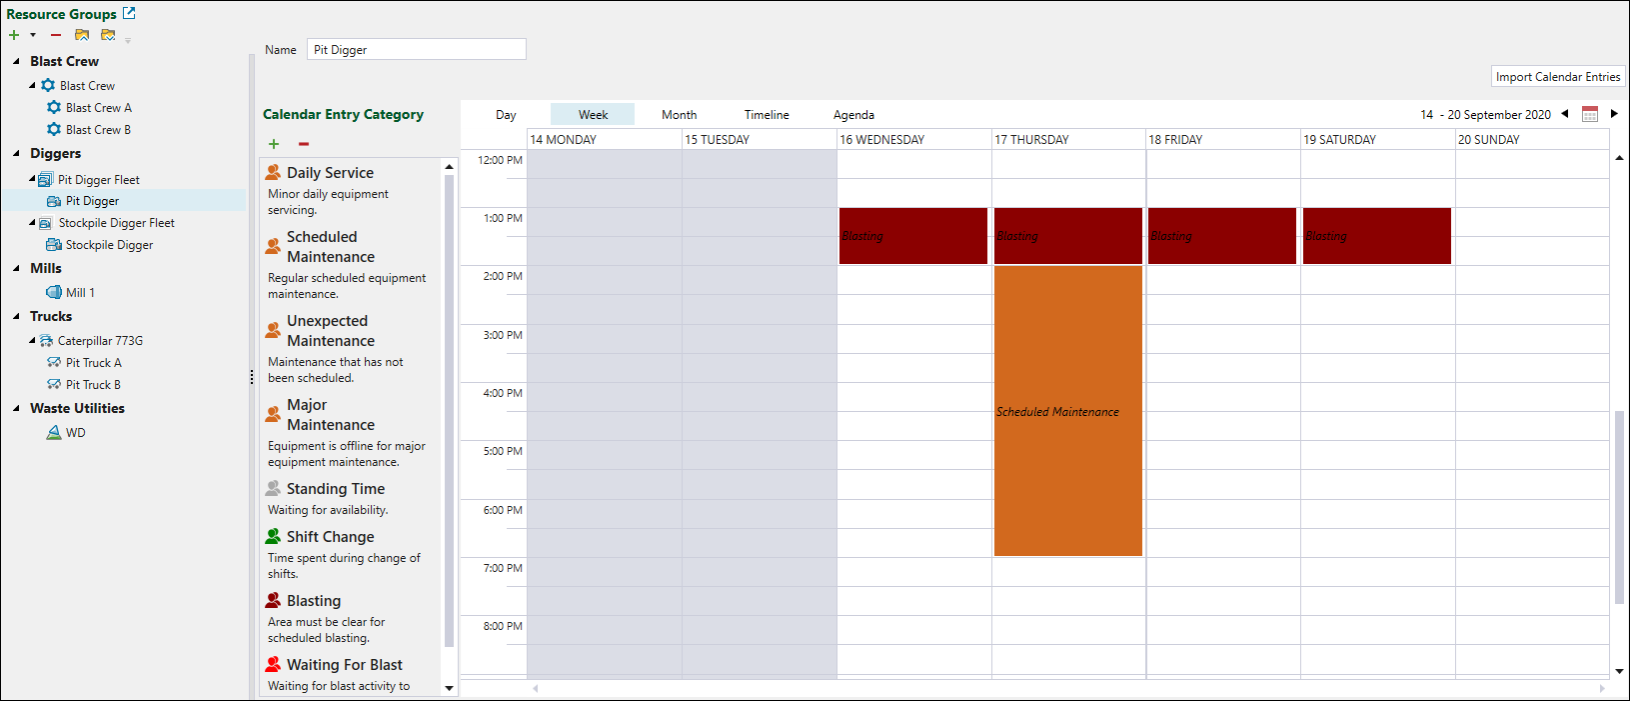
To add an entry to the calendar, click on the fleet item to which you want to assign a calendar entry, select one of the predefined categories in the Calendar Entry Category column, and drag it to the required time slot.

Tip: You can add or remove calendar entry categories by clicking the ![]() (Click to add a category) or
(Click to add a category) or ![]() (Click to delete the selected category) buttons.
(Click to delete the selected category) buttons.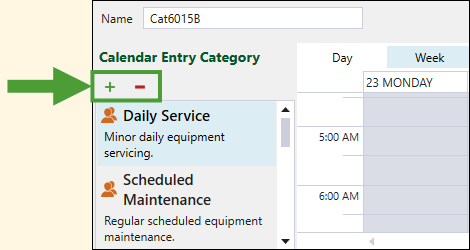
Alternatively, you can also add calendar entries by completing the following steps:
-
Click on the fleet item to which you want to assign a calendar entry.
-
Double-click the required cell in the calendar workspace.
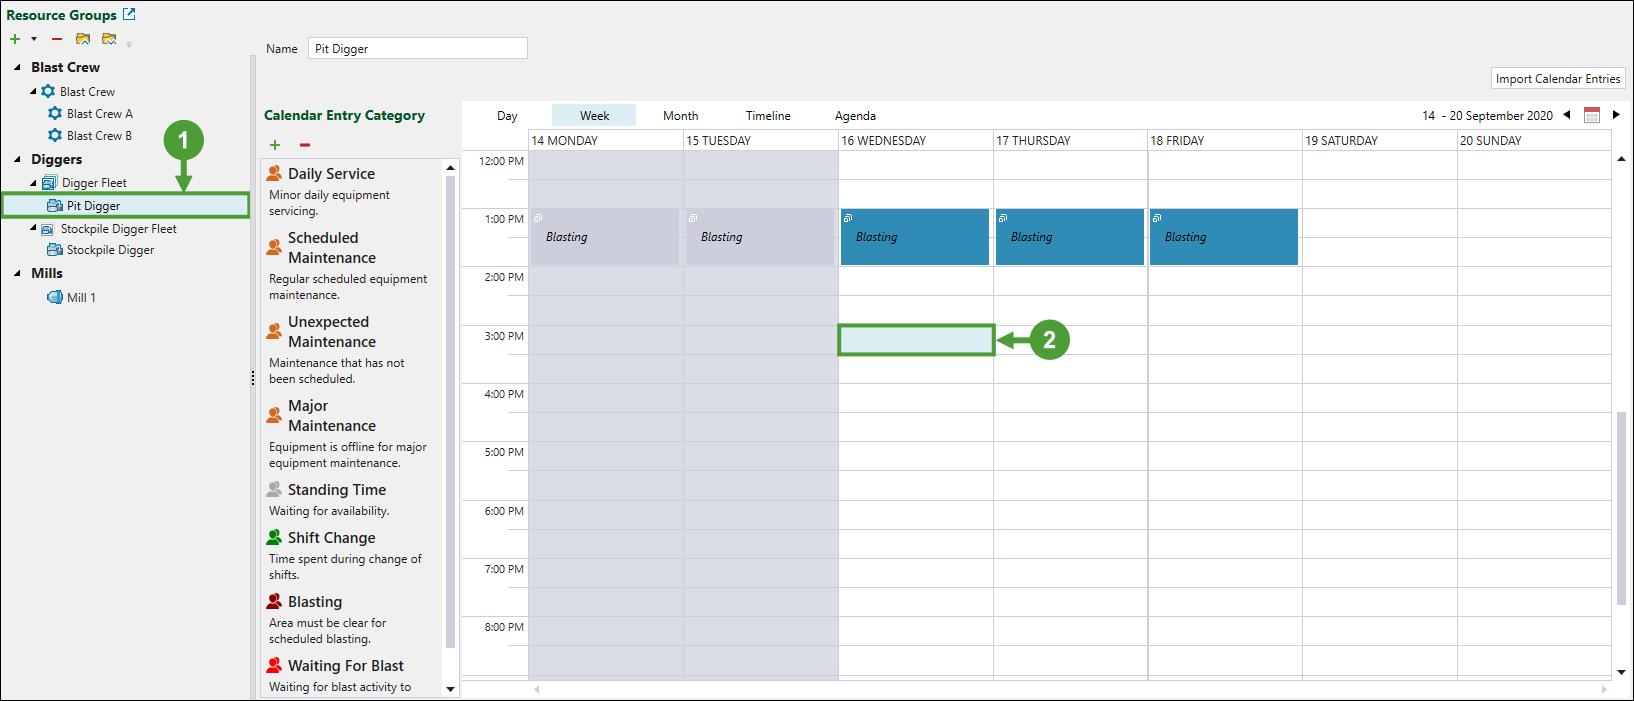
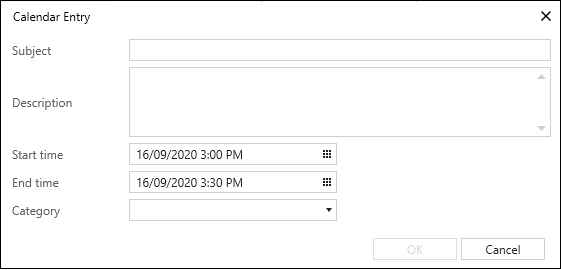
This will open the Calendar Entry window. -
Provide a Subject, Description, Start time, End time, and Category for the calendar event.
-
Click OK to apply the entry in your calendar.
Importing calendar entries from a CSV file
To add calendar entries from a CSV file, complete the following steps:
-
Click on the fleet item to which you want to assign a calendar entry.
-
Click the Import Calendar Entries button.

-
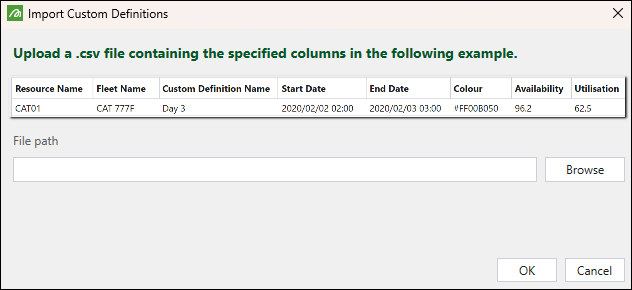
In the Import Custom Definitions panel, click Browse to select a CSV file.
-
Set the Resource Name, Fleet Name, Skip Rows, Appointment Types, and other optional fields (if required), and then click OK. In the Appointment Types, select the Is Percentage checkbox if you want the values to be a percentage.
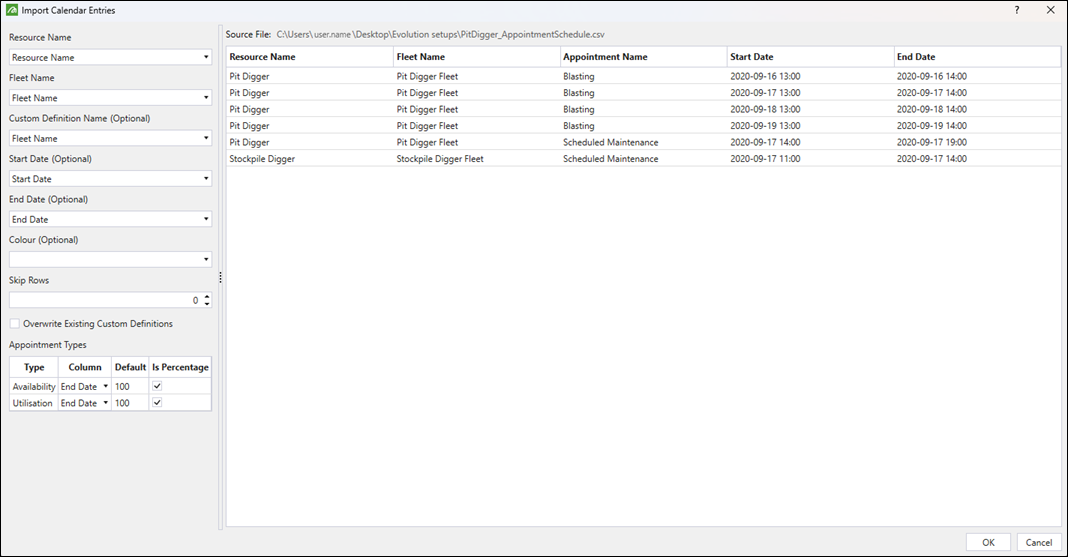
The appointments will be added to the calendar as shown below.
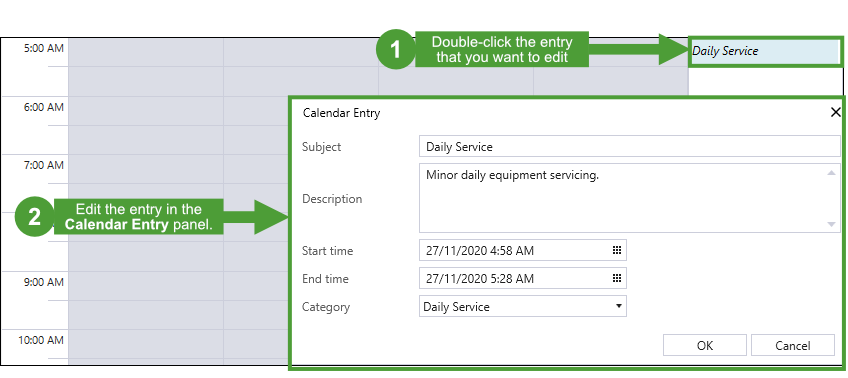
Editing the existing calendar entries
You can edit the existing calendar entries the following wayss:
-
Double-click on the entry in the Appointments Calendar workspace. This will bring up the Calendar Entry panel where you can apply the required changes.
-
To change the time slot of a calendar entry, drag the entry to a different cell in the Appointments Calendar workspace.
-
To delete an entry from the Appointments Calendar workspace, hover over it and click the x button in the top right corner.

Note: You can modify calendar entries only at the fleet item level.
