Data
The following table describes the tools in the Data section of the Home tab.
| Tool | Description |
| Import | Imports one or more files of the same type into a project. |
| Export | Exports a file to a specified destination. |
| New Project | Creates a new project and opens it as a secondary project. |
| Open Object Or Project | Opens an existing Maptek object file or project as a secondary project. |
| Open Object or Project (Read-Only) | Opens an existing Maptek object file or project as a secondary project, with read-only access. |
| Load Vulcan Data | Loads Vulcan data into Vulcan GeologyCore. |
| Publish to Vulcan | Publishes Vulcan GeologyCore data to Vulcan. |
| Export Drillholes to Isis | Exports a drillhole database to Isis. |
| Export PDF | Exports the view to a PDF file. |
| Export U3D | Exports the view to a U3D file. |
| Image Render | Exports the view to as a high resolution image. |
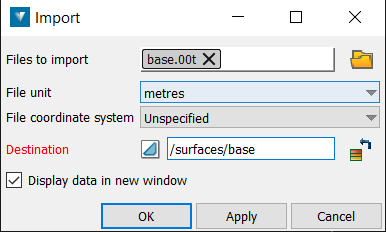
Import
To import a file or multiple files of the same type:
-
Go to Home > Data > Import. This will open a new panel.
-
Specify the Files to import by clicking the folder icon and selecting files from the File Importer.
-
Specify the File unit, File coordinate system and Destination.
-
Check the Display data in new window checkbox, other the new data imported will not be displayed in the view.
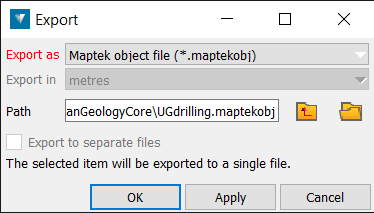
Export
To export data:
-
Select data from one of the containers in the Data Explorer.
-
Go to Home > Data > Export. This will open a new panel.
-
Specify the file type (Export as), file units (Export in) and Path.
-
Check the Export to separate files checkbox if you want to export the selected items into a single file.
Note: The drillhole group selection objects can be used to allow a selection of drillhole (rather than an entire database) to be exported as ISIS or CSV.
New Project
To create a new project and open it as a secondary project:
-
Go to Home > Data > Project > New Project. This will open the File Importer.
-
Choose a file name for the maptek database and click Save.
Open Object or Project
To open an existing maptek object or project as a secondary project:
-
Go to Home > Data > Project > Open Object or Project.This will open the File Importer.
-
Select the maptek object or project and click OK.
Open Object or Project (Read-Only)
To open an existing maptek object or project as a secondary project (read-only):
-
Go to Home > Data > Project > Open Object or Project (Read-Only).This will open the File Importer.
-
Select the maptek object or project and click OK.
As it is read-only, you won’t be able to edit the secondary project.
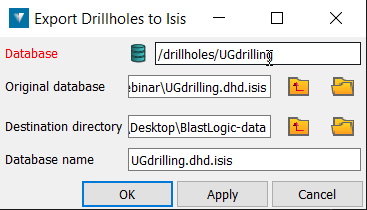
Export Drillholes to Isis
To export a drillhole database to Isis:
-
Go to Home > Data > Export Drillholes to Isis. This will open a new panel.
-
Specify the database, by dragging and dropping the drillhole database from the Data Explorer into the Database field.
-
Specify the Destination directory and the Database name. Vulcan GeologyCore will try and guess these settings for you.
-
Click OK or Apply.
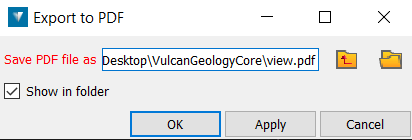
Export PDF
To export the current view as a PDF:
-
Load the desired objects in the view.
-
Go to Home > Data > Export PDF. This will open a new panel.
-
Specify the name of the PDF in the Save PDF file as field.
-
Click OK or Apply.
Export U3D
To export the current view as a U3D file:
-
Load the desired objects in the view.
-
Go to Home > Data >Export to PDF > Export U3D. This will open a new panel.
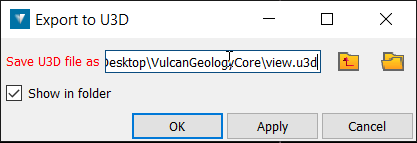
-
Specify the name of the U3D file in the Save U3D file as field.
-
Click OK or Apply.
Image Render
High resolution image rendering enables a screen capture of the View window.
To render an image of the view:
-
Go to Home > Data > Export to PDF > Image Render. This will open a new panel.

-
Select an image type to export.
-
Select the location where the image will be saved.
-
Tick Sequentially name files to automatically name the images. Tick Show in folder to open the destination folder when complete.
-
To increase the size of the captured image, enter a number greater than one in the times view window size field. The Width and Height fields display the image dimensions in pixels. New dimensions can be manually entered if required.