Quick Start Guide
Learn how to get started viewing and manipulating your geological data in Vulcan GeologyCore.
On this page
Overview
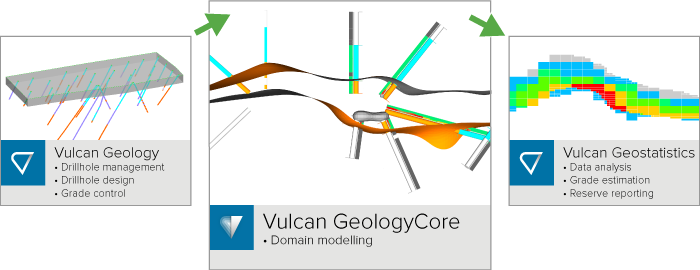
What is Vulcan GeologyCore?
Maptek Vulcan GeologyCore helps you get the most out of your geological data. It provides a complete suite of tools to view, analyse, and interpret geological and geophysical data. View data from disparate sources together in an intuitive 3D viewer to understand how everything relates. Generate vein, implicit, and stratigraphic models, or use Maptek DomainMCF to quickly generate block models.
Vulcan GeologyCore has been designed to integrate seamlessly with Maptek Vulcan. Manage your drillhole and mine data in Vulcan. Use Vulcan GeologyCore to validate your data, define domains and generate models, before publishing back to Vulcan to model grades and perform advanced statistical analysis.
What problems can I solve with Vulcan GeologyCore?
Vulcan GeologyCore helps ensure you are making the best domaining decisions for production model size datasets across stratigraphic and metalliferous deposits.
Vulcan GeologyCore is best suited for drillhole datasets containing up to 10,000 holes. Stratigraphic deposits exhibiting many seams and splits may be better modelled using the Vulcan integrated stratigraphic modellings tools.
Use Vulcan GeologyCore to benefit from:
-
An easy-to-use workflow for geological modelling
A workflow of tools helps you validate your data, define domains and generate models quickly. -
Rapid generation of models
Vulcan GeologyCore paves the way towards updating resource models daily or multiple times a day, instead of yearly or quarterly. -
A repeatable and non-destructive process
Test scenarios by editing domains and see the model update automatically, without modifying the source until you publish. -
Access to cutting-edge modelling techniques
Vulcan GeologyCore allows you to plug into cloud-based machine learning to generate your model quickly via Maptek DomainMCF.
Getting Started
Follow these steps to learn the basics of Vulcan GeologyCore.
-
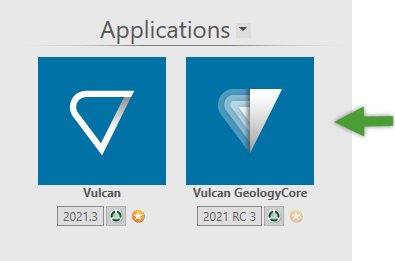
Launch Vulcan GeologyCore
Launch Vulcan GeologyCore from the Maptek Workbench Start Page. Your current Vulcan project folder (see Data folder) will be used as the default location to load data from and publish to.
-
Configure Preferences
Configure application preferences such as defaults units and coordinate systems from the Vulcan GeologyCore preferences panel.
On the Workbench title bar, navigate to
 >
>  Vulcan GeologyCore Preferences.
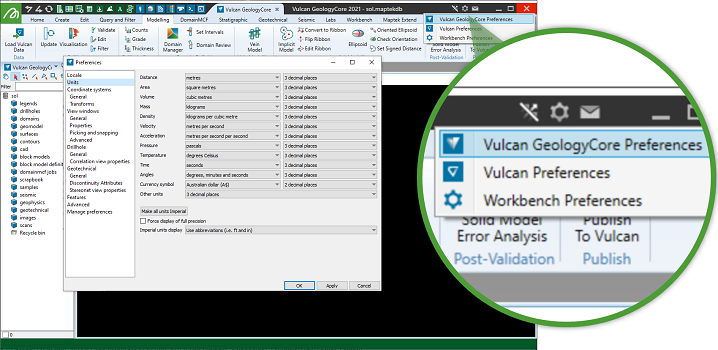
-
Load Some Data
Data needs to be explicitly loaded into a Vulcan GeologyCore project
 A Vulcan GeologyCore project is a local store of your data. A project is stored physically on disk in a database folder with a .maptekdb extension. Most data that you load into Vulcan GeologyCore is imported as a copy, although some data can be imported as a live link back to the source file(s)..
When you load data into your project, it is usually imported as a copy, although some data can be loaded as a live link back to the source file(s). This means that mostly, any changes you make to the data do not affect the source until you publish or export.
Loading Vulcan data for geological modelling
To quickly load Vulcan data relevant for geological modelling, use the Load Vulcan Data tool.
To launch the tool, on the ribbon
A collection of named toolbars, called ribbon menus, each containing a set of related tools and controls. The ribbon appears at the top of the application. Click on a named menu tab on the ribbon to show the tools on that ribbon menu., navigate to Home > Data >  Load Vulcan Data.
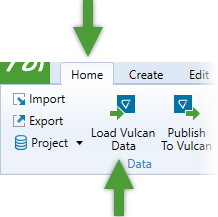
See Step 1: Load Geological Data in the Vulcan GeologyCore Workflow for more information.
Other ways of importing data
You can also import data in the following ways:
-
On the ribbon, navigate to Home > Data >
 Import. The keyboard shortcut for Import is Alt + F2.
 -
Drag and drop files from the Vulcan Data Explorer or from a Windows file explorer into Vulcan GeologyCore. Drop files onto the Vulcan GeologyCore project explorer, or straight into a view window. Most file types will require you to specify parameters for import, such as the file unit.
-
-
Organise Your Project
The project explorer allows you to browse, organise, and select your project data.
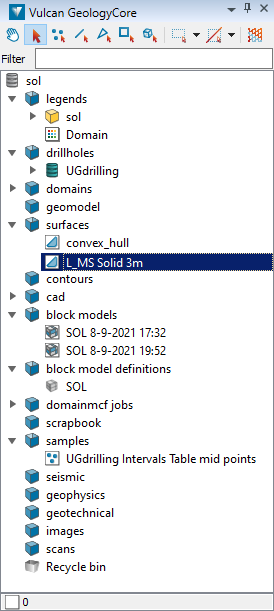
Objects are organised in a hierarchy of containers. Standard containers
 are the default location for any objects you import or create.
You can organise objects as you like within the project.
-
Drag and drop objects within the project explorer to move them.
-
To create your own custom container
 , right-click anywhere in the project explorer list and select New Container from the context menu.
Saving Changes
All changes you make to objects are automatically saved in your Vulcan GeologyCore project
 . The project is stored physically on disk in a database folder with a .maptekdb extension.
 -
-
Select Data
Vulcan GeologyCore is in object selection mode by default. This means clicking on an object in the project explorer, a view window, or even a report window will select the object.
To make an object selection, make sure the selection mode is set to Select objects by clicking
 in the selection toolbar at the top of the project explorer.
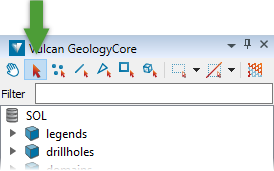 Expand for detailed instructions on selecting objects in the project explorer.
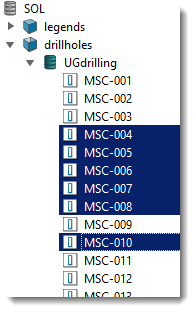
To select objects in the project explorer, first make sure the selection mode is set to
Select objects in the selection toolbar. Then:-
Click on a single object to select it.
-
Click on a container
 (including drillhole databases
  ) to select all the items in the container.
 -
Hold Ctrl and click on an item to add or remove that item from the selection.
-
Hold Shift and click on an item to select the range of items from the last clicked item.
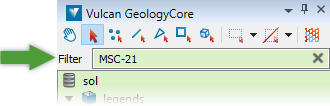
Tip: Type into the Filter field at the top of the project explorer to display only objects matching the given string.
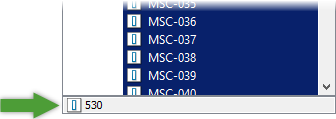
The selection status bar at the bottom of the project explorer tells you how many objects are in the selection. The icon indicates the type of objects selected if they are of a single type.
Selecting data in panels
Some panels require you to supply a selection.
To populate or add to a selection field in a panel, either:
-
Click
 above the list to add the current active selection.
 -
Drag and drop the current selection from the project explorer onto the list.

Tip: You can add an object to a selection field in a panel without changing your active selection by using the middle mouse button to drag and drop.
To remove an item from a selection field, select it in the list and click
 .
.Some tools require you to specify a single object. To do this, either:
-
Click on an object in a view window while the field is active (indicated by a red label).
-
Drag and drop the object from the project explorer into the field.
Need more detail? See Selecting Data in Key Concepts.
-
-
View Data
Loading Objects into a View
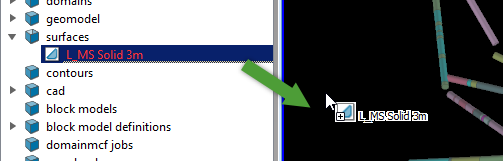
To view an object, double click it in the project explorer. Double click a container to load all the objects in the container into a view.
Alternatively, drag and drop objects from the project explorer into the view.
Tip: You can drag and drop objects without changing the selection by using the middle mouse button.
Manipulating the View
To set the centre of rotation, click
 on the view window toolbar (or press C), and then pick a location in the view.
To manipulate the view, hold down the Alt key and use the mouse. The operation controls are summarised in the table below.
Operation Combination  Rotate
 Alt + Left mouse button click and drag  Pan
Pan Alt + Middle mouse button click and drag  Zoom
Zoom Alt + Right mouse button click and drag Hiding and showing objects
To hide an object in the view, right click on it and select Hide from the context menu.
Use the Visibility Manager to control the visibility of objects loaded into the view.
The table below summarises the keyboard shortcuts relating to object visibility.
Action Keyboard shortcut 
Show/hide Visibility Manager V 
Hide selected objects in active view H 
Hide picked objects H + Click 
Hide all except selected objects in active view Shift + H 
Show last hidden objects in active view J 
Show all hidden objects in active view Shift + J Sections
Sections allow you to see inside your data.
Define a section quickly using the Quick Section options in the view window toolbar.

Use the keyboard and mouse combinations summarised in the table below to control the section:
Operation Combination  Move section plane
Ctrl + Alt + Left mouse button click and drag  Change strip size
Ctrl + Alt + Right mouse button click and drag Juxtaposition view
Juxtaposition view is a way of quickly comparing parts of objects in the same region of space. When juxtaposition view is on, you choose objects to display on the left and right sides of the view. You then drag a slider to progressively reveal and hide the parts of objects on either side.
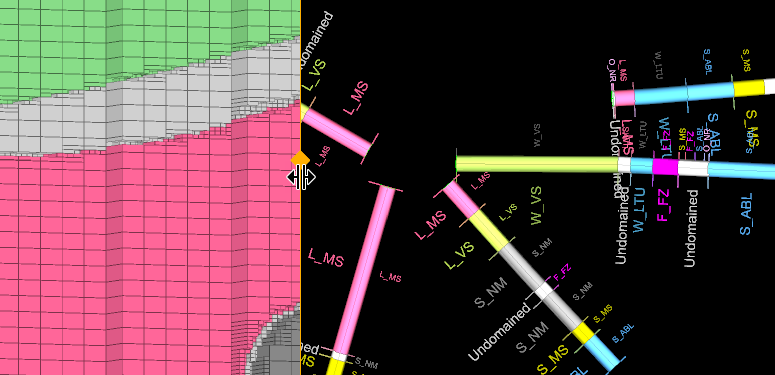
To set up juxtaposition view:
-
If it is not already shown, show the visibility manager (V).
-
Click
 to toggle Juxtaposition view on.
Two Juxtaposition columns appear in the list.
-
For each object in the view, toggle the Left or Right checkbox to set which side of the view it should appear.
-
Drag the orange slider in the view left or right to change its location in the view.
Juxtaposition view can be used in conjunction with section mode.
Need more detail? See Viewing Data in Key Concepts.
-
-
Create a Model
Vulcan GeologyCore is all about making geological modelling simple.
All the main tools you need to generate and publish geological models are presented on the Modelling, DomainMCF and Stratigraphic ribbon menus.
The tools are arranged on each ribbon menu in order from left to right to mirror the recommended workflow for each modelling method. Tools for loading and validating data appear on the left. Tools for defining domains and generating models appear in the middle. Tools for validating and publishing models appear on the right.
Use the Modelling ribbon menu to generate vein and implicit models.

Use the DomainMCF ribbon menu to generate block models using Maptek DomainMCF. Requires add-on licence.

Use the Stratigraphic ribbon menu to generate stratigraphic models.

The Vulcan GeologyCore Workflow establishes the key steps to follow to generate and publish your geological model. Get started with Step 1: Load Geological Data.
What’s Next?
-
Get more detailed information about the basics of Vulcan GeologyCore in Key Concepts.
-
Get started with geological modelling in the Vulcan GeologyCore Workflow.