File management
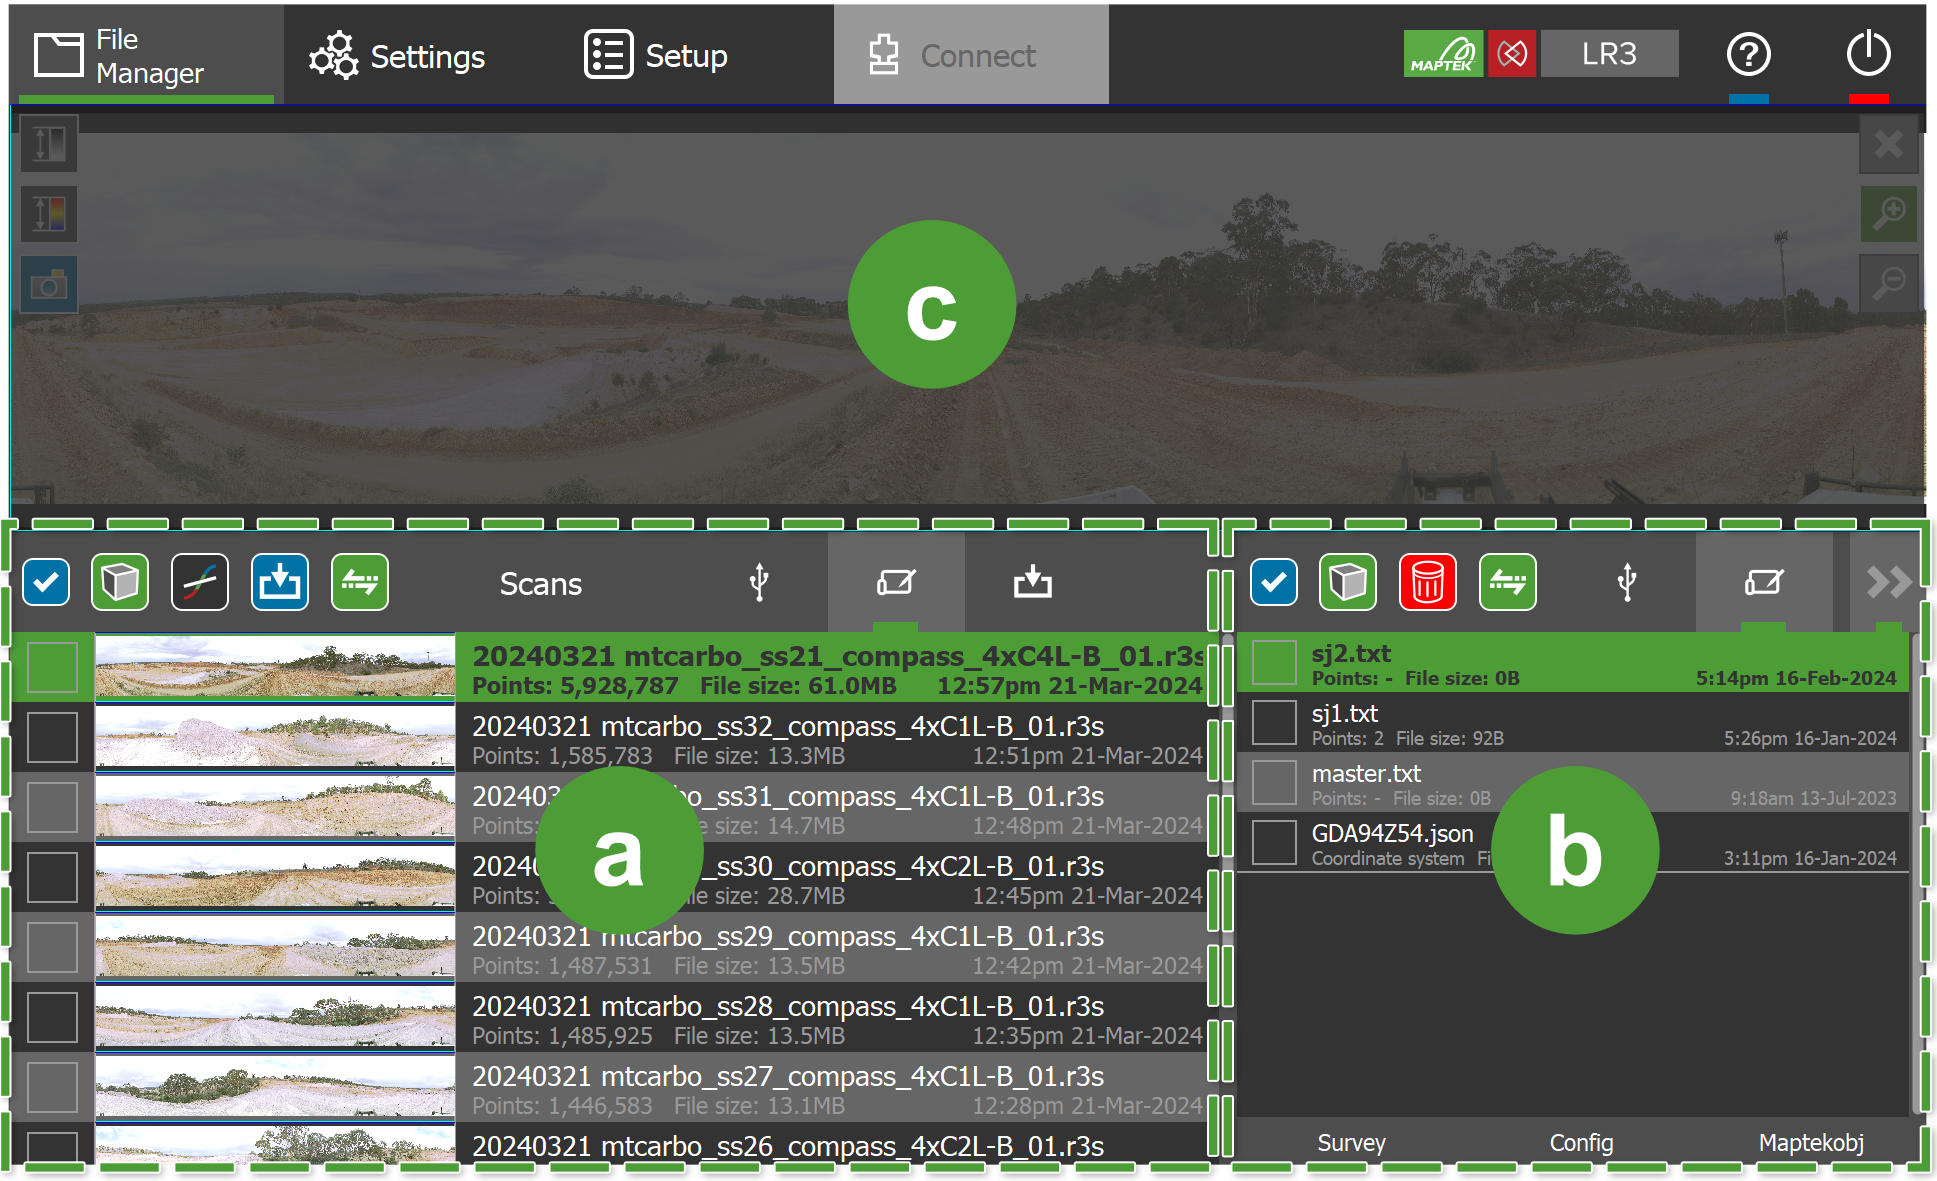
You can manage files such as scan and configuration files from the  File Manager tab. Scan files are managed in the Scans list located in the bottom left. All other file types are managed in the files drawer located in the bottom right.
|
|
|
|
View and manage scans in the selected repository. See Transferring, archiving, and deleting scan files for details. |
|
|
View and manage non-scan files in the selected drive. See Managing non-scan file types for details.
|
|
|
View scans and perform other operations. See Viewing scans for more information. |


 to hide the files drawer.
Transferring, archiving, and deleting scan files
|
|
|
Figure 7-5 Scans list |
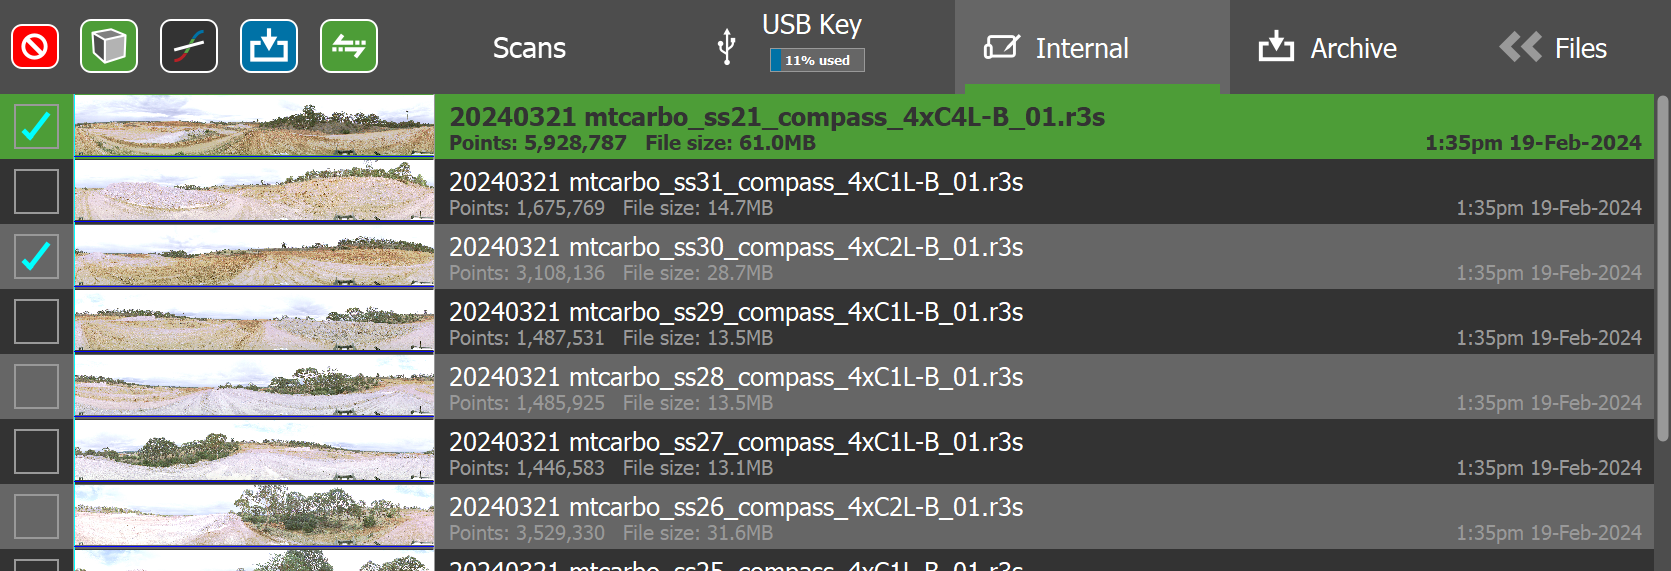
The Scans list allows you to view and manage scans located in the following repositories:
 .
. .
.
Note: Scans acquired from R3 series scanners have the extension .r3s and are named using the naming scheme described in Scan file naming. Scans are listed in descending time order; that is, the most recent scan appears at the top of the list.
Managing non-scan file types
You can manage supported non-scan file types from the files drawer located in the bottom-right of the File Manager tab.
|
|
|
Figure 7-6 Files drawer |

Note: The files drawer is initially hidden. Tap  Files to show it.
The files drawer supports the following file categories:
-
Survey job files (.txt). These are text files containing survey station locations used in survey jobs.
-
Configuration files (.json). This includes coordinate systems and registration sequences. These can be exported from PointStudio.
-
Maptek object files (.maptekobj). These typically contain the following object types:
These data types can be exported to Maptek object files from PointStudio.
Tip: Tap the Survey, Config, or Maptekobj filter tabs at the bottom of the Files drawer to show only files that match that category. Tap the selected filter tab again to show all files.
The Files drawer displays supported non-scan files from the following locations:
|
|
USB key. This corresponds to the folder named Maptek Files on the USB key. |
|
|
Internal hard drive. This corresponds to the folder c:\SurveyStationFiles on the tablet’s internal hard drive. |
Copying files from USB key
To copy non-scan files from a USB key to the FieldHHC tablet, follow these steps:
-
Make sure the desired files are located in a folder named Maptek Files on the USB key.
-
Insert the USB key into the tablet.
-
On the File Manager tab, make sure the Files drawer is open.
-
Switch to the USB drive view by tapping
 .
. -
Optionally tap Survey, Config, or Maptekobj to filter for the specific file category.
-
Select the files you wish to copy and tap
 .
.You will be prompted to confirm the copy, after which the files will be copied to the internal hard drive.
-
Tap
 to view the files on the tablet’s hard drive.
-
Copying files from the tablet to USB key
To copy non-scan files from the FieldHHC tablet to a USB key, follow these steps:
-
Insert the USB key into the tablet.
-
On the File Manager tab, make sure the Files drawer is open.
-
Make sure the internal hard drive view is selected by tapping
. -
Optionally tap Survey, Config, or Maptekobj to filter for the specific file category.
-
Select the files you wish to copy and tap
.You will be prompted to confirm the copy, after which the files will be copied to the folder Maptek Files on the USB key.
-
Tap
to view the files on the USB key.
-
Managing survey job files
A survey station is a named set of coordinates used to identify a fixed scanning location. Survey stations can be used to set the scanner location in survey jobs. A survey job stores associated survey stations in a survey file named <job_name>.txt in the tablet’s internal hard drive (in c:\SurveyStationFiles). In addition, FieldHHC maintains a special survey job named master, which can be used to store the master set of survey stations.
FieldHHC requires survey job files (including master.txt) to be in a specific format. To create a survey job file from an external file (such as a CSV file) for use in FieldHHC, follow these steps:
-
In PointStudio, use the Import tool to import the survey file as Survey points.
-
Select the container of survey points that was imported and use the Export tool to export it as Survey file (*.txt).
-
Copy the file to FieldHHC using the steps described in Copying files from USB key.
