Projects
Secondary and Read-only projects
Overview
A project file stores data and results of analyses which can be opened in a project session. The project file (also termed a database file) uses the extension .maptekdb and can't be accessed by other programs.
Project sessions display data in an organised manner, similar to Windows Explorer. Data is automatically assigned to appropriate containers (similar to folders in Windows) and each project has a set of standard containers.
The program cannot be run without opening or creating a project file, as the data and analyses must be automatically saved to this file during the entire project session. Projects are automatically backed up every minute so data loss is limited to the last minute's backup.
Additionally, projects operate seamlessly over a network to allow easy sharing of data, although when opened, the project file is locked to this single user.
Primary projects
A primary project is the working file for data and analyses. An existing file must be opened or a new file created when the session begins. All data is contained within the project file having the extension .maptekdb, which can't be accessed by other applications. Projects are automatically backed up every minute so data loss is limited to the last minute's backup.
The project's data is displayed in an organised manner, similar to that used in Windows Explorer. Data is automatically assigned to appropriate containers. Each project has a set of standard containers.
The most recent primary project files are displayed on the splash screen when the program starts.
Secondary and Read-only projects
Read-only projects are secondary data sources which can be used to access data from CDs or shared read-only network drives. More and how to.
Starting or
selecting a Primary project
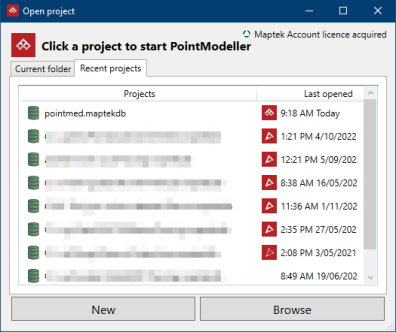
New Project
Click New to create a new project and browse to the location the project will be stored.
The name should
be meaningful so you can identify the data later on.
Existing Project
There are four different methods for opening PointModeller project files. Two methods require opening the project folder then opening the index.maptekdb file. The other two just involve dragging and dropping the index.maptekdb file.
Method 1
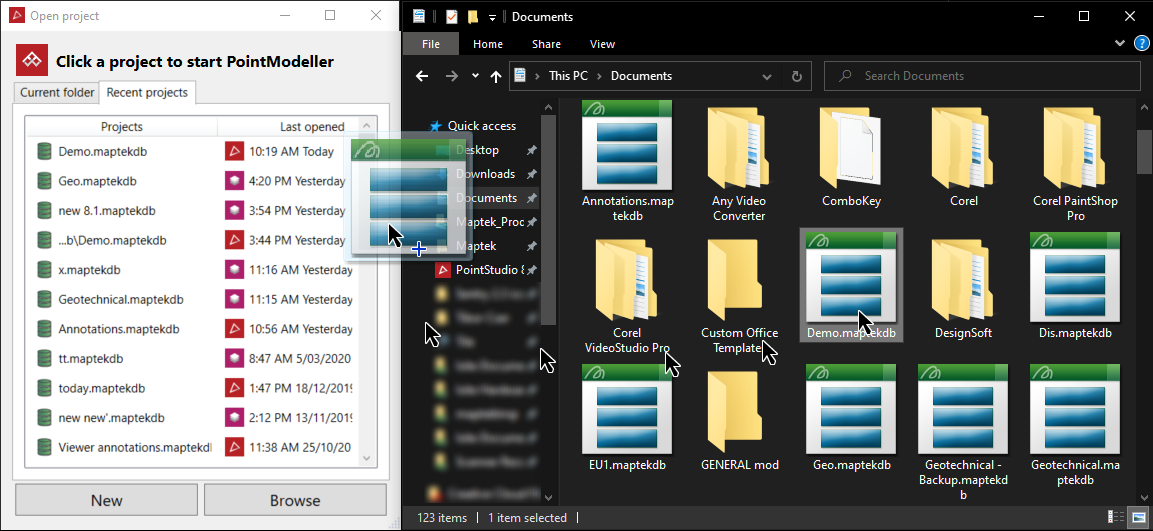
Drag the .maptekdb project folder from Windows Explorer onto the PointModeller software icon. The project will open.
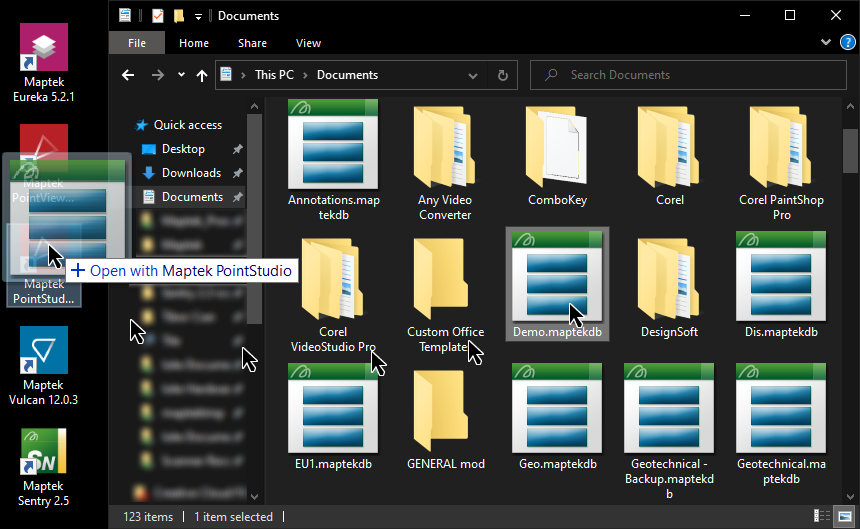
Method 2
-
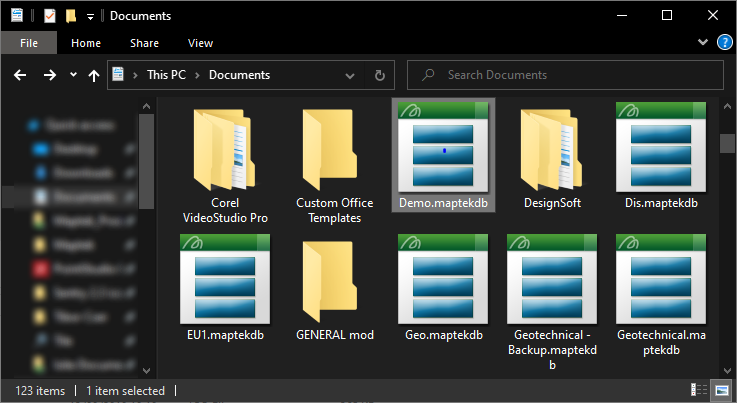
Open Windows Explorer and navigate to the project folder file.
-
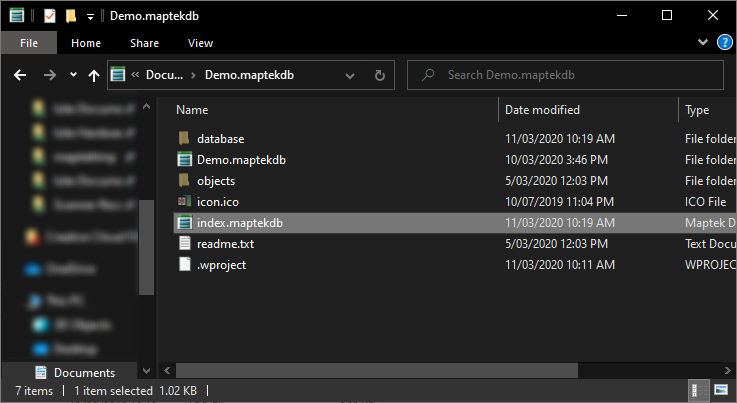
Double click the .maptekdb project folder in Explorer to view it's contents.
-
Double click the index.maptekdb file to open the project.
Method 3
-
Open PointModeller and display the splash screen and project selection dialog box.
-
Drag the .maptekdb project folder from Explorer onto the Open project screen. The project will open.
Method 4
-
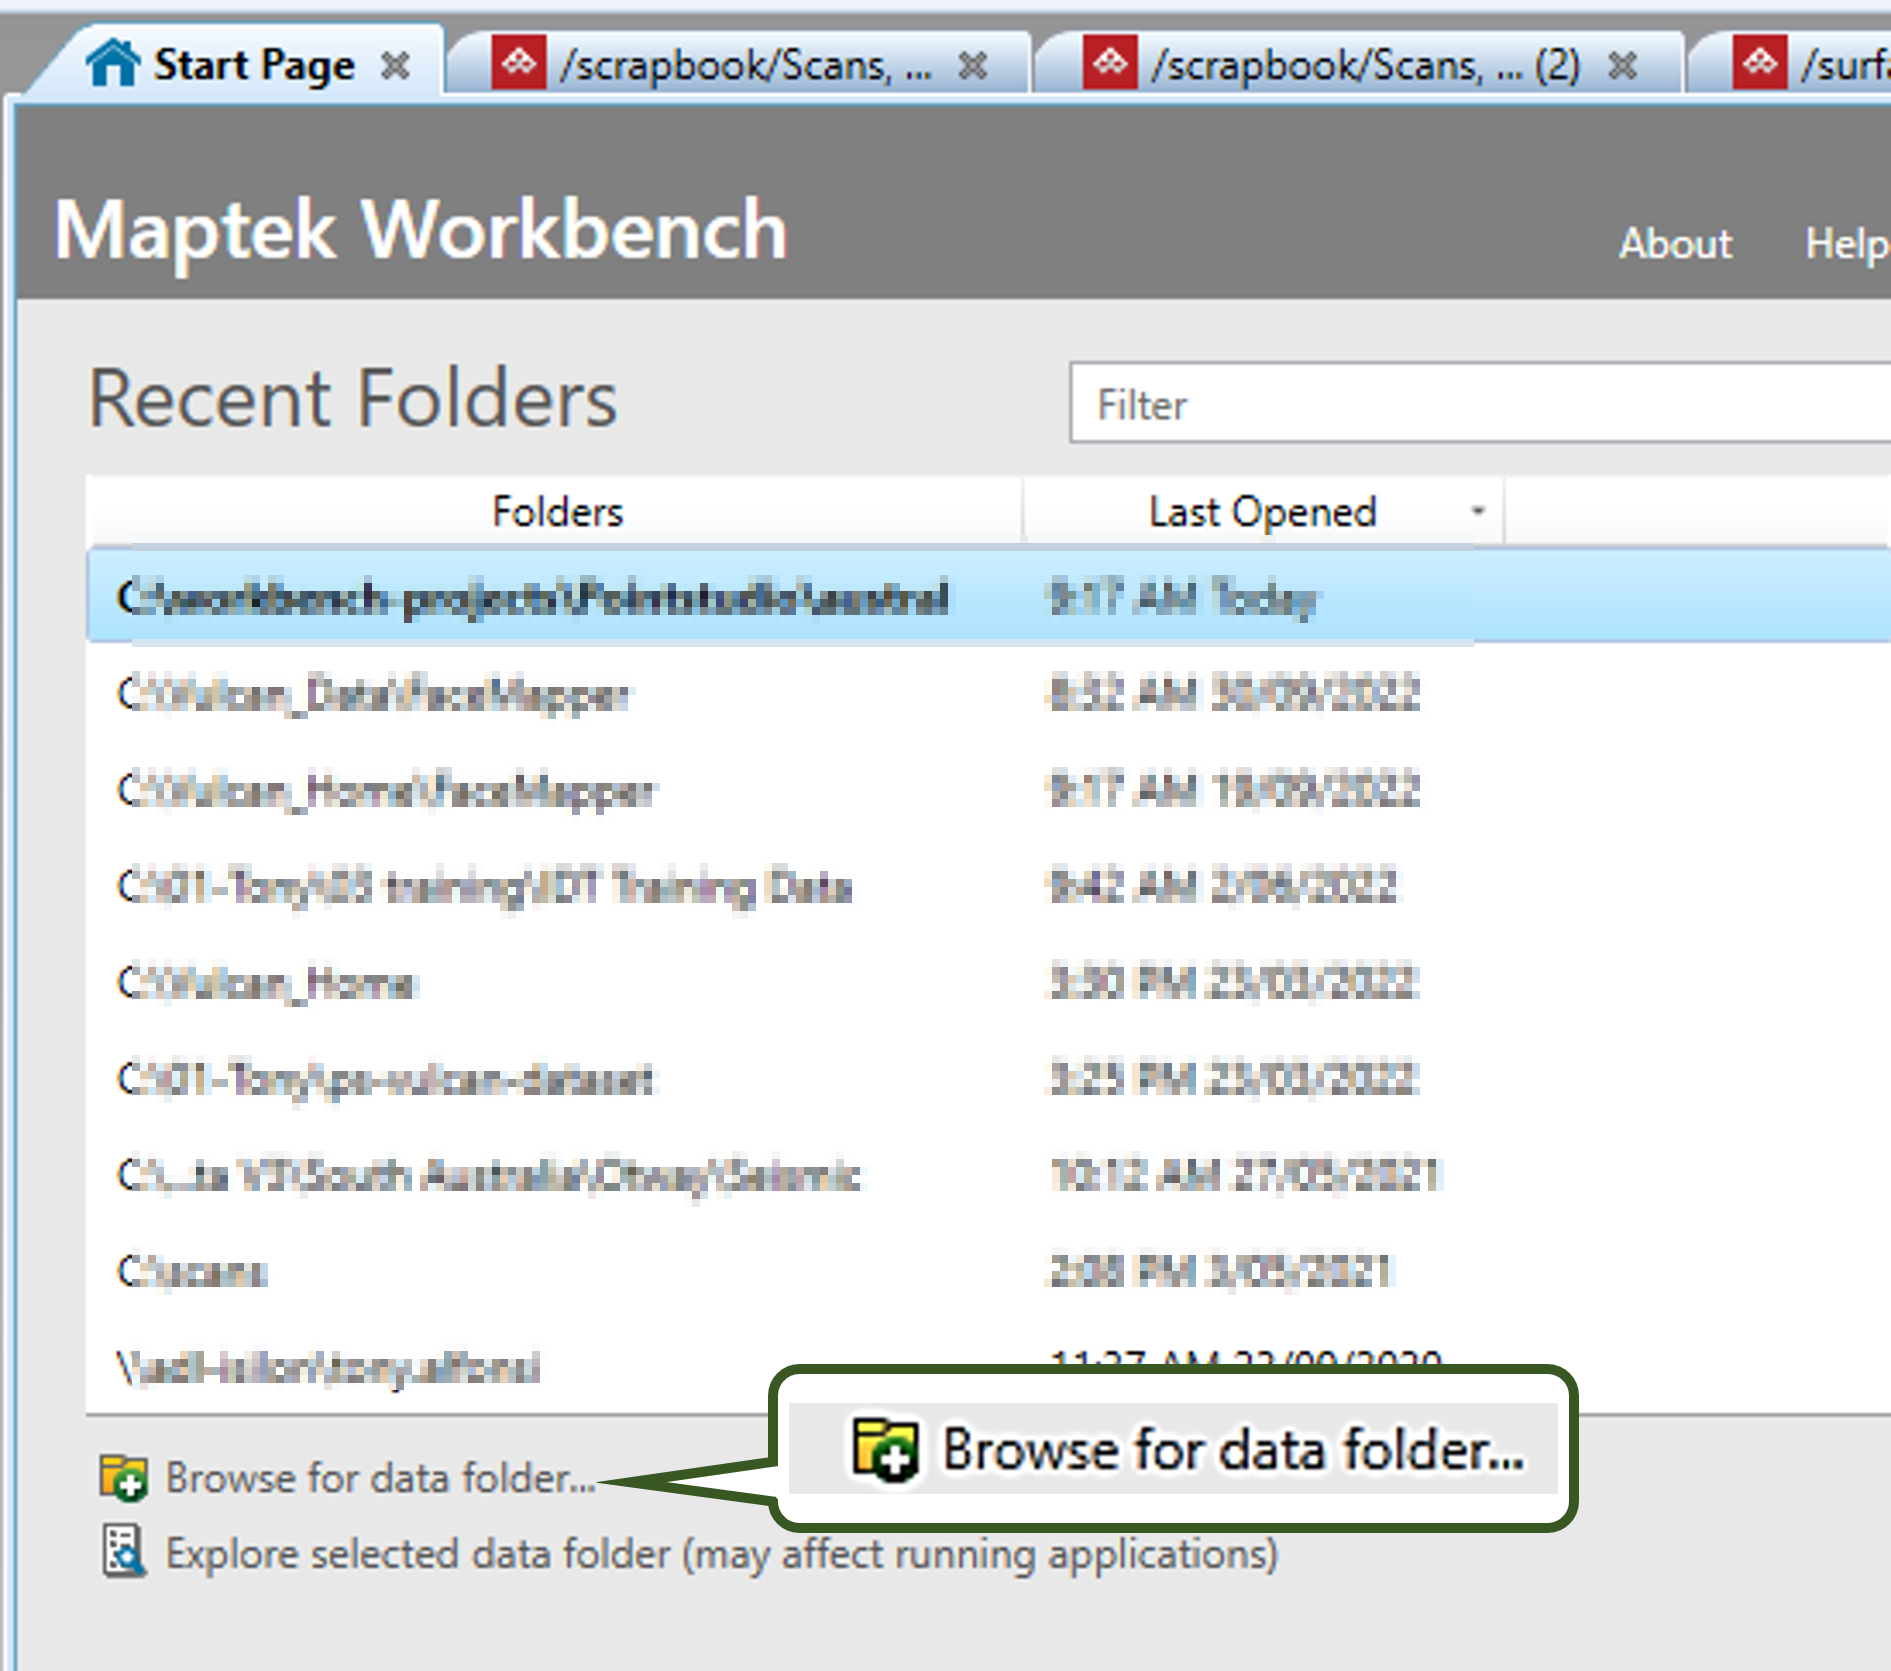
Open Workbench and click the Browse for data folder....
-
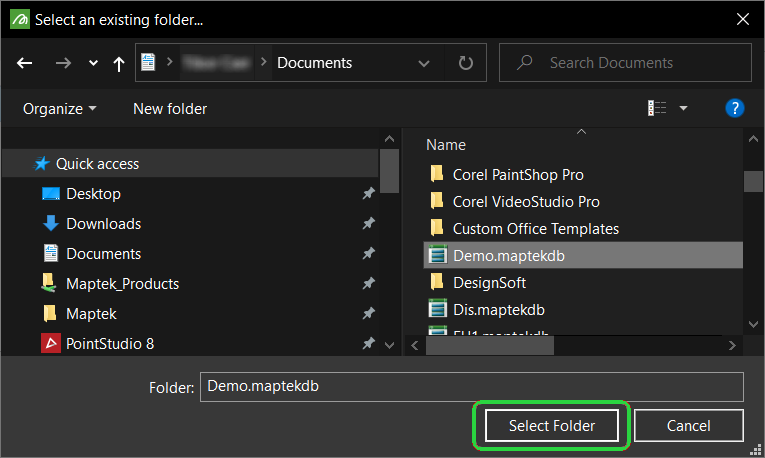
Navigate to the folder containing the project files and click on Select Folder.
Method 5
-
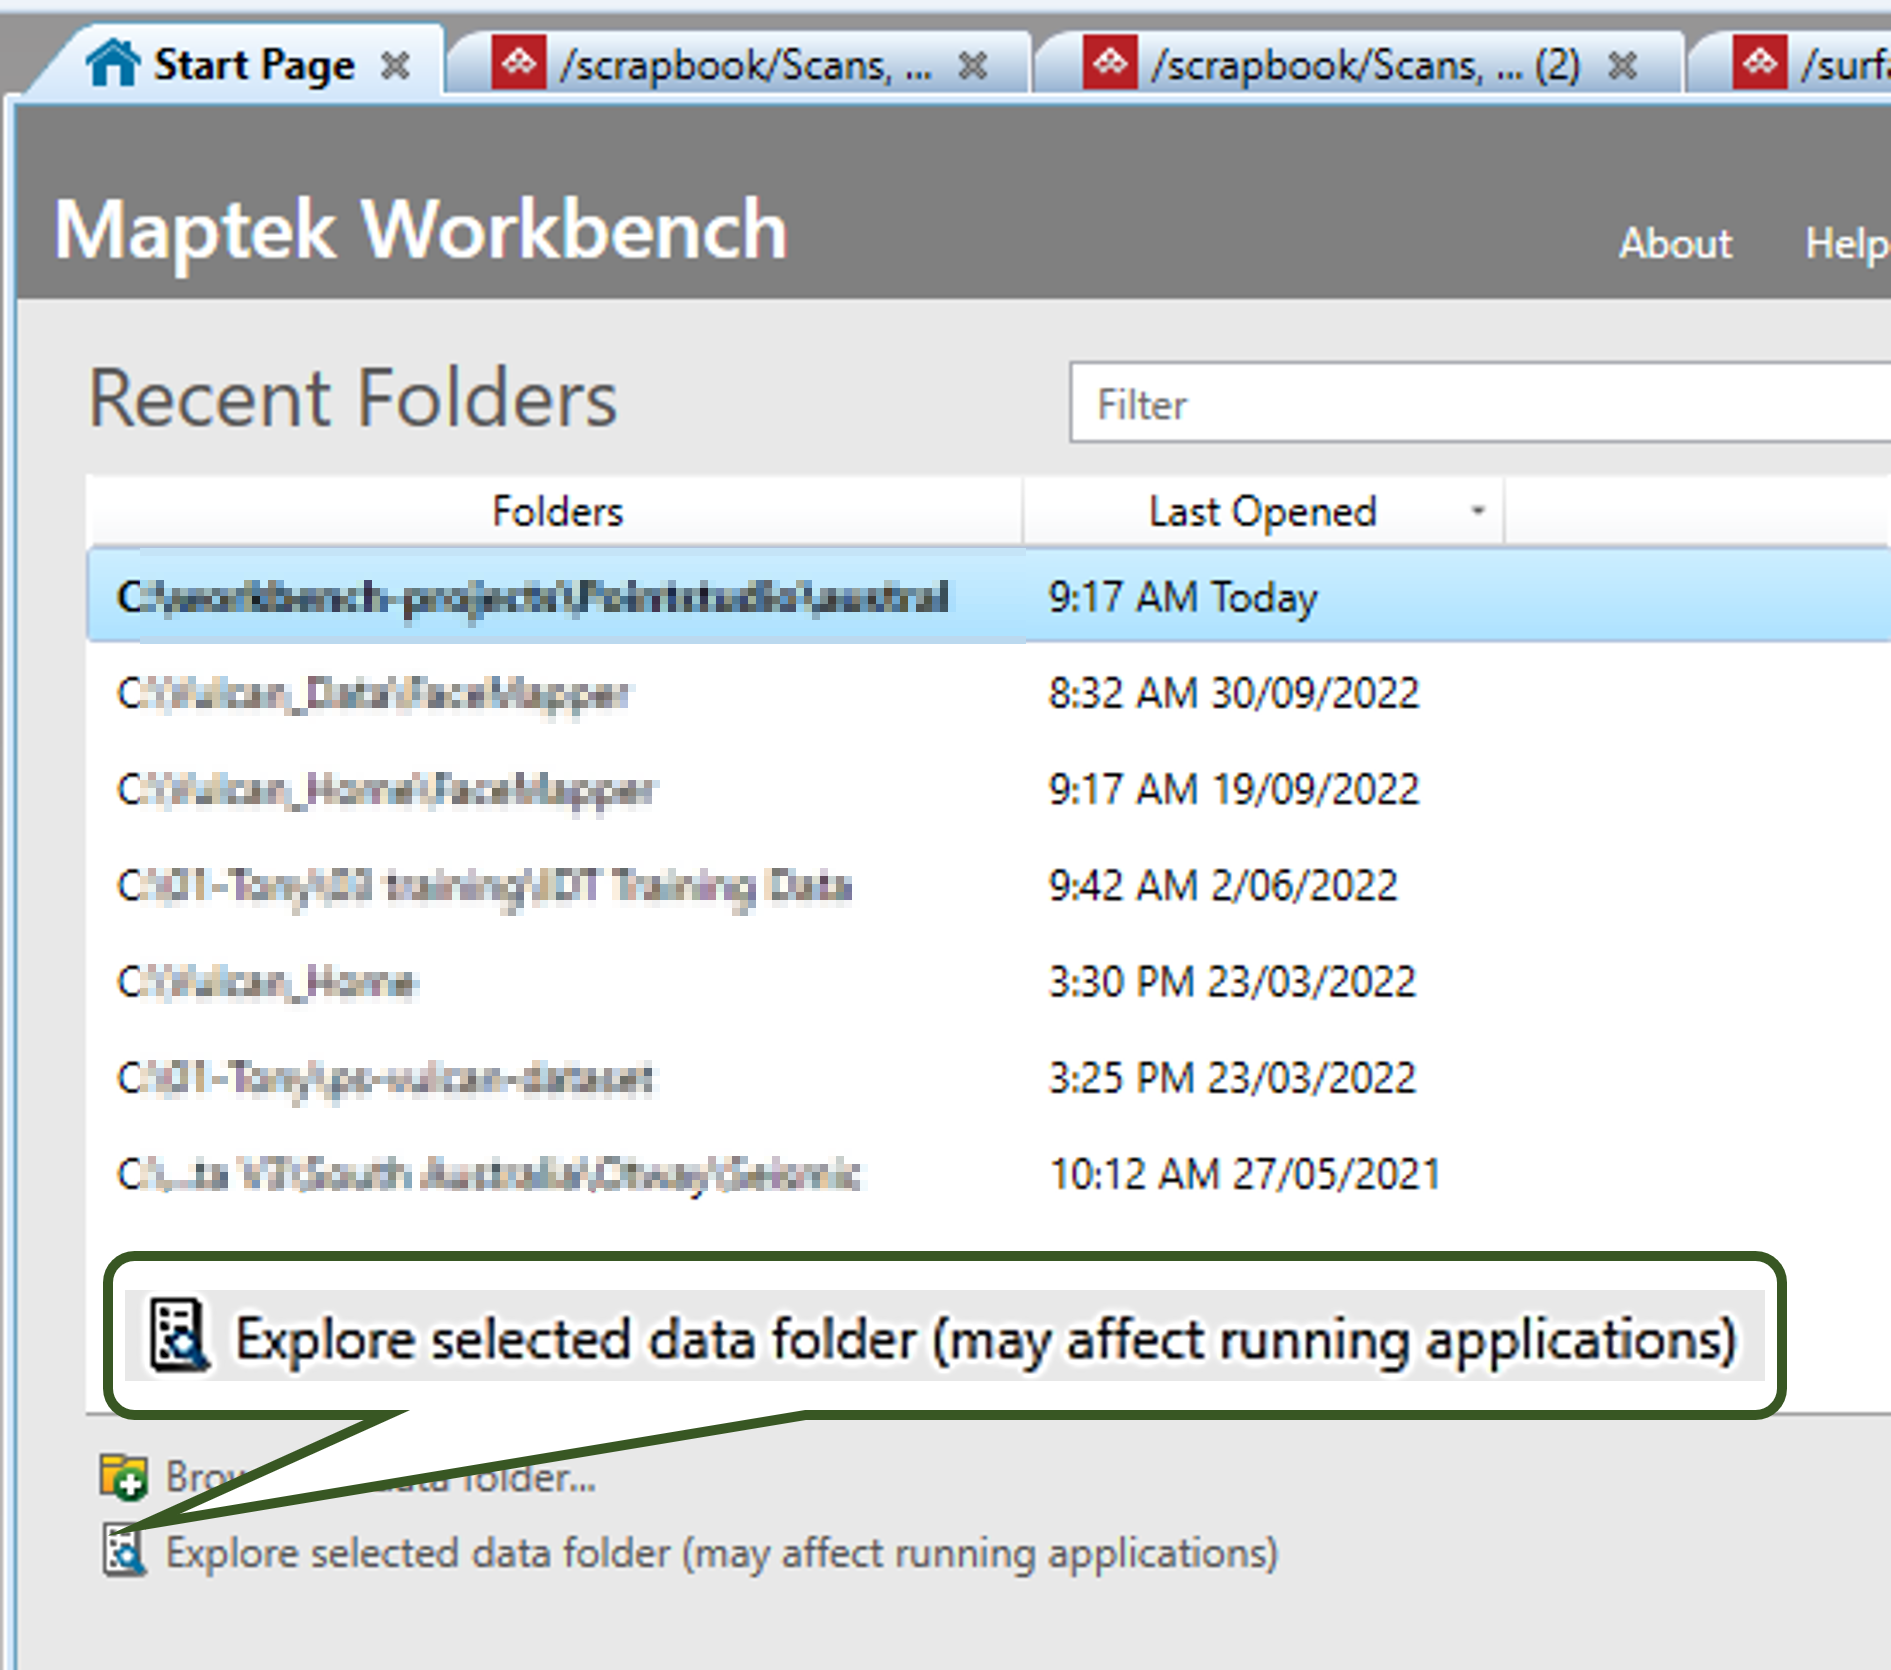
Open Workbench and click the Explore selected data folder.
-
In the Workbench Data Explorer expand the Maptek Databases to view all the .maptekdb database projects.
-
Right-click on the .maptekdb database project of interest and choose to Open with .
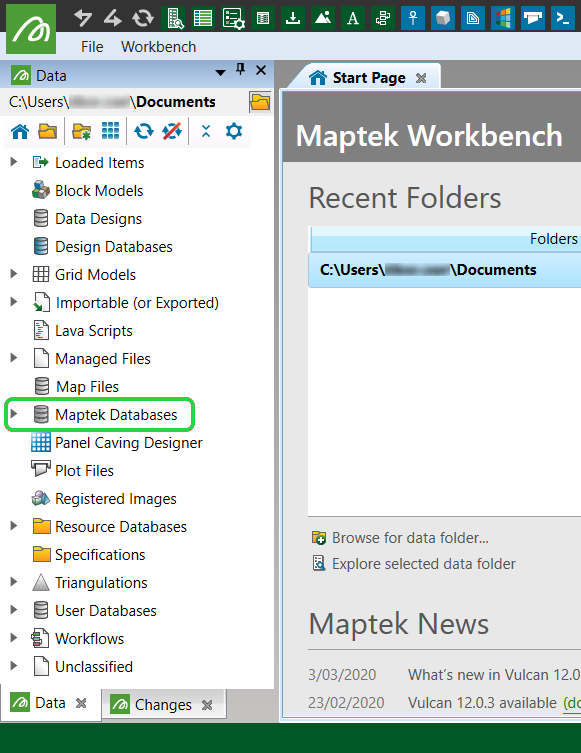
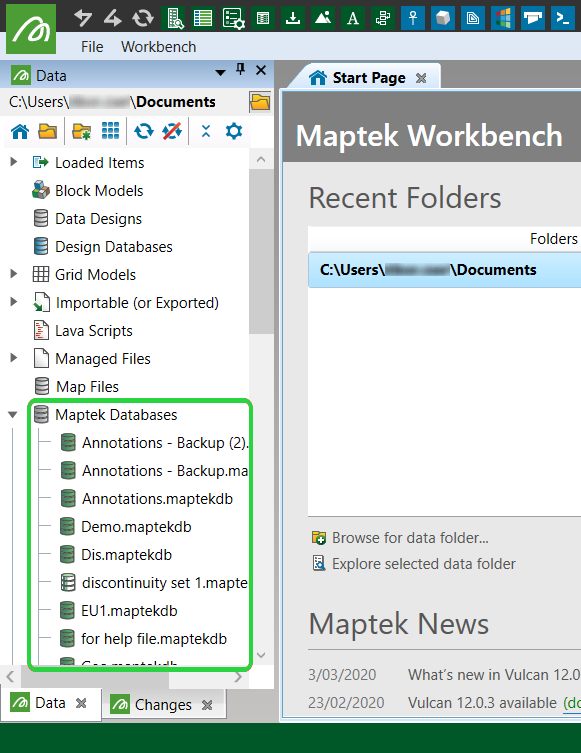
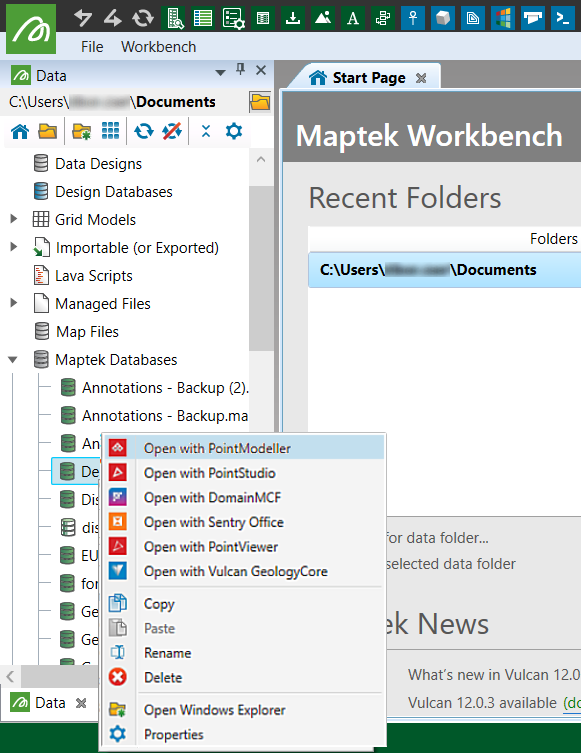
-
Project will open in PointModeller.
Secondary and Read-only projects
Secondary projects are used to access data from another project, including read-only projects.
-
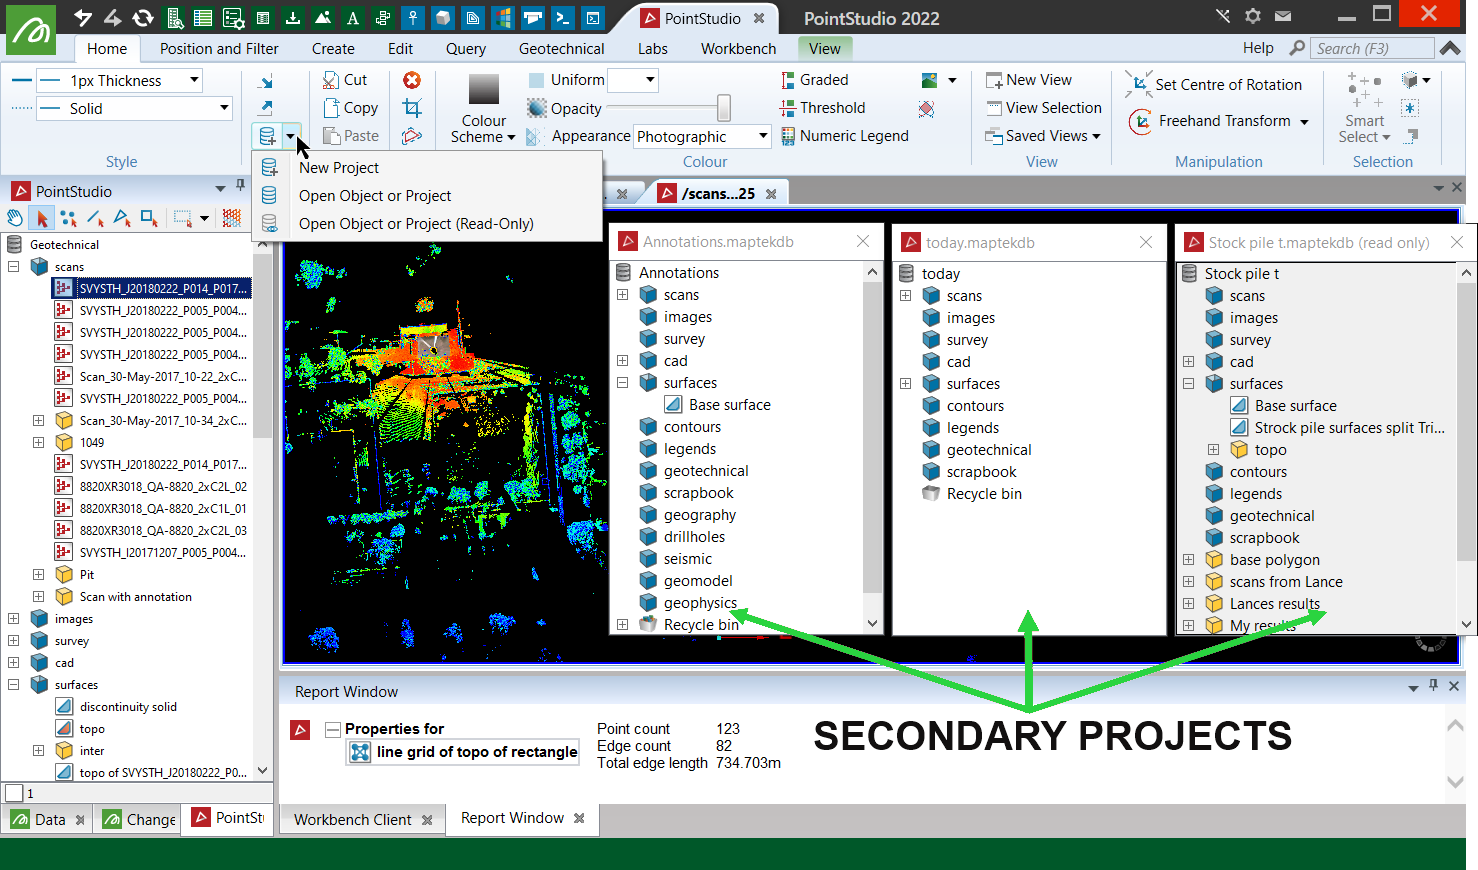
On the Home ribbon tab navigate to the Data group. From the Project drop-down list select and choose one of the three secondary project import options:
- New Project - is for creating a new .maptekdb projects however it can also open an existing project to compile a new project from existing ones. Allows deleting, copy an paste in and out of these projects.
- Open Object or Project - is for opening existing projects and also allows deleting, copying and pasting in and out of these projects. Good for amending projects. - is for opening existing projects and also allows deleting, copying and pasting in and out of these projects. Good for amending projects.
- Open Object or Project (Read Only) - is for opening existing projects, Read Only prevents accidental modification to any of the files within the project (cannot add files to it or delete any files within it), however it does still allow copying files from and pasting into the Primary project or a writeable secondary project for analysis however it doesn't allow co.
-
Navigate to your project .maptekdb folder
 .
. -
Click Open.
-
Navigate to the
 index.maptekdb
file.
 -
Click Open.

When a secondary project is opened, the project explorer from that project is displayed in the Workspace. You can transfer data (drag and drop) to and from the secondary project, browse data within them, however data cannot be displayed directly in a view window without it first being imported into the primary project.
You can edit the data in the secondary project explorer using functions like, delete, rename and move, as well as query object properties.
Data persistence applies to primary projects and secondary projects (not applicable to read-only files).
Secondary projects will open in a floating project explorer style windows.
In-use projects
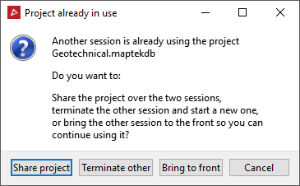
When trying to open a project which the current user already has open (in-use), the panel below will be displayed. Select Terminate other to attempt to close the in-use session and start with a fresh session. Select Bring to front to display the in-use session. See Locked projects for instances where projects are being accessed by other users.
Locked projects
When trying to open a locked project, the dialog below will be displayed.

This can occur if the project is being accessed by another user, or can appear if the program was shut down uncleanly (the previous session crashed before the project file could close properly) . Click Yes if you are sure the file is not in use elsewhere.
Maptek Object files
The .maptekobj is the Maptek object file. The purpose of this generic file format is to allow the user to transfer objects between other projects, or any arbitrary groups of objects excluding external referenced files. All data can be stored in one file, which makes it easier to email than Maptek projects. Otherwise, objects can be saved to individual files. The export format is simpler than the Maptek Object file format which makes it perfect for archival (it's less likely to change and much more likely to be compatible with future versions). The file format can be imported or exported using the Import and Export menu items.
-
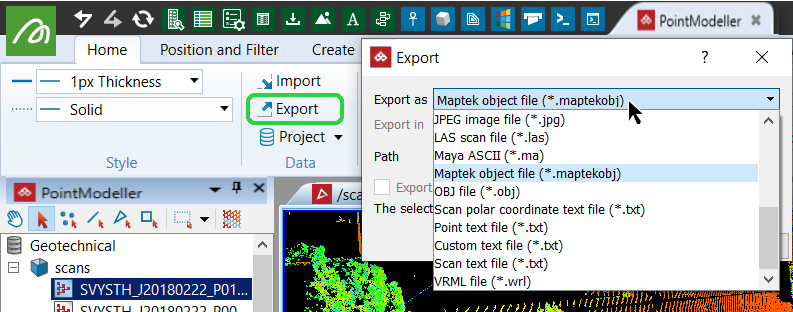
Highlight the scan and on the Home ribbon tab navigate to the Data group and select
 Export.
 -
The Export panel opens.
-
In the Export as field choose .maptekobj from the list of options, navigate to and select the destination folder with
 and
and  .
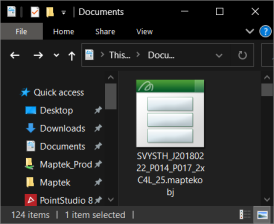
.Exported .maptekobj will populate in its destination folder.
Data persistence
This program does not include a Save function. The project file is automatically backed up every minute so data loss is limited to the last minute's backup.
However, data can be lost from a project in exceptional circumstances, such as if the power is suddenly cut to the machine or if resetting the machine terminates the project session.
Ensure your
session is always shut down correctly by clicking the (x)  to avoid data loss.
-
From the top right corner of the interface click
 Preferences button and from the list of application preferences choose
  PointModeller.
 -
In the Preferences dialog navigate to Manage Preference and expand the User interface check box list.
-
Check the Dialog location and remembered values check box.
-
Click the Reset selected to default button.