Colour Surface by Polygon
Colour surface by polygon is a function allowing you to use the projection of a polygon to apply a colour to a surface. Different methods of projection are possible to accurately define the region.
Note: To exactly colour the region inside the polygon, duplicate points will be added which will produce an inconsistent surface.
Note: Ensure the surface is not in photographic display mode, otherwise the surface display will be impaired. Use the ![]() Surface Appearance selector to set the surface to anything other than photographic.
Surface Appearance selector to set the surface to anything other than photographic.
-
Select the surface to be coloured.
-
Select the polygon to be used as the boundary.
-
On the Labs ribbon tab navigate to the Geological group and select
 Colour Surface
by Polygon.
Colour Surface
by Polygon. -
If the Polygon and Surface fields do not auto fill, drag and drop the objects to their respective fields or manually type in their names.
-
Select the colour you want to project onto the surface.
-
Select the Blend factor. This will dictate to what degree the colour will mix with underlying colours.
-
The default projection direction (normal of the plane fitted to the polygon) will automatically load. Otherwise select another method from the Projection direction choices.
Choices are:
- Two points - select two points to define the projection direction
- Facet - use the normal of a facet to define the projection direction
- Axis aligned - align the projection direction with an axis of the view window
- Bearing and inclination - use bearing and inclination to define the projection direction
- Action plane axis - align the projection direction with an axis of the Action plane
-
Fill in the remaining fields appropriate to the type of projection selected (if required).
-
Click OK or Apply to complete the process.

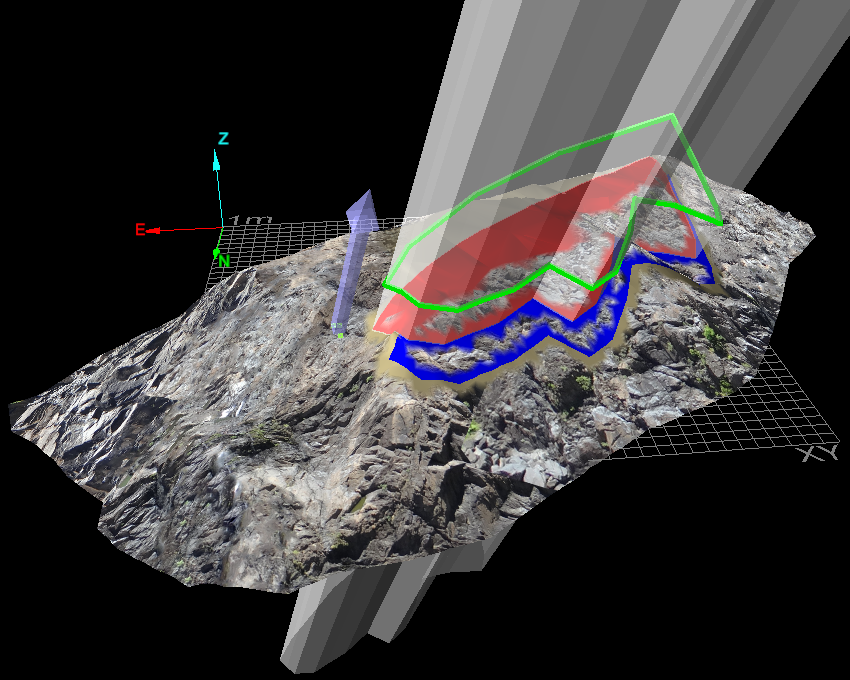
Example with wrong surface setting - photographic surface displayed.
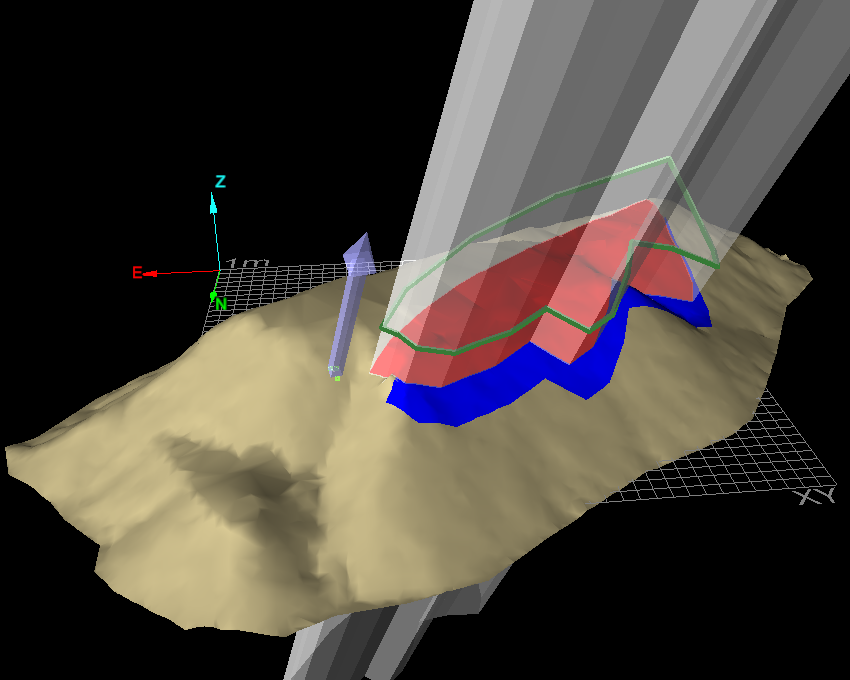
Example showing different coloured regions from different projections.
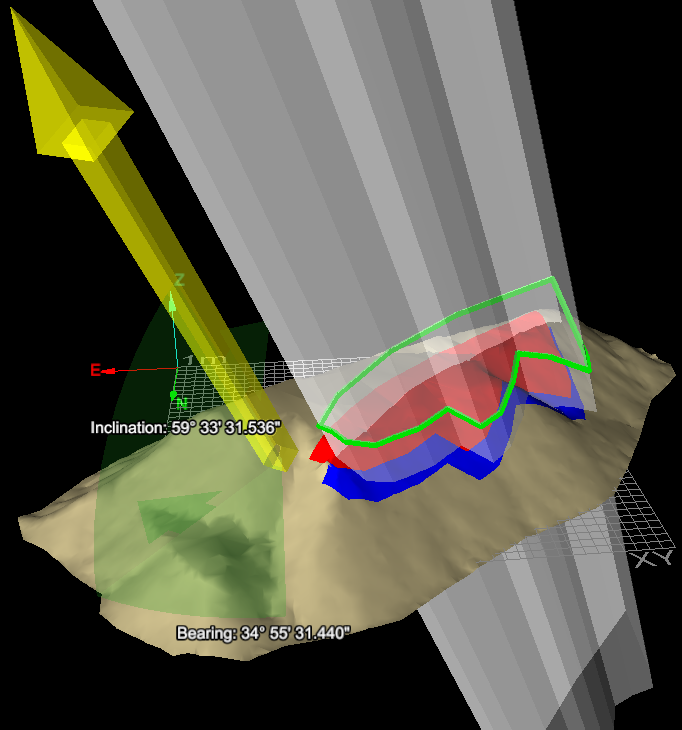
Example of Bearing and inclination projection.