Pits
Use this option to produce contours for pits stored in a regular block model.
Instructions
On the Block menu, point to Viewing, then click Pits.
Follow these steps:
-
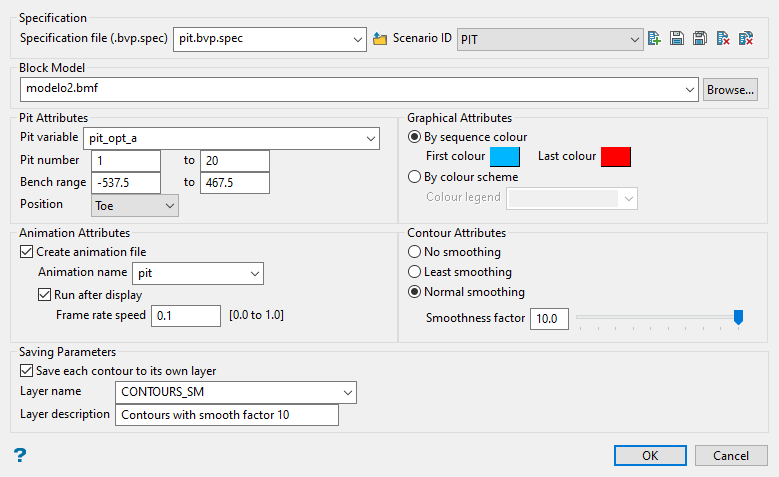
Set up your project parameters using the controls at the top of the panel. Enter a name for the Specification file, or select it from the drop-down list. The drop-down list displays all files found in the current working directory that have the (.bvp.spec) extension. Click Browse to select a file from another location.

-
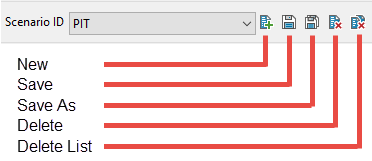
Next, enter or select an Scenario ID. To create a new ID, click the New icon and provide a unique name for the current panel settings. Up to nine separate IDs can be created for each BEF file.
The information entered here is stored in your project folder as a (<name>.bvp.spec) file. These can be opened with Vulcan"s Text Editor, or any other text editor.
pit.bvp.spec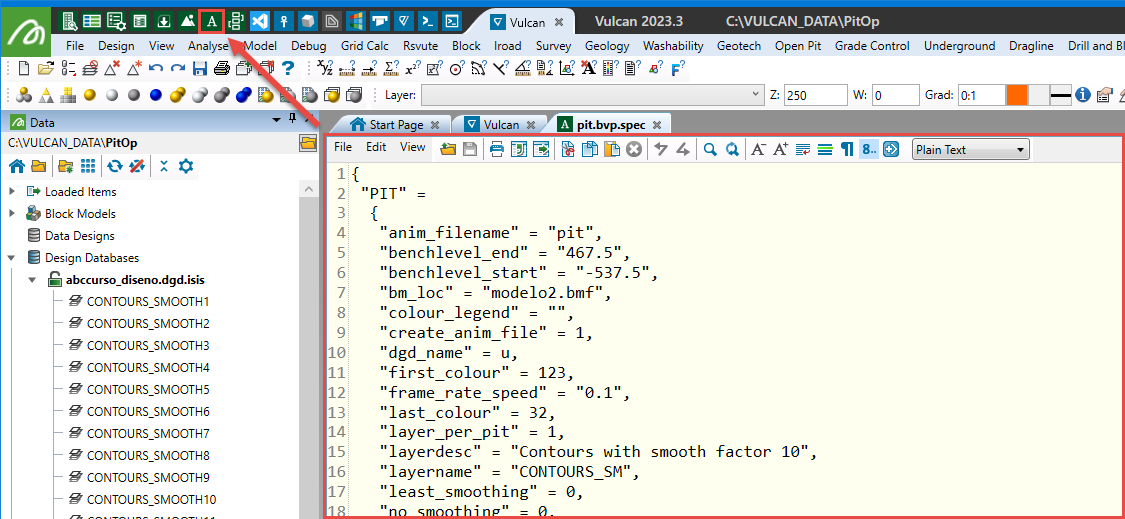
-
Select the block model from the drop-down list, or click the Browse icon if it is located outside of your current working directory.
-
Specify the name of the Pit variable in the block model that contains the pit numbers.
- Air recorded as zero
- Pits recorded as numbers between 1 to the number of the final pit
- Waste recorded as greater than the final pit number
-
Specify the Pit number of first and last pit to contour. Multiple pits can be contoured at the same time.
-
Specify the Bench range. This is the level of the first and last bench to contour. The contours can also be produced for multiple benches simultaneously.
-
Select Create animation file if you want to create an animation file of the pit progress through time. The drop-down list contains all the animation files found in the current working directory.
To create a new animation file, enter the file name. The project code will be added automatically. By default, the resulting file will be placed in your current working directory.
-
Select Run after display to play the animation file once the contours have been generated. If this check box is checked, then you will need to specify the frame rate speed. The frame rate speed must be between 0.0 (slowest) to 1.0 (fastest).
-
Use the Graphical Attributes section of the panel to specify how the resulting contours are to be coloured. The contours can either be coloured By sequence colour or through using an existing block colour legend.
The resulting contours can be smoothed in three ways:
- No smoothing - No smoothing is performed and the contours follow the exact boundaries of the blocks.
- Least smoothing - Minimal smoothing is performed such that the corners of the pit blocks are cut.
- Normal smoothing - Smooth contours are created through the pit blocks. You will need to specify the level/factor of smoothing required in the pit contours. The level must be an integer greater than 0.
-
Use the Saving Parameters section to store the results in a layer. You can store all the results in a single layer, or store each contour in a separate layer.
If you choose to store each contour in a separate layer, then the layer name entered will be used as a prefix for each layer.
Example: In the screenshot of the panel above a layer name of CONTOURS_SM was used. Since there are 20 contour layers, each layer will be named CONTOURS_SM1, CONTOURS_SM2, CONTOURS_SM3, etc.
Select the name of the layer from the drop-down list, or type the name of a new layer into the space provided.
Note: A confirmation will be displayed asking you if you want to overwrite an existing layer if the layer selected already exists.
A new layer:
- may contain up to 40 characters
- must begin with an alphanumeric character [0-9] or [a-z]
- cannot include spaces
- can include hyphens [ - ], plus signs [ + ], underscores [ _ ], periods/dots [. ]
- can include the special characters of ÁÂÃÀÇÉÊÍÓÔÕÚÜÑ that are used in the Spanish and Portuguese languages
Enter an optional description to further describe the contents of this layer. The description can be up to 80 alphanumeric characters and may include spaces. If a description is not entered, then a default description will be used instead. If the chosen layer already has an assigned description, the description displays when the layer is selected. Existing layer descriptions can be overwritten.
Note: If you are working with Whittle products, then this option will assume that the results of a previous Whittle 4-D /4-X pit optimisation have been imported into the model.
The pit contouring tool uses block model variables that contain results from a pit optimisation. These values could be:
For example, a pit optimisation might produce pits ranging from 1 to 20, with the results in the block model appearing as:
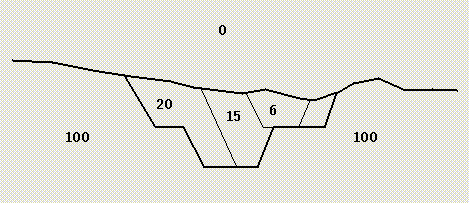
Figure 1 : Block Model After Pit Optimisation
Click OK.
The contours are then generated and saved in the specified layer. The resulting contours will be assigned a group code of PIT_SHELL.

