Partition
Use the Partition option to split (partition) a polygon into new polygons by interactively digitising partition lines.
Apart from splitting a polygon into new polygons, this option can also be used to remove parts of a polygon, i.e. an area of a polygon could be deleted by splitting the area from the rest and then deleting it. This option is also useful when redesigning blast hole blocks.
This option can also be accessed by selecting the Partition button ![]() from the Merge toolbar. The Merge toolbar is a "sub toolbar" and can either be accessed through the Modify toolbar or through using the Toolbar Visibility option (under the Tools menu).
from the Merge toolbar. The Merge toolbar is a "sub toolbar" and can either be accessed through the Modify toolbar or through using the Toolbar Visibility option (under the Tools menu).
The W values of the new polygons will be set to 0. Use the Assign W Tag or the Edit options (under the Attribute Edit submenu) to set these values. The Z value of the ("projected") intersection points will be the average of the original Z values.
Instructions
On the Design menu, point to Polygon Edit, then click Partition.

Follow these steps:
-
Begin with the polygon you want to edit already loaded into Envisage.
-
Select the Use Projection Plane check box to work in a plane other than plan view. Select the Plane method from the drop-down list to define a plane with the selected method. See below for explanations of the available plane methods.
 Level
Level
A flat plane at the given elevation.
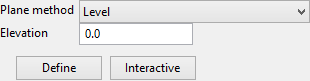
Elevation
The elevation can be defined two ways:
-
Type the elevation into the textbox.
-
Click the Define button and then digitise the elevation on the screen.
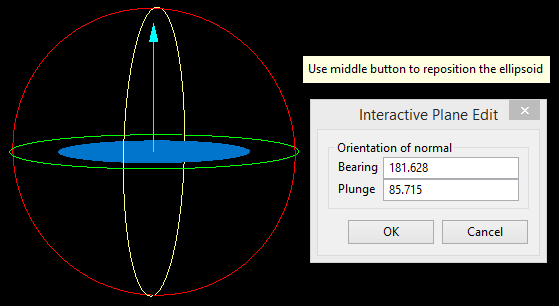
Interactive
The Interactive button can be used to display the current plane definition or change it by dragging the handles around.
 Easting
A vertical plane at the given easting.
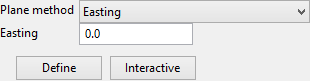
Easting
The easting can be defined two ways:
-
Type the easting into the textbox.
-
Click the Define button and then digitise the easting on the screen.
Interactive
The Interactive button can be used to display the current plane definition or change it by dragging the handles around.
Northing
A vertical plane at the given northing.
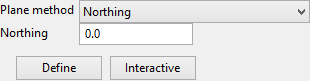
Northing
The northing can be defined two ways:
-
Type the northing into the textbox.
-
Click the Define button and then digitise the northing on the screen.
Interactive
The Interactive button can be used to display the current plane definition or change it by dragging the handles around.
Line Segment
A plane defined along a selected line segment at the given angle (dip).
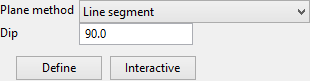
Dip
Enter the dip angle.
Define
Click this button to select a line segment of an existing object.
Interactive
The Interactive button can be used to display the current plane definition or change it by dragging the handles around.
Two Points
Similar to the Line Segment option, except the segment is defined by interactively defining two points.
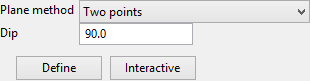
Dip
Enter the dip angle.
Define
Click this button to digitise the two points.
Interactive
The Interactive button can be used to display the current plane definition or change it by dragging the handles around.
Three Points
A plane defined by interactively defining three points.
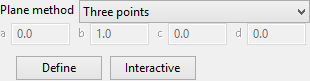
Define
Click this button to digitise the plane, defined by three points.
Interactive
The Interactive button can be used to display the current plane definition or change it by dragging the handles around.
Strike and Dip
A plane defined by the strike and dip.

Strike
Enter the strike angle.
Dip
Enter the dip angle.
X, Y, Z
These fields show the coordinates of the origin of the plane. The origin can be defined by clicking the Define button and digitising it on screen or by entering the coordinates directly into the textboxes.
Define
Click this button to digitise the origin of the plane.
Interactive
The Interactive button can be used to display the current plane definition or change it by dragging the handles around.
Best Fit
A plane determined to be the best fit, in a least squares sense, to a selected point cloud.
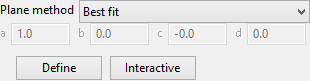
Define
Click this button to select the point cloud.
Interactive
The Interactive button can be used to display the current plane definition or change it by dragging the handles around.
Interactive
A plane defined interactively within Vulcan.
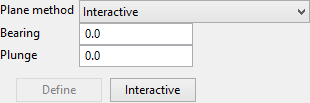
Bearing / Plunge
Enter the bearing and plunge angles, or click the Interactive button to select the bearing and plunge interactively.
Interactive
The Interactive button can be used to display the current plane definition or change it by dragging the handles around.
Current View
The current view in Vulcan.

Interactive
The interactive button can be used to display the current plane definition or change it by dragging the handles around.
Explicit
A plane defined by the equation of the plane.
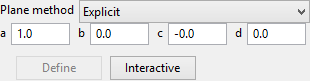
The equation of the plane is
ax + by + cz + d = 0.a, b, c, d
Click the Interactive button to digitise the bearing and plunge, or enter the values for the equation directly into the textboxes.
Interactive
The Interactive button can be used to display the current plane definition or change it by dragging the handles around.
-
-
Click OK to select the polygon that you want to partition (split) from the screen.
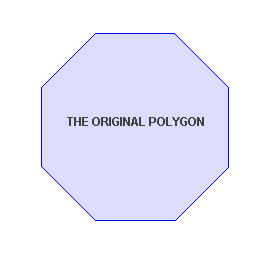
Figure 1 : Original Polygon
-
Indicate the points that define the partition line.
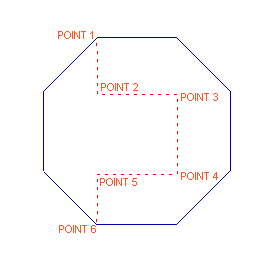
Figure 2 : Defining a Partition Line
-
Right-click to cancel this step when you have finished defining the line.
Results
The new polygons are then shown on the screen and you will be asked whether you want to reject or retain the changes. Retain keeps the new polygons and removes the original polygon. Reject exits the option, i.e. no changes are applied.
In the following diagram, the resulting polygons have been moved and coloured to highlight the partitioning results.
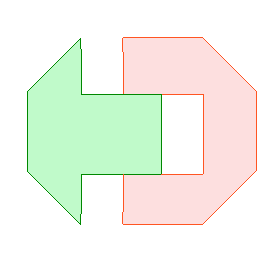
Figure 3 : The Resulting Polygons
The new polygons will have the same name and description as the old one.
Note: You can change these values by using the Name and Description option (under the Design > Attribute Edit submenu).

