Import LIDAR Data : Load Point Data Using Sampling Method
This option provides a graphical user interface into the executable point_reduce_nn. This is used to resample a large set of point data into a smaller set. This subsequent set of data can be saved as a triangulation, grid, CSV file, or an ASCII file.
Instructions
Process
Click on the Process branch on the left side of the panel, and select Load Point data using sampling method.

Input
Click on the Input branch on the left side of the panel.
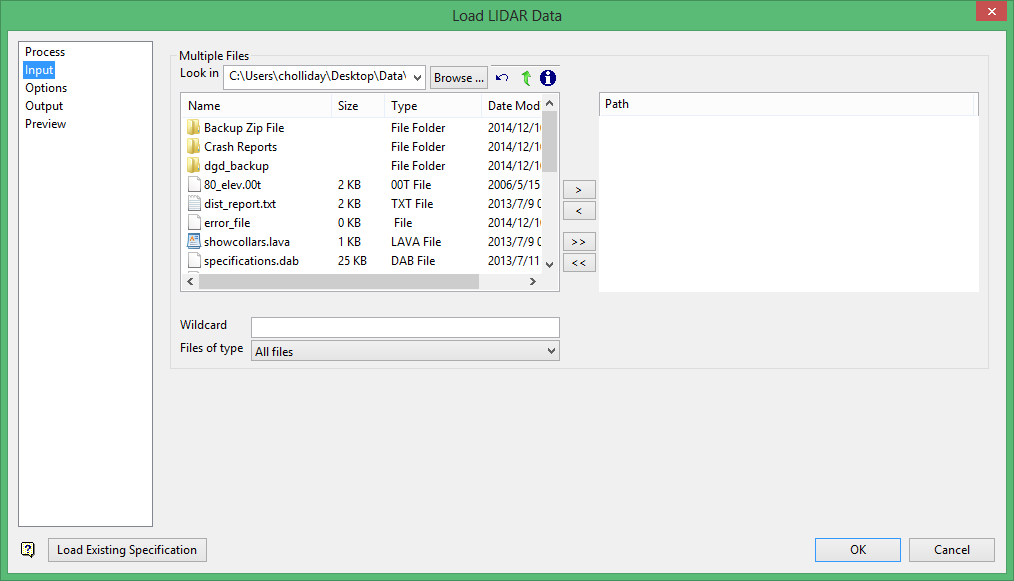
Multiple Files
File Selection
Browse for files using the Browse button, or use the interface showing the available grid files in the current working directory.
Click on the name of the file(s) you want to select. Use the  icons to go to the last folder visited, go up one level, or change the way details are viewed in the window.
To highlight multiple files that are adjacent to each other in the list, hold down the Shift key and click the first and last file names in that section of the list.
To highlight multiple non-adjacent files, hold down the Ctrl key while you click the file names.
Move the items to the selection list on the right side of the panel.
- Click the
 button to move the highlighted items to the selection list on the right.
 - Click the
 button to remove the highlighted items from the selection list on the right.
 - Click the
 button to move all items to the selection list on the right.
 - Click the
 button to remove all items from the selection list on the right.
Wildcard
Enter any characters used as wildcards. Wildcard characters can be an * as well as regular characters.
Example: If the topo_* were used as a wildcard, the result might be topo_area2_aerial, topo_min, or topo_with_pit.
Files of type
Use this to filter the file types that display in the search list.
Options
Click on the Options branch on the left side of the panel.
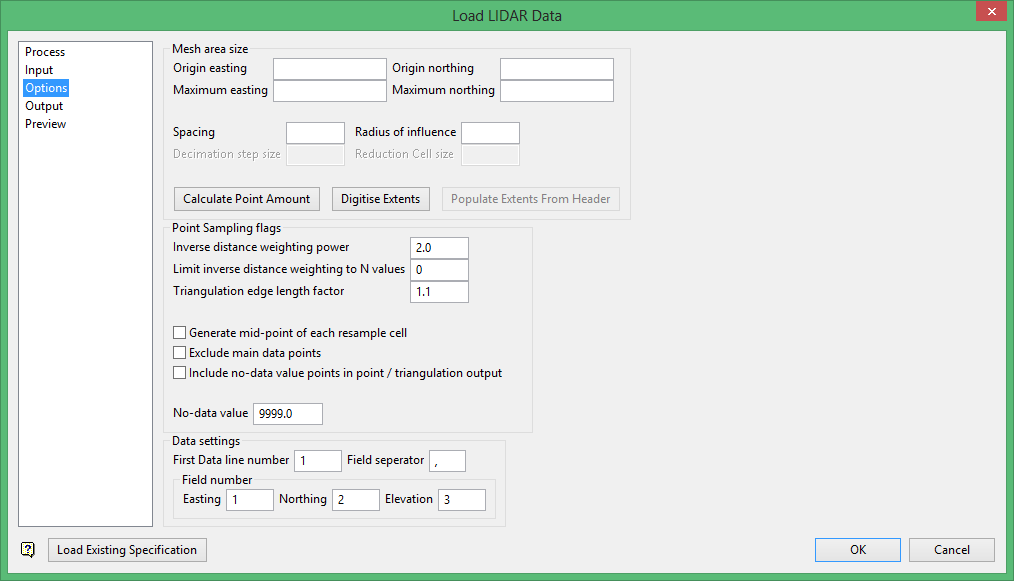
Mesh area size
This option is used to determine the area in which the new data set resides. Provide the origin and maximum values of easting and northing.
Spacing
This option is used to determine the size of the new cells.
Radius of influence
This option is used to calculate the point's new elevation value in regards to the points that neighbour it.
Calculate Point Amount
This option calculates the amount of points that will be created in the new data set.
Digitise Extents
This option brings up a GUI selection box that allows user to either select a point or a box on the screen. The selected points populate the origin and maximum number of boxes.
Populate Extents from Header
This option is not available when using the points process.
Point sampling flags
Inverse distance weighting power
This refers to the weight that a grid value has when the sampling is being processed. A value of 0 turns off the inverse distance weighting and the median value of the surrounding data points within the radius of sampling will be used as the resample value.
Limit inverse distance weighting to N values
This refers to the total amount of values to use when processing the final grid value during sampling. A value of 0 indicates that there is no maximum amount of values specified.
Triangulation edge length factor
This value is used to modify the maximum length of the triangulation edges when the trimming is processing the resulting triangulation. A value of 0 stops the trimming process of the triangulation.
Generate mid-point of each resample cell
When calculating the points on the mesh grid, ideally the calculation of the mid-points for each cell and for them to be included in the resulting output are also enabled. If this option is selected, the mid-points will not be included when outputting the resulting data as a Vulcan grid.
Exclude main data points
When selected, this will stop any main data value from being included in the output of the resulting data structure. When used with the include no-data option, this can be used to evaluate the positioning of the points which only include no-data values.
Include no-data values in point / triangulation output
Selecting this option enables the inclusion of any data points that correspond with the specified no-data value when the user decides to output the resulting data as points or a triangulation.
No-data value
The value is used to crop any points which have no valid data associated with them.
Data settings
This section depicts how the program is to read the data from the file.
The First Data line numbe r refers to the line the first data point is located at. This can be used to skip any headings that may be present.
The Field separator value is used to differentiate between each field in the file. The default value is a blank space.
The Easting, Northing, and Elevation fields refer to the X, Y, and Z columns respectively, and in which column they can be found.
Output
Click on the Output branch on the left side of the panel.
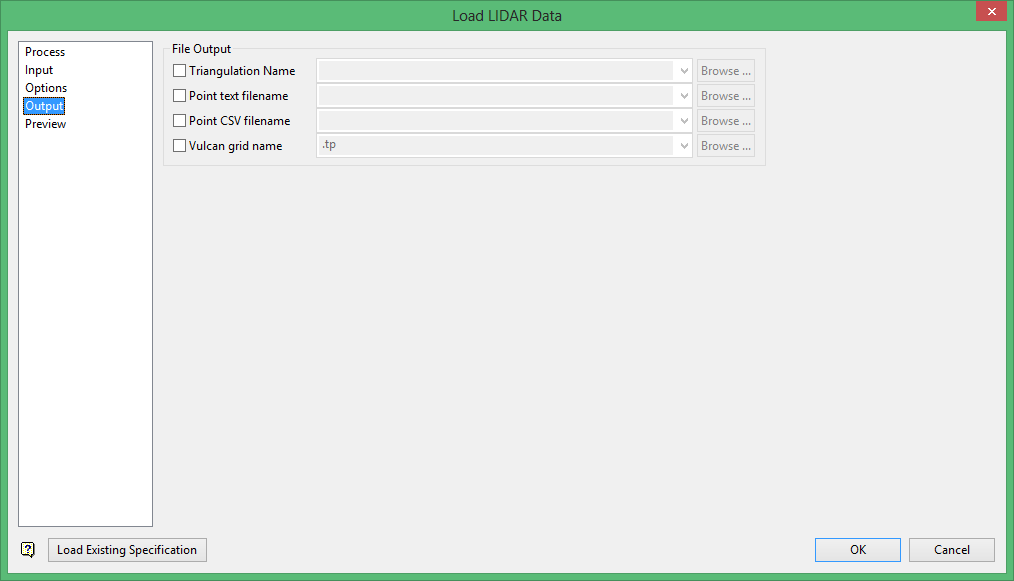
File Output
This section allows user to select the type of output they wish the executables to produce. After enabling the checkbox, the fields become available to specify. The drop-down list is automatically populated with the extensions associated with the type of output being selected. The filename should be appended to the front of the visible text so that the extension is still on the end of the final filename.
The Point text filename and Point CSV filename are required to have the.asc and.csv extensions respectively. However, Triangulation and Vulcan grid follow separate rules for naming the extensions.
Triangulation Name
The extension given must consist of either a number or letter followed by a second number or letter.
Vulcan grid name
The extension given must consist of a letter followed by either a letter or number.
The extension will be completed when the user accepts the panel values and sends the information to the external executable.
If user tries to proceed without any outputs being specified, a popup dialog appears stating that there must be at least one output specified before proceeding with the conversion routines.
If the filenames don't have their respective extensions, there will be a popup dialog stating that the filename must be populated and that a valid extension must be provided.
Preview
After completing the panels for the selected mode, click the Preview branch on the left side of the panel.
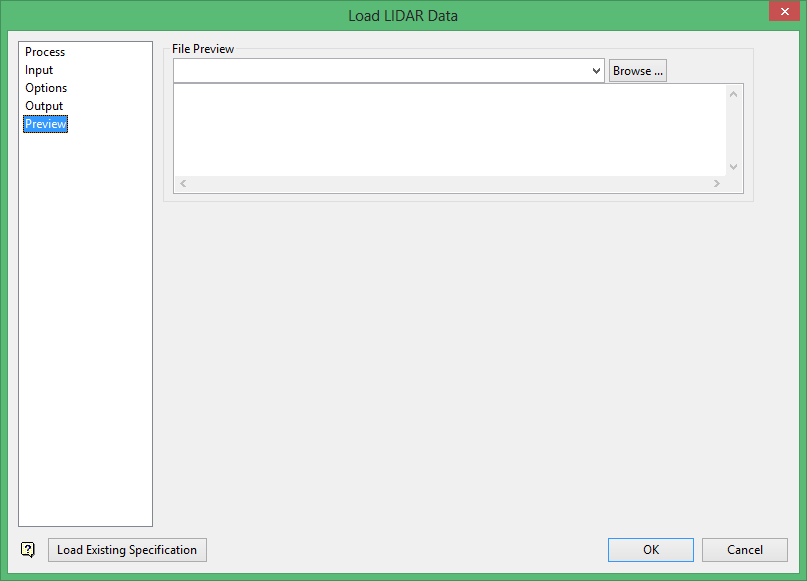
File Preview
Select a file from the File Preview list, or click Browse to select a file from a location other than your working directory. The first ten lines of text of the selected file will display in the box. This text is unformatted and will be populated directly as the data is represented in the file. This can be used to determine the specific format for ASCII files when trying to use the Point Sampling or Layer Importing options.
Click OK to complete the process.
Related Topics
- Load Point Data Into Layer
- Load Point Data Using Sampling Method
- Load ASCII Grid Using Decimate Method
- Load ArcInfo ASCII Grid Using Reduce Method

