Tutorial - Load Dynamic Model
This tutorial provides step-by-step instructions on how to load and view a dynamic block model.
There are three considerations to think about when loading a dynamic model:
- Determining what information you want to display,
- Deciding how you want the display to look,
- Choosing how much information you want to display.
In this tutorial, you will display results from the bm50x50 block model from the Thor project. You will view the results of the kriged estimation for gold and display the value of each block using block text display.
Section One - Determining What Information to Display
Section One - Determining What Information to Display
The first step will be to choose a block model and then a variable from the model.
To begin, navigate to Block > Viewing > Load Dynamic Model... to bring up the Dynamic Block Model Details panel.
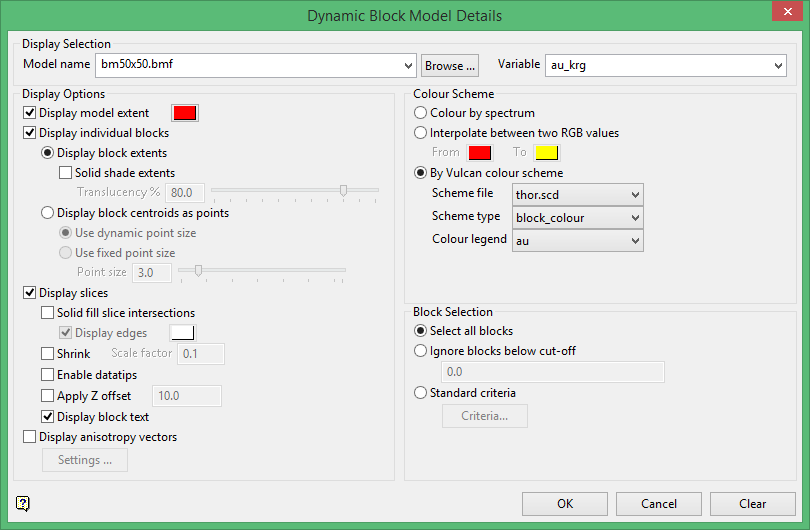
Display Selection
Model name
From the drop-down menu, select the block model you wish to view. In this case, select bm50x50.bmf.
Variable
Next, select the variable you wish to see by selecting it from the list in the drop-down menu. At this stage of selection, you can only select one variable from the list. However, you can display information for up to nine variables at the same time by using the block text feature. You will use this feature in Section Three. For now, select au_krg.
Continue to Section Two
Section Two - Deciding How the Display will Look
Section Two - Deciding how the display will look.
In this section, you will set parameters that determine how the dynamic model will look when displayed on the screen.
Display Options
Display model extent
There are two options to choose from. We will select both options.
Select the option to Display model extent.
Select the option to Display individual blocks. Here, you can choose to fill each block with solid shading, but since we are going to view block text we will leave that option unchecked.
Display slices will be discussed in the next section.
Colour Scheme
Select the option By Vulcan colour scheme, then choose the following from the drop-down menus:
Scheme file - thor.scd
Scheme type - block_colour
Colour legend - au
Block Selection
Choose Select all blocks.
Continue to Section Three
Section Three - Choosing How Much Information to Display
Section Three - Choosing How Much Information to Display
In this section you will choose how much information you are going to display. Here you will learn how to set up block text and show the values of up to nine variables of a block at the same time.
Display slices
Begin by selecting this option.
Display block text
Select this option and then click  . This will open the Block Text dialog panel.
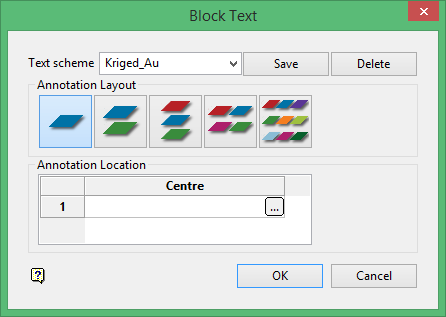
Text scheme
Type a name for the scheme in the textbox and click  . For this tutorial type in the name Kriged_Au.
Annotation Location
There are five format layouts to choose from as shown by the five icons.

As you click on each of the icons, the display window will reflect the change in layout. In this tutorial, click on the icon showing nine locations. We will use four of the nine places to display information about the kriged estimation for gold.
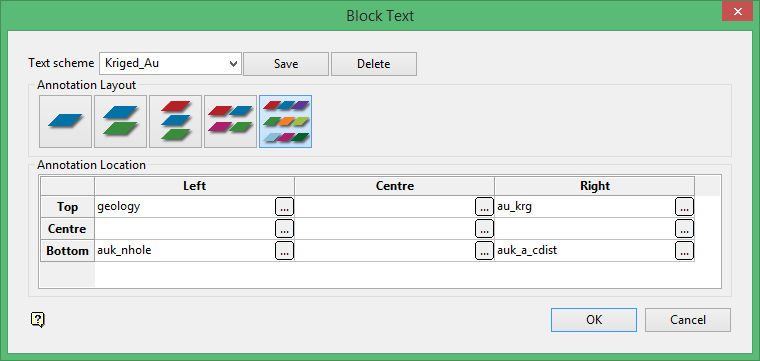
Start by clicking on the small ![]() button in the top left corner. This will cause the Block Model Variable Annotation panel to open.
button in the top left corner. This will cause the Block Model Variable Annotation panel to open.
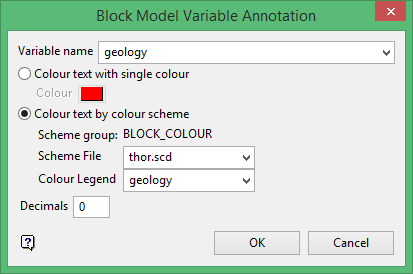
Variable name
Select geology from the list of variables in the drop-down menu.
Scheme File - thor.scd
Colour Legend - geology
Decimals - 0
Select the options as shown then click .
Next, click on the small ![]() button in the bottom left corner.
button in the bottom left corner.
Variable name
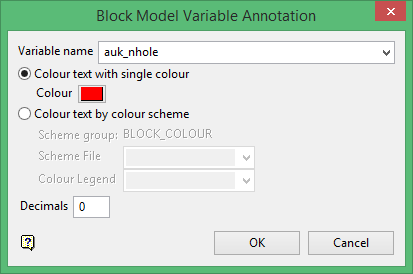
Select auk_nhole from the list of variables in the drop-down menu.
Since you do not need a graduated colour scheme for this variable select a single colour for the text. Set Decimals to '0' and click .
Next, click on the small ![]() button in the upper right corner.
button in the upper right corner.
Variable name
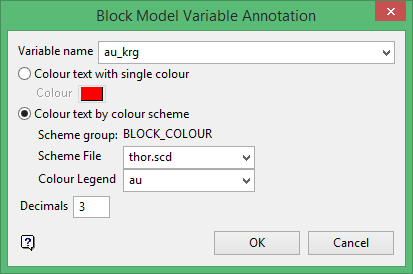
Select au_krg from the list of variables in the drop-down menu.
Scheme File - thor.scd
Colour Legend - au
Decimals - 3
Select the options as shown then click .
Finally, click on the small ![]() button in the bottom right corner.
button in the bottom right corner.
Variable name
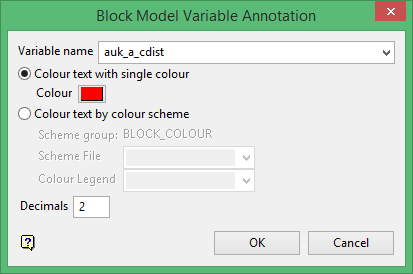
Select auk_a_cdist from the list of variables in the drop-down menu.
Since you do not need a graduated colour scheme for this variable select a single colour for the text. Set Decimals to '2' and click .
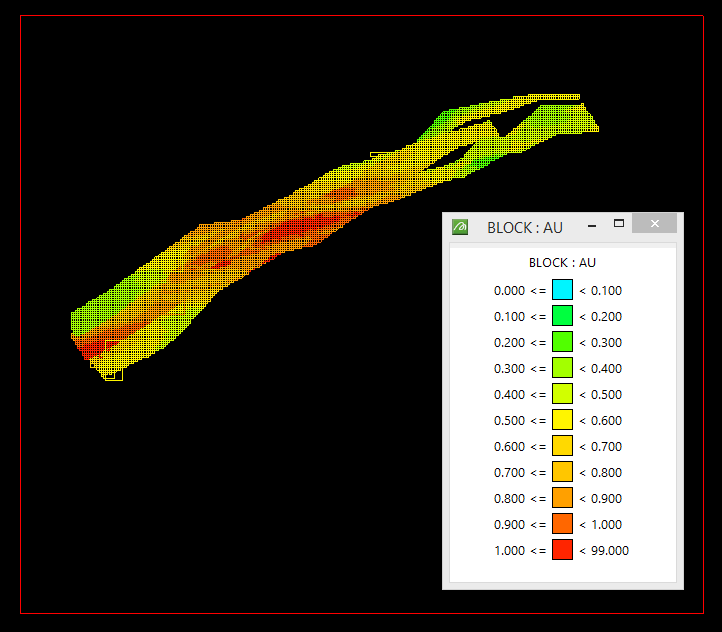
The block model will now begin building and displaying on the screen.
Continue to the final section
Viewing the Final Results
Viewing the Final Results
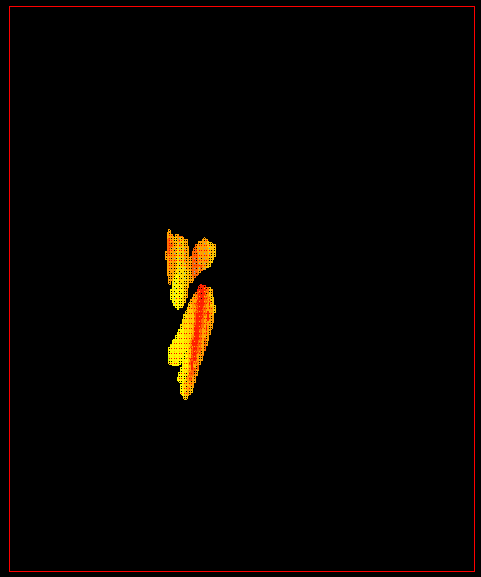
You should now see the final results of the Thor dynamic block model on your screen like that shown below. However, to view the block text information the model needs to be set up in section view. The orientation of the section view does not matter.
The steps for viewing the model in section view are listed below.
Viewing the model in section view
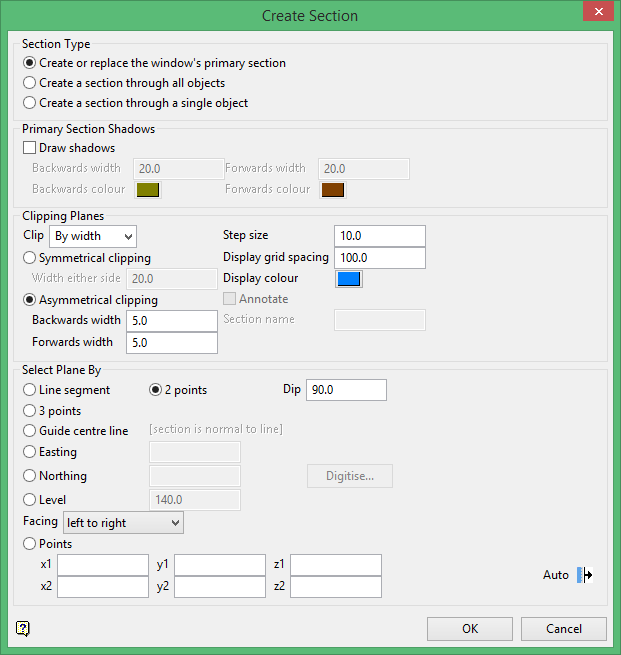
Navigate to View > Create Section
When the Create Section panel opens, select all options as shown below and click .
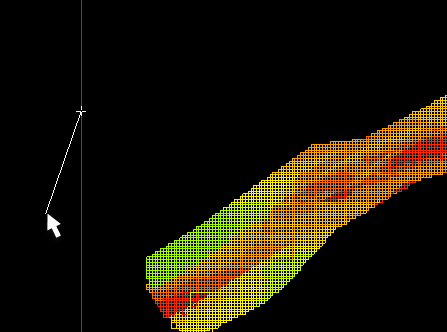
When the panel disappears, make sure the cursor is set to snap to object. Snap the first and second points along the model extents to align the section view to the blocks.
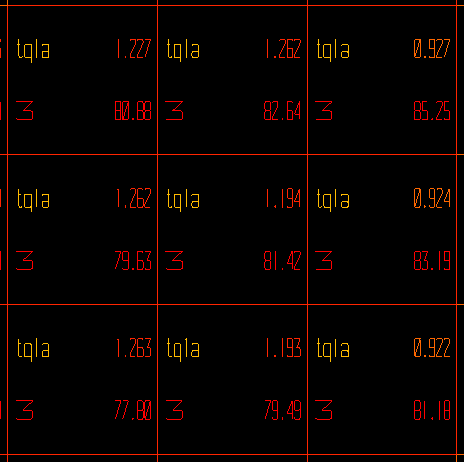
Step through the sections until you see the area you are interested in viewing.
Then you can zoom in to view the information.
Related topics

