Applying Datatips
In order to apply datatip information from an external database we will need to use the Intelligent Objects Editor.
Applying Datatip Information
Saving the Settings
Removing Datatip Information
Exercise
Applying Datatip Information
- Load the
HAUL_ROUTElayer, which should have been created through the Getting Started tutorial. If this layer has not been created, then you will need to complete the Getting Started tutorial before continuing. - Select Design > Intelligent Objects > Intelligent Objects Editor.
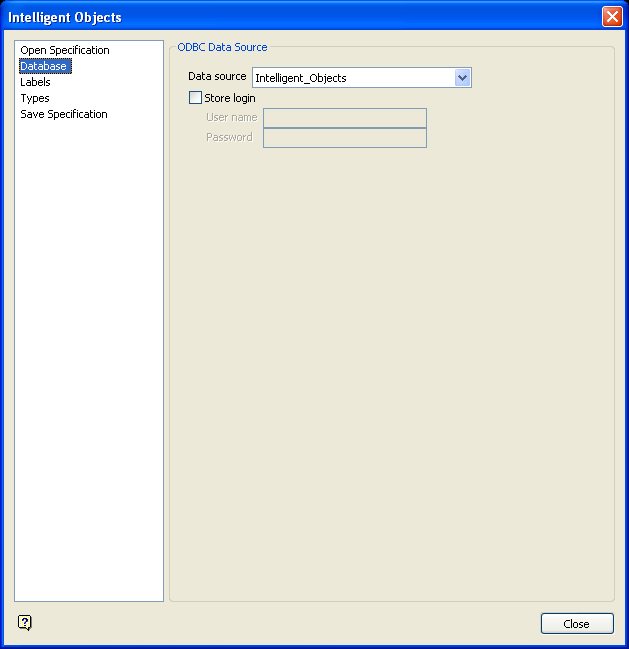
- Go to the Database section of the Intelligent Objects Editor interface.
- Select ‘
Intelligent_Objects’ from the Data source drop-down list. If you cannot select this, then an ODBC data source does not exist. Refer to the ODBC Interface documentation for steps on how to set up an ODBC link.Figure 1 : Specifying the Data Source
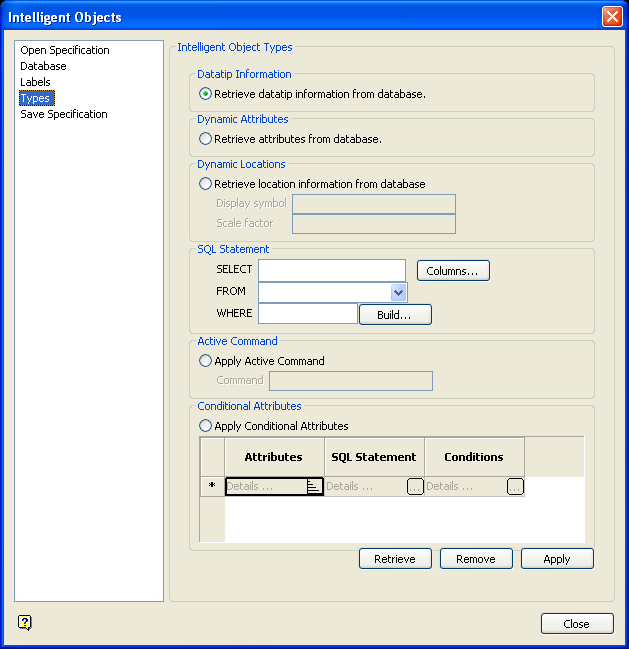
- Go to the Types section of the Intelligent Objects Editor interface and select the Retrieve datatip information from database option.
Figure 2 : Retrieving Datatip Information from the Database
- Under the SQL Statement section, construct the following statement:
Select * from Haulage_Information where haulage_route = ‘$NAME’
The above statement is saying select all fields of a record (*) from the
Haulage_Informationtable where the value in thehaulage_routefield is equal to the name of an object. In our case, where the object name isROUTE_1, the fields for the record that has a matchingHAULAGE_ROUTEvalue ofROUTE_1displays through the datatip.To construct the statement:
- Click Columns. From the displayed panel, enter an asterisk ( * ) in the first field of the first row.
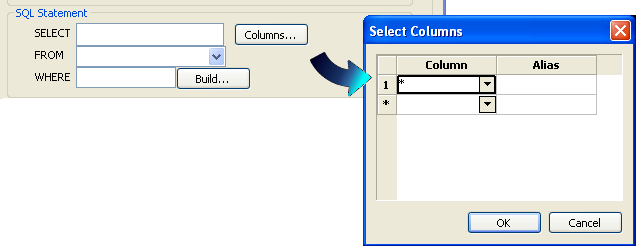
- Select
Haulage_Informationfrom the drop-down list.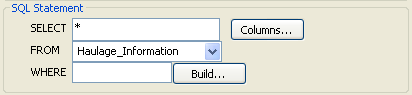
- Click Build to construct the remainder of the statement.
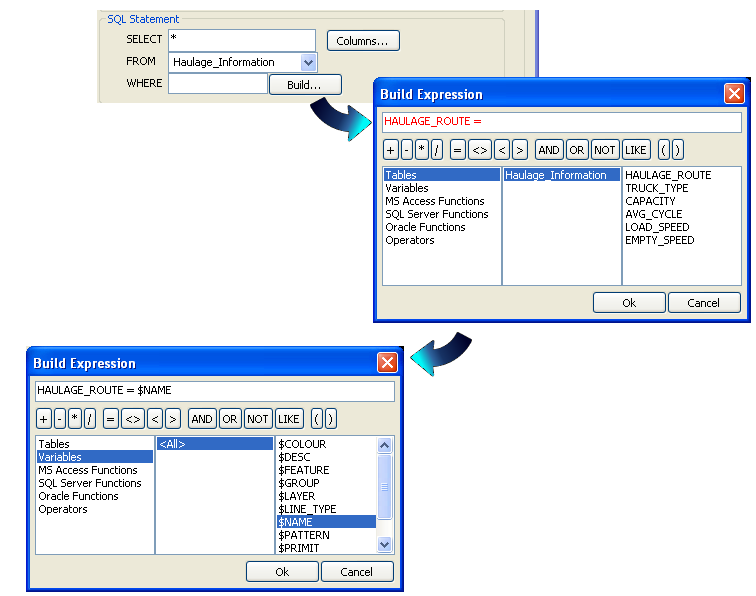
- Click Columns. From the displayed panel, enter an asterisk ( * ) in the first field of the first row.
- Click Apply and select Polygon from the displayed dialog box.
- From the Multiple Selection box, select the Object selection method followed by the
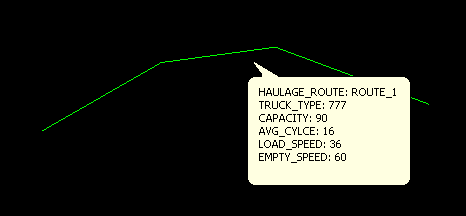
ROUTE_1design object. Right-click twice to return to the Intelligent Objects Editor interface. - Hover your mouse over the design object to display the data from your
Haulage_Informationtable of the external database.Figure 3 : Intelligent Objects Datatip
Saving the Settings
- Go to the Save Specification section of the Intelligent Objects Editor interface and enter
Haulagein the Specification file field.Figure 4 : Saving your Settings to a Specification File
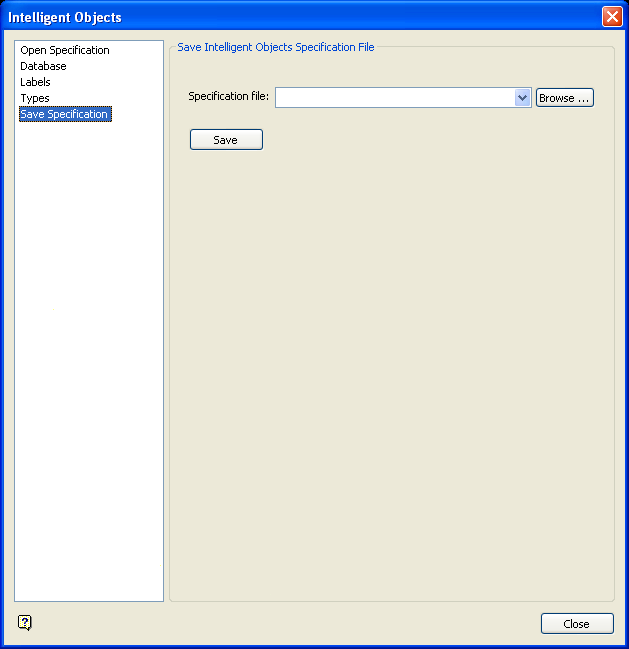
- Click Save and close the Intelligent Objects Editor interface.
The resulting specification file will be stored in your current working directory. This specification file, which can be opened and viewed through a text editor, holds the panel settings for the Intelligent Objects Editor interface and can be reloaded at a later time.
Removing Datatip Information
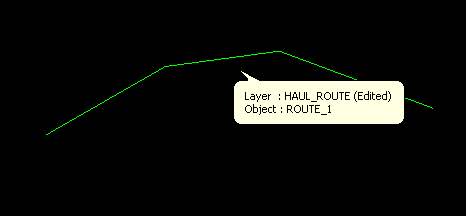
- Go to the Types section of the Intelligent Objects Editor interface and click Remove.
- From the Remove Data dialog box, select the Datatip Information option followed by the Polygon entry.
- From the Multiple Selection box, select the Object selection method followed by the
ROUTE_1design object. Right-click twice to return to the Intelligent Objects Editor interface. - Hover your mouse over the object to confirm that the standard Vulcan datatip has been restored.
Figure 5 : Standard Vulcan Datatip
Exercise
Create another line in the ‘ HAUL_ROUTE ’ layer using the coordinates below:
| X | Y | Z |
| -222 | -13 | 0 |
| -7 | -61 | 0 |
| 41 | -58 | 0 |
| 70 | -42 | 0 |
| 114 | -37 | 0 |
Assign the object an object name of ROUTE_2 and apply the intelligent objects datatip tool so that when hovering your mouse over either of the two objects the datatip displayed relates to the HAULAGE_ROUTE table in your external database.
Click the ![]() Save button to save the layer to your design database.
Save button to save the layer to your design database.

