Applying User-Defined Vulcan Attribute Datatips
In order to apply user-defined Vulcan attribute datatips we will need to use the Intelligent Objects Editor. You will need to have completed the Getting Started tutorial before undertaking this tutorial.
Applying Datatip Information
- Load the '
HAUL_ROUTE' layer, which should have been created through the Getting Started tutorial. If this layer has not been created, then you will need to complete the Getting Started tutorial before continuing. - In order to display the attributes we will need to set some up
initially. Select the
 Information button,
which is located on the Status toolbar, followed by the object named
'
Information button,
which is located on the Status toolbar, followed by the object named
'ROUTE_1'. Once selected, the current attributes for the selected object displays in the Report Window.Diagram 1 - Report Window Output

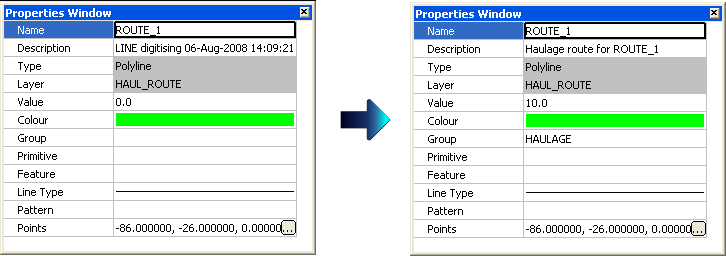
- Using the Properties Window, assign a new description, object value
and group code.
Diagram 2 - Modifying Object Attributes
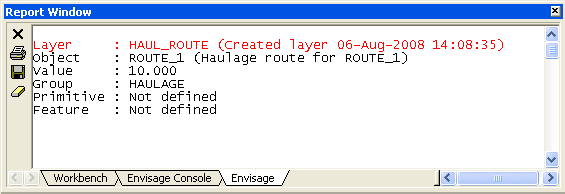
- Select the Information button followed
by the object named '
ROUTE_1'. Once selected, the updated attributes for the selected object displays in the Report Window.Diagram 3 - Report Window Output
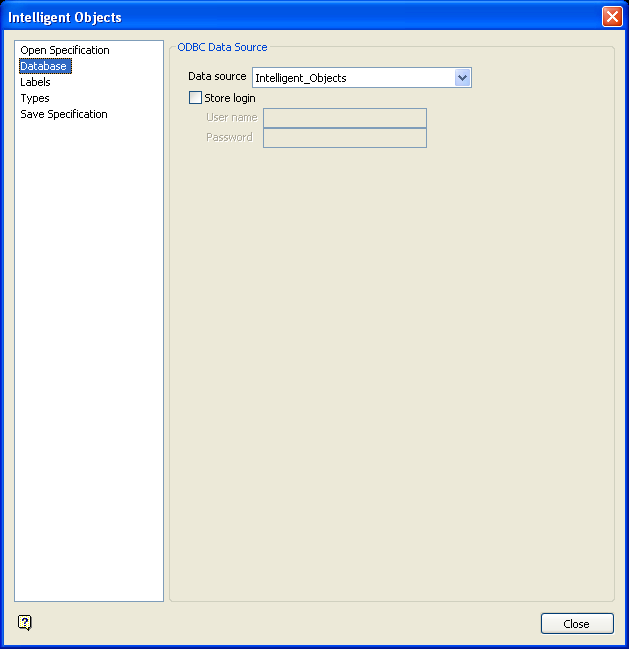
- Select Design > Intelligent Objects > Intelligent Objects Editor.
- Go to the Database section of the Intelligent Objects Editor interface.
- Select ‘
Intelligent_Objects’ from the Datasource drop-down list. If you cannot select this, then an ODBC data source does not exist. Refer to the ODBC Interface documentation for steps on how to set up an ODBC link.Diagram 4 - Specifying the Data Source
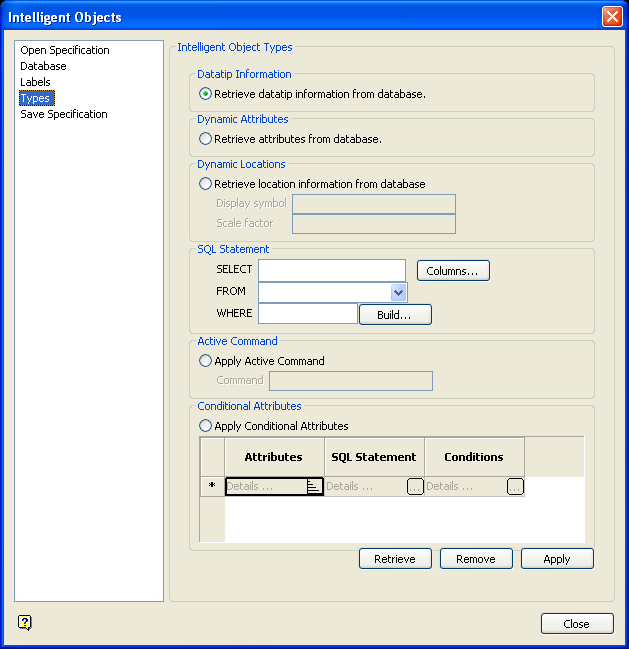
- Go to the Types section
of the Intelligent Objects Editor interface and select the Retrieve
datatip information from database option.
Diagram 5 - Retrieving Datatip Information from the Database
- In the SQL Statement field, enter the following statement:
Select '$NAME' AS NAME, '$DESC'
	 AS DESCRIPTION, $VALUE AS [VALUE], '$GROUP' AS [GROUP]
Using basenames, Intelligent Objects can query design objects for their values in an attribute to insert into an SQL statement. The following basenames are supported in Vulcan:
Vulcan Basename Description $COLOUR Object/triangulation colour. $DESC Object description. $FEATURE Object feature. $GROUP Group code. $LAYER Layer the object belongs to. $LINE_TYPE Object line type. $NAME Object/triangulation name. $PATTERN Object pattern. $PRIMIT Object primitive. $VALUE Object value. The above statement is saying select the object's name and insert this value into the field called '
AsNAME', select the object's description and insert this value into a field called 'DESCRIPTION', select the object's value and insert this value into a field called 'VALUE', and also select the object's group code and insert this value into a field called 'GROUP'.GROUPandVALUEare reserved SQL operators they are required to be enclosed in square brackets ([ and ]). All fields that contain alphanumeric values are enclosed in single quotations (' and ') whereas numeric fields, such asVALUE, are not. - Select the Apply button and select Polygon from the displayed dialog box.
- From the Multiple Selection box, select the Object
selection method followed by the '
ROUTE_1' design object. Right-click twice to return to the Intelligent Objects Editor interface. - Hover your mouse over the design objects to display the user-defined
datatip.
Diagram 6 - Intelligent Objects Datatip

Saving the Settings
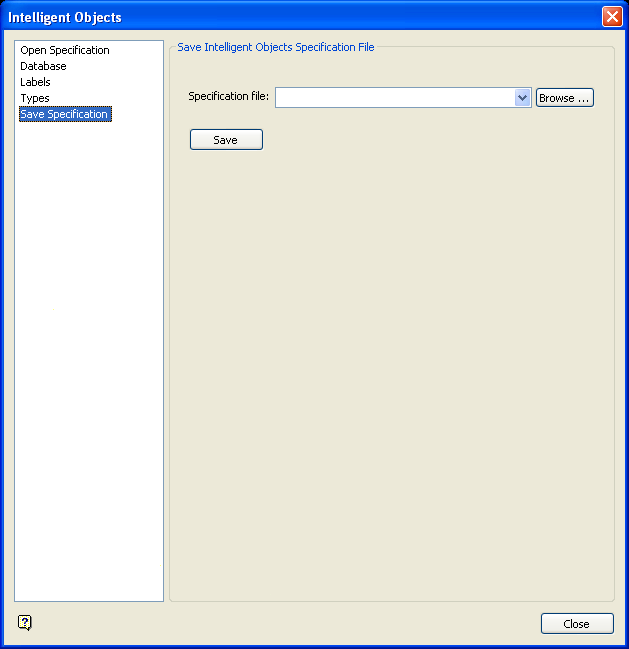
- Go to the Save Specification
section of the Intelligent Objects Editor interface and enter '
VULCAN_Attributes' in the Specification file field.Diagram 7 - Saving your Settings to a Specification File
- Click Save and close the Intelligent Objects Editor interface.
The resulting specification file will be stored in your current working directory. This specification file, which can be opened and viewed through a text editor, holds the panel settings for the Intelligent Objects Editor interface and can be reloaded at a later time.
Removing Datatip Information
- Go to the Types section of the Intelligent Objects Editor interface and click Remove.
- From the Remove Data dialog box, select the Datatip Information option followed by the Polygon entry.
- From the Multiple Selection box, select the Object
selection method followed by the '
ROUTE_1' design object. Right-click twice to return to the Intelligent Objects Editor interface.
To confirm that the datatip has been restored to the standard Vulcan
datatip, hover your mouse over the 'ROUTE_1' design object.
Diagram 8 - Standard Vulcan Datatip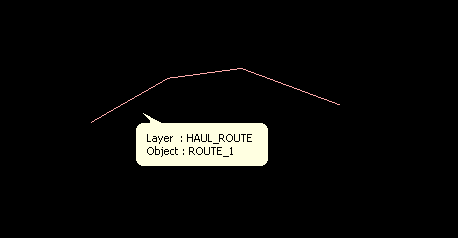
Exercises
Exercise 1 : Applying User-defined Field Names to the Datatip Information
The field names specified for the Vulcan attribute datatips may be user-defined. In the SQL Statement field of the Intelligent Objects Editor, enter the following statement:
Select '$NAME' AS [Route_Name], '$DESC' AS Comment, $VALUE AS [Number],
 '$GROUP' AS [Type of Route]
Apply this datatip to the 'ROUTE_1' design object. This allows
you to display the same attributes but include the field names that represent
the field values being displayed.
Diagram 9 - Intelligent Objects Datatip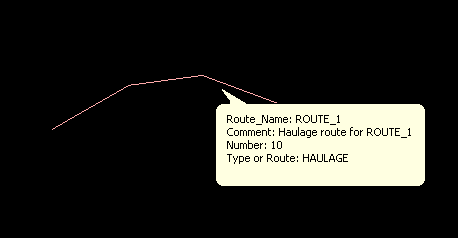
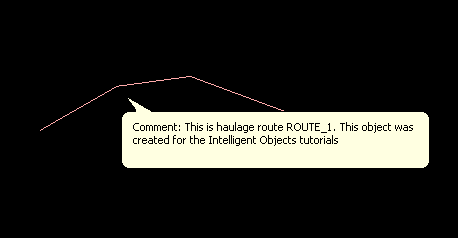
Exercise 2 : Applying Comments to the Datatip Information
Comments can be directly applied to design object datatips. In the SQL Statement field of the Intelligent Objects Editor, enter the following statement:
Select 'This is haulage route ROUTE_1.
 This object was created for the Intelligent Objects tutorials' AS Comment
Remove the previous datatips before applying this datatip to the 'ROUTE_1'
design object. This allows you to display comments in the datatip that
are unrelated to any Vulcan attribute or information contain in the external
database.
Diagram 10 - Intelligent Objects Datatip