Creating Moving Objects
In order to apply dynamic locations from an external database you will need to use the Intelligent Objects Editor.
Applying Dynamic Locations
Saving the Settings
Removing Dynamic Locations
Applying Dynamic Locations
- Load the
HAUL_ROUTElayer, which should have been created through the Getting Started tutorial. If this layer has not been created, then you will need to complete the Getting Started tutorial before continuing. - Select Tools > Preferences.
- Under the Vulcan : Graphics section of the Preferences interface, select the Update Intelligent Objects check box and set the Update Delay to 15000 milliseconds (15 seconds). This setting is required to update the dynamic positioning.
Figure 1 : The Update Intelligent Objects preference

- Click OK to exit the Preferences interface.
- Select Design > Intelligent Objects > Intelligent Objects Editor.
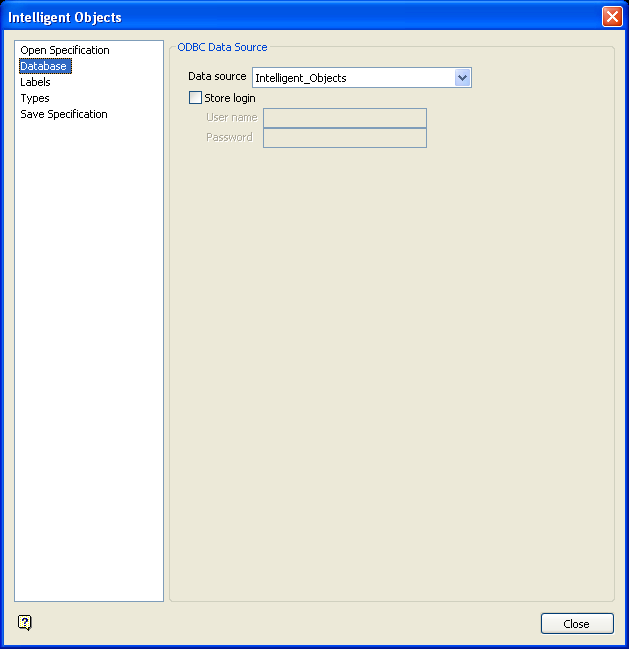
- Go to the Database section of the Intelligent Objects Editor interface.
- Select ‘
Intelligent_Objects’ from the Data source drop-down list. If you cannot select this, then an ODBC data source does not exist. Refer to the ODBC Interface documentation for steps on how to set up an ODBC link.Figure 2 : Specifying the Data Source
- Go to the Types section of the Intelligent Objects Editor interface and select the Retrieve location information from database option.
Figure 3 : Retrieving Location Information from the Database
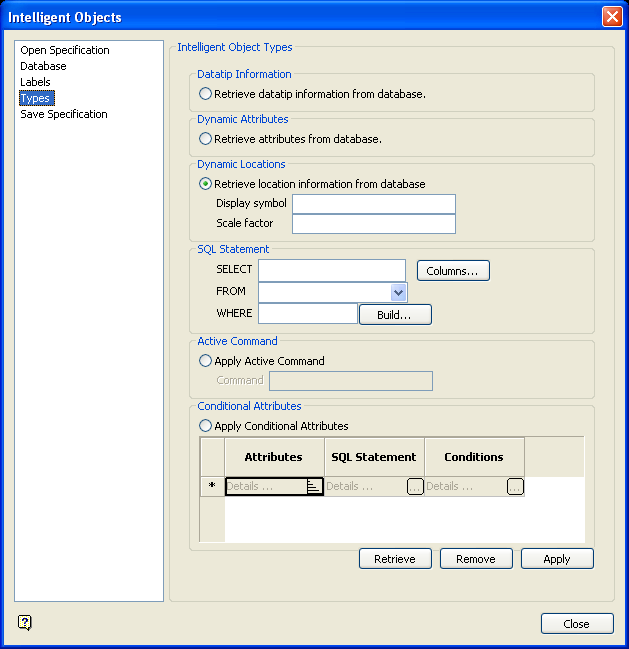
- Type in a display symbol name of
BIG_TRUCKand set the scale factor to0.005.Figure 4 : Specifying a Symbol and Scale Factor

- Under the SQL Statement section, construct the following statement:
The statement is saying select the X, Y, and Z fields from the record in theSelect X, Y, Z from Truck_Location where HAULAGE_ROUTE = ‘ROUTE_1’Truck_Locationtable where theHAULAGE_ROUTEfield is equal toROUTE_1.To construct the statement:
- Click Columns. From the displayed panel, enter the following in the displayed panel.
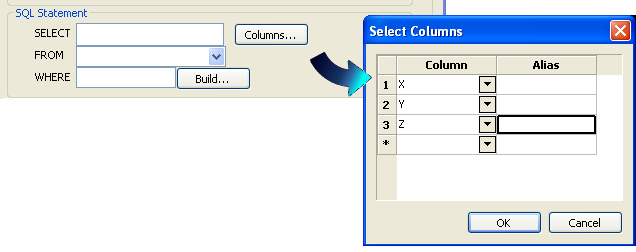
- Select
Truck_Locationfrom the drop-down list.
- Click Build to construct the remainder of the statement. You will need to type in the
ROUTE_1value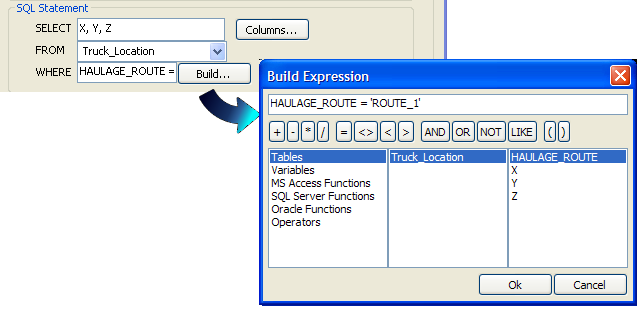
- Click Columns. From the displayed panel, enter the following in the displayed panel.
- Click Apply and select Polygon from the displayed dialog box.
- From the Multiple Selection box, select the Object selection method followed by the
ROUTE_1design object. Right-click twice to return to the Intelligent Objects Editor interface. - Open the
Truck_Locationtable in theIntelligent_Objectsexternal database. Change the values in the table as shown below:Figure 5 : Alteration of values in the Truck_Location table

- Click out of the first row of cells, wait approximately 15 seconds and then change the values as follows:
Figure 6 : Alteration of values in the Truck_Location table

- Close the table and return to Vulcan. The truck should start moving along the original design line.
Saving the Settings
- Go to the Save Specification section of the Intelligent Objects Editor interface and enter
Pathin the Specification file field.Figure 7 : Saving your Settings to a Specification File
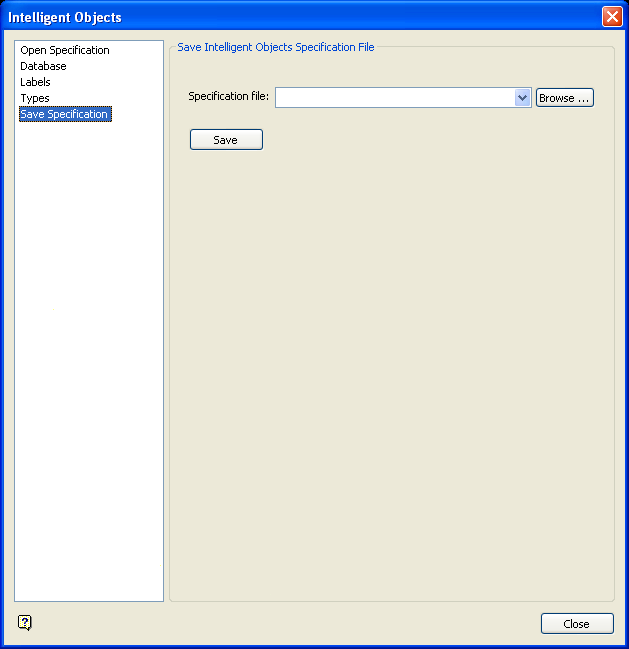
- Click Save and close the Intelligent Objects Editor interface.
The resulting specification file will be stored in your current working directory. This specification file, which can be opened and viewed through a text editor, holds the panel settings for the Intelligent Objects Editor interface and can be reloaded at a later time.
Removing Dynamic Locations
- Go to the Types section of the Intelligent Objects Editor interface and click Remove.
- From the Remove Data dialog box, select the Datatip Locations option followed by the Polygon entry.
- From the Multiple Selection box, select the Object selection method followed by the haul truck symbol. Right-click twice to return to the Intelligent Objects Editor interface.

