Tutorial - Designing Highwall Roads
The Design Pit/Dump option in the Open Pit menu combines the basic pit design functions of projection, benches or berms and ramp placement into one integrated option. These examples demonstrate how to build a road for a highwall mine and how to build multiple roads simultaneously.
 Opening Your Data File in Vulcan
The dataset for this tutorial is in the Coal Open Pit.zip folder. (click the link to download the dataset).
Highwall Roads
- Open Vulcan using the dataset from the Coal Open Pit\Open Pit Highwall folder.
- Load the Strip1 and RoadStart layers.
- Select Open Pit > Ramps > Design Pit/Dump.The Road Parameters panel displays.
-
- Select Highwall from the drop-down list in the top left corner of the panel.
- Select Testing from the Spec name drop-down list.
- Click OK. The Crete Pit menu display.
- Select Insert Road on the Create Pit menu.
- Select the vertical string in the STRIP1 layer.
- Select Don’t register on the Register menu.
- Select the point where the two strings intersect.
- Select This way on the Direction menu.
- Select Build new road on the Build Road menu.
- Leave the name as New Road 2 and click OK.
- Select Retain insert on the Insert Road menu.
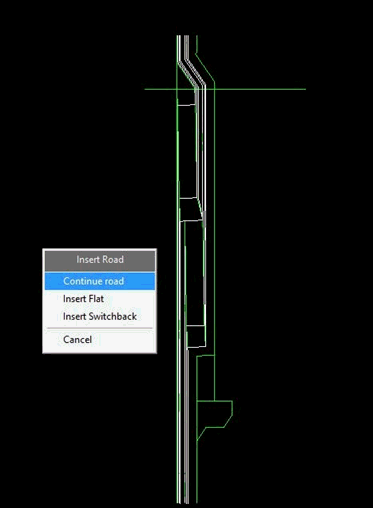
- Select Continue road on the Insert Road menu, then click Retain insert on the Insert Road menu to confirm. Repeat these selections for a total of four sections.
- Select Insert flat on the Insert Road menu, then select Retain insert on the Insert Road menu to confirm.
- Select Insert switchback on the Insert Road menu. The Switchback Parameters panel displays.
- Select Flat switchback and click OK.
- Select Retain insert on the Confirm menu.
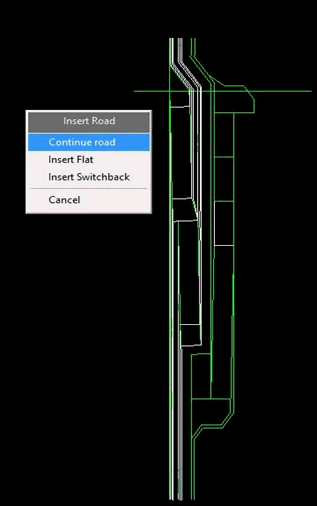
- Select Continue road on the Insert road menu, then click Retain insert on the Insert Road menu to confirm.
- Select Insert flat on the Insert Road menu, then click Retain insert on the Insert Road menu to confirm. Repeat these selections for a total of three sections.
- Select Insert switchback on the Insert Road menu. The Switchback Parameters panel displays.
- Select Flat switchback and click OK.
- Select Retain insert on the Confirm menu.
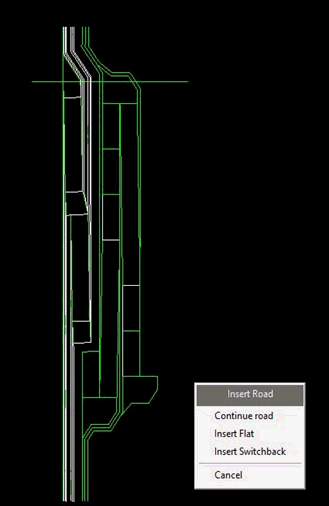
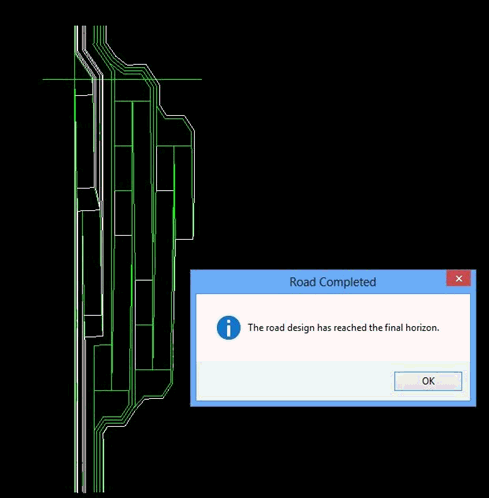
- Select Continue road on the Insert road menu, then click Retain insert on the Insert Road menu to confirm. A message then displays to confirm that the road design has reached the final horizon.
Related topics

