Specifications
Display Characteristics Settings
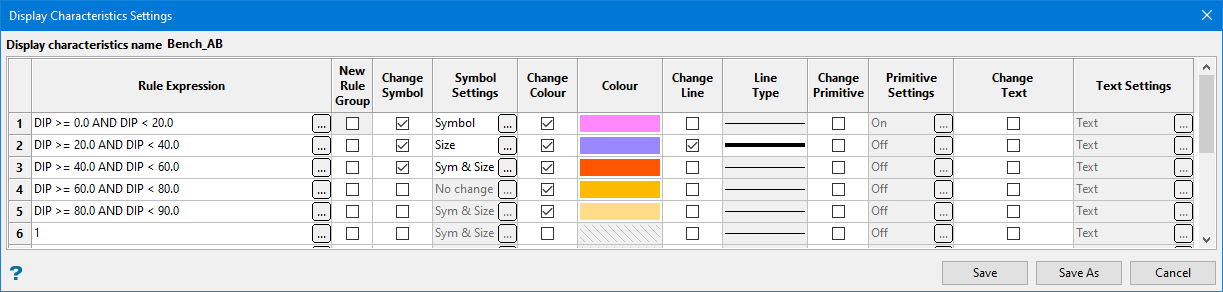
This option allows you to set up the details for Drill and Blast > Edit > Apply Display Characteristics.
Instructions
Follow these steps:
-
On the Drill and Blast menu, point to Files, then click Specifications.
-
Select Display Characteristics Settings from the Specifications panel, then click OK to display the Display Characteristics Settings panel.
-
Enter a conditional expression in the Rule Expression column.
An expression Builder panel is available by clicking the
 button.
 Using the Expression Builder
Follow these steps:
-
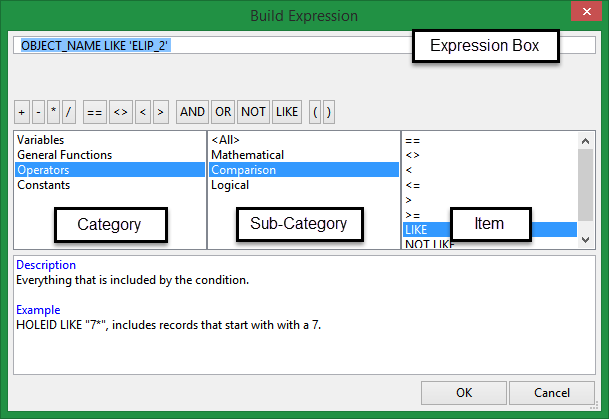
Build an SQL expression one term at a time by selecting a category from the first column, a sub-category from the middle column, then double-clicking an item from the third column. This will become the term in the expression.
Note: The choice you make will affect the selection available in the second column's sub-category menu. Similarly, the selection made in the sub-category column will affect the items made available in the third column.
As you select your terms, the SQL conditional statement will be displayed in the Expression Box. You can type terms directly into the Expression Box. If the syntax is incorrect the conditional statement will be coloured red to indicate there is an error.
Operator Button Bank Button Description Notes ==
Equal to
<>
Not equal to
<
Less than
Adding a '=' symbol after the '<' will allow you to match conditions that are less than or equal to.
>
Greater than
Adding a '=' symbol after the '>' will allow you to match conditions that are greater than or equal to.
>=
Greater than or equal to
<=
Less than or equal to
AND
Joins two or more conditions and displays the data that satisfies ALL specified conditions
OR
Joins two or more conditions and displays the data that satisfies ANY of the specified conditions
NOT
Not like a specified pattern
An asterisk ( * ) can be used to match any possible characters that might appear before or after the characters specified, while the underscore (_) is used to match any single character that may appear before or after the characters specified.
LIKE
Like a specified pattern
An asterisk ( * ) can be used to match any possible characters that might appear before or after the characters specified, while the underscore (_) is used to match any single character that may appear before or after the characters specified.
( )
Should be used to enclose any field names that contain spaces or to enclose identifiers that match SQL reserved words
-
-
Use the New Rule Group checkboxes to group conditional statements together. The first rule that is satisfied will be applied until it hits a row that is defined as a start of a New Rule Group.
-
Select the Change Symbol check box to alter the object's symbol when the corresponding field matches a condition.
-
Click the
button in the Symbol Settings column to select the symbols that will be used to display the collars. The Collar Symbol Settings panel will be displayed.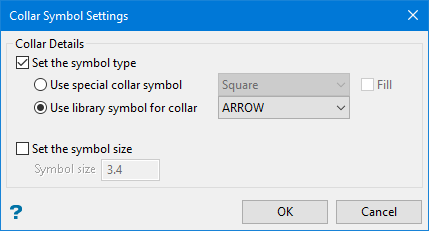
-
Set the symbols that will be used to display the collars in the Collar Details section.
-
Selecting Use special collar symbol will allow you to choose between a square, circle, or cross.
-
Selecting Use library symbol for collar will allow you a much larger selection taken from the symbols database.
-
Enable Set the Symbol size to enter a customised setting in the space provided.
-
-
Select Change Colour to alter the object's colour when the corresponding field matches a condition.
-
Select a colour from the current colour table. This column will be disabled if the Change Colour check box has not been checked.
-
Select Change Line if you want the style of the line to change.
Note: If this is selected, you will need to assign a line type.
-
Select the line thickness and style.
-
Click Change Primitive to enable editing the primitive shapes.
-
The Hole Primitive Settings panel is available by clicking the
button.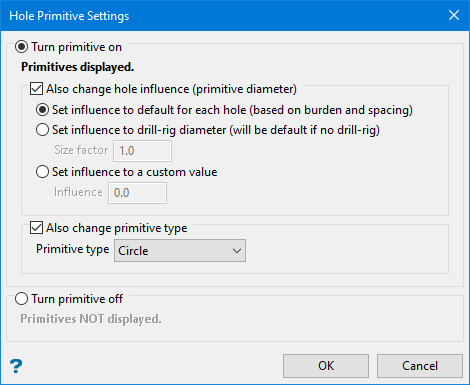
You can set primitives to be displayed or not displayed. If you want to display them there are some options you can set.
-
Select Also change hole influence (primitive diameter) to include the area of influence around the hole.
-
Select Set influence to default for each hole (based on burden and spacing) to set it to the default diameter.
-
Select Set influence to drill-rig diameter (will be default if no drill-rig) to set the diameter by entering a value for the drill-rig into Set value.
-
Select Set influence to a custom value to customise the diameter by entering the value into Set factor.
-
Select Also change primitive type to change the shape of the primitive. Use the drop-down list to make your selection.
-
-
Click Change Text to enable editing the text settings.
-
The Display Attributes panel is available by clicking the
button. The panel has two tabs: Collar Annotations and Downhole Annotations.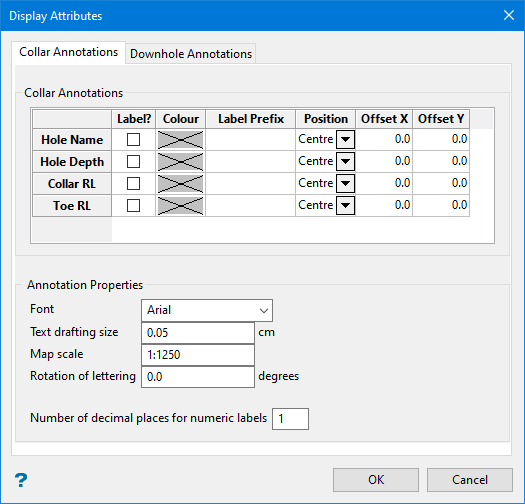
The Collar Annotations tab is used to set up the labels associated with the blasts. It determines which labels will be visible and where they will be located.
-
Use the Label checkbox to select which label will be displayed.
-
Click the Colour table cell to display the colour palette.
-
Enter any text you want to use as a prefix into the Label Prefix. cell
-
Use the Position drop-down list to select the position of the label.
-
Enter the distance away from the collar that you want the label to display into the Offset X/Y cells.
-
Set the Annotation Properties for the text.
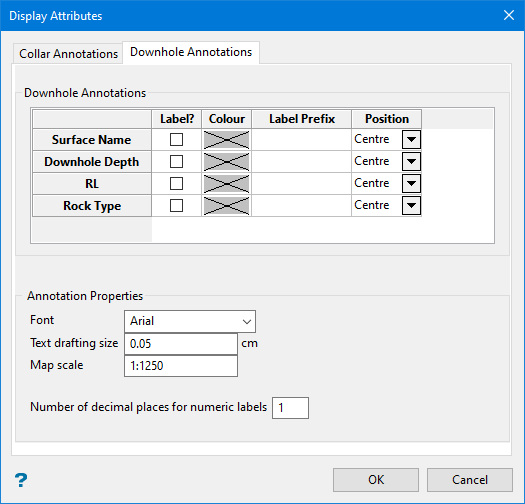
The Downhole Annotations tab is used to set up labels that will be displayed at the bottom of the drillhole. It determines which labels will be visible and where they will be located.
-
Use the Label checkbox to select which label will be displayed.
-
Click the Colour table cell to display the colour palette.
-
Enter any text you want to use as a prefix into the Label Prefix. cell
-
Use the Position drop-down list to select the position of the label.
-
Set the Annotation Properties for the text.
-

