Specifications
Reporting specifications
This option allows you to set up the details for Analysis and Reporting > Reporting.
Instructions
Follow these steps:
-
On the Drill and Blast menu, point to Files, then click Specifications.
-
Select Reporting specifications from the Specifications panel, then click OK to display the Edit Report Format panel.
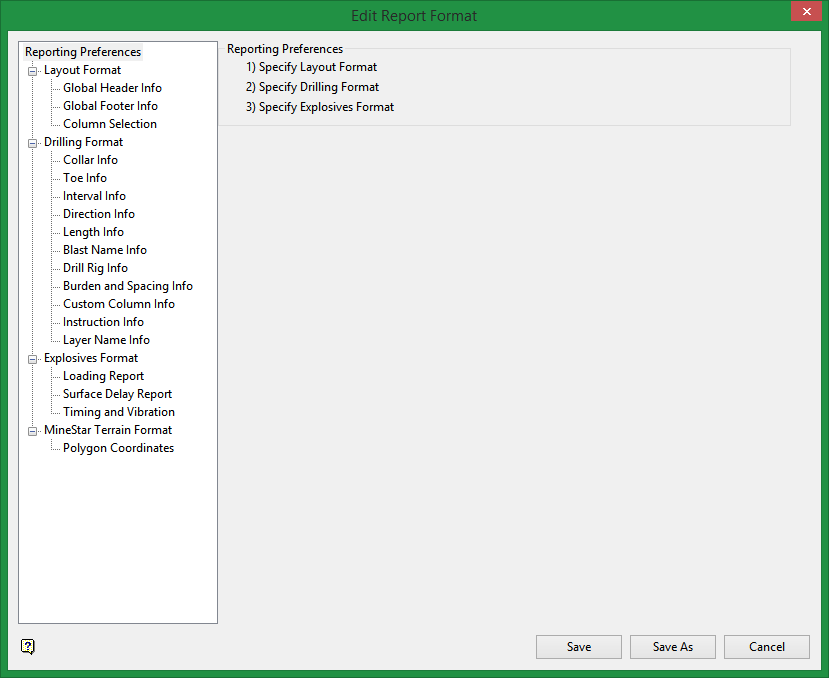
This panel will help you set up reports for the Drill and Blast module. When report specifications are created, you only need to select the blast, where to save the report, and which report format to create reports.
When saving a specification, the information will be written to file. The Save As button allows you to save under a new name, you can load an existing specification, modify it and save it as a new specification. Click Cancel to cease creating or making changes to the specification.
There are four sections to this panel:
Layout Format
This section enables you to customise the layout of the report. You can enter summary information such as header and footer notes, blast information, as well as drill rig information, drilling totals, rock type, and blast volume.
Follow these steps:
-
Click Display Header Notes to enable the three textboxes. Use these textboxes to include notes in the header of your report.
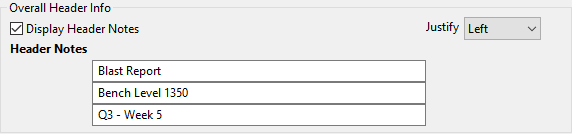
Note: The Global Header Info and Global Footer info panes contain the same options and allow data to be summarised at the beginning or end of the report, or both.
-
Click the options that you want to include in your report. Use the Justify drop-down menu to position the text on your report.
-
Blast Info - Adds the blast name to the report.

-
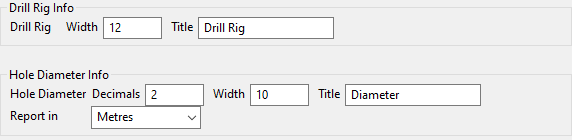
Report Drilling Rig Info - Adds the Drill Rig name. You can also include the Hole Diameter, Penetration Rate, and Calculated Drilling Time. The Decimals field allows you to specify the accuracy for each parameter and the Title box allows you to input the title you want to use for each parameter.

-
Report drilling length total and number of holes - Provides the total drilled metres.

-
Summarise Rock Type - Reports the rock types and gives the total metres drilled in each rock type.

-
Report blast volume - Reports the overall blast volume. You also have the option to include subdrilling and standoffs in the volume total.

-
-
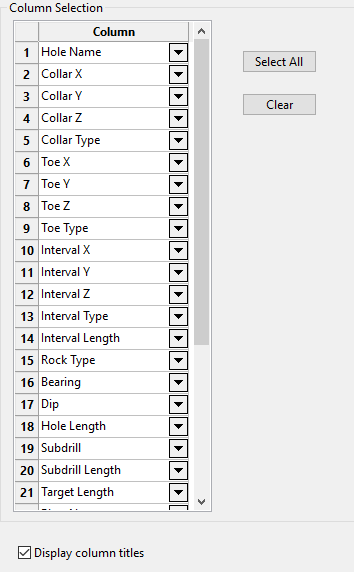
Proceed to Column Selection to select the information you would like reported. Use the drop-down list to select each option, or click the Select All button to populate the column selections with all available choices.
 Note
NoteYou will be able to enter information about each column in the Drilling Format section of the panel. Note that each area of the Drilling Format section is disabled by default until it is selected from these drop-down options.
Drilling Format
Use this section to enter detailed information about the collar, toe, interval, direction, length, blast name, drill rig, burden and spacing, setting up a custom column, information about sub-drilling, and layer information.
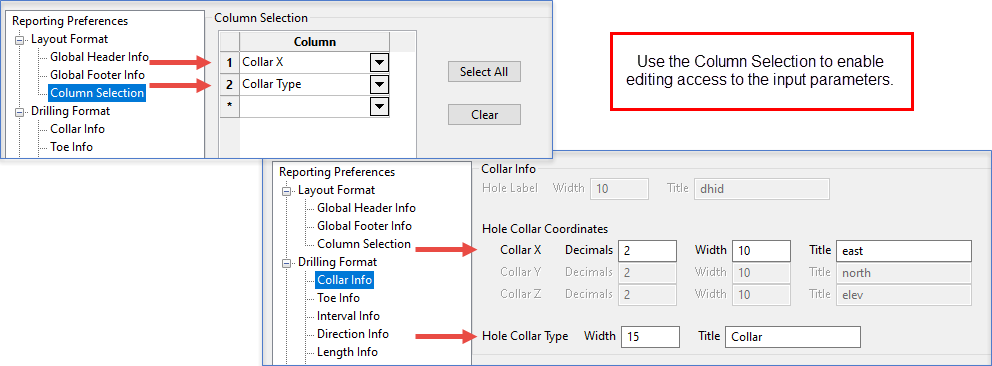
Note: You will not be able to edit these parameters until they have been selected from the Column Selection pane.
-
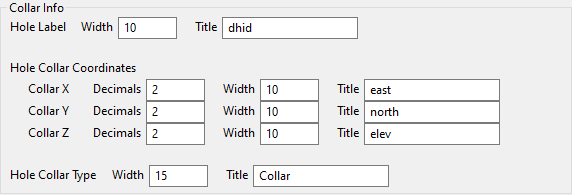
Collar Info - Enter information to set the column widths, decimal places, title (or column header) for the hole label, collar details, and collar type.
-
Toe Info - Enter information to set the column widths, decimal places, title (or column header) for the hole label, and toe type.

-
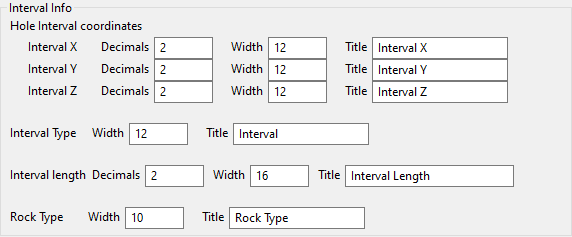
Interval Info - Enter information to set the column widths, decimal places, title (or column header) for the interval label, interval type, interval length, and rock type.
-
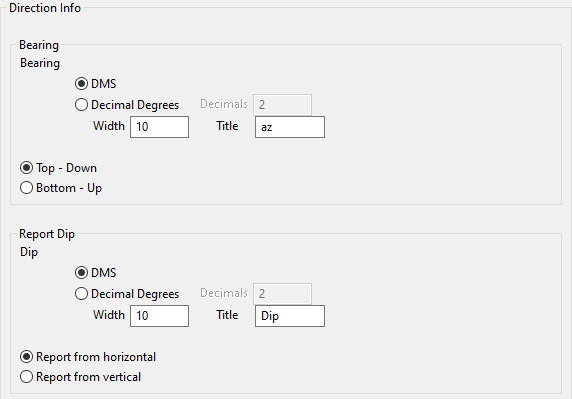
Direction Info - Enter information about the bearing and dip of each hole, and select whether to report from horizontal or vertical orientations.
-
Specify the bearing and dip in DMS (degrees minutes seconds) or Decimal Degrees.
-
Select whether to report the bearing from the top down or bottom up.
-
Select whether to report the dip from the horizontal or vertical.
-
-
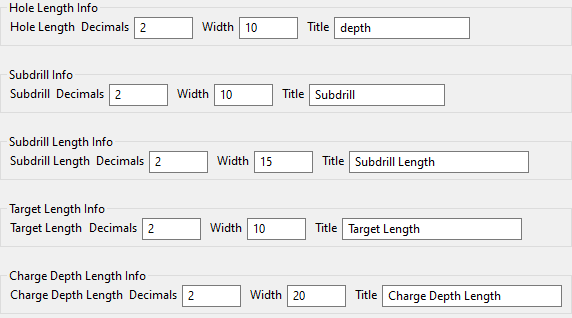
Length Info - Enter information to set the column widths, decimal places, and title (or column header).
-
Blast Info - Enter information to set the column width and title (or column header).

-
Drill Rig Info - Enter information to set the column widths, decimal places, title (or column header), and the units of measurement that are to be used.
-
Burden Info - Enter information to set the column widths, decimal places, and title (or column header).

-
Custom Column Info - Enter information to set the column widths and title (or column header).

-
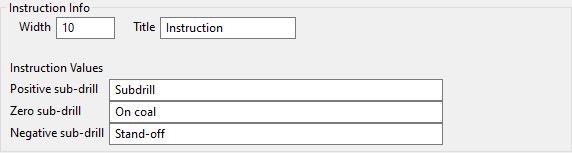
Instruction Info - Enter the column width and the title (column heading). Define the terms that will describe the values for Positive sub-drill, Zero sub-drill, and Negative sub-drill.
-
Layer Name Info - Enter information to set the column widths and title (or column header).

Explosive Format
Use this section to enter information about loading, surface delays, and timing.
-
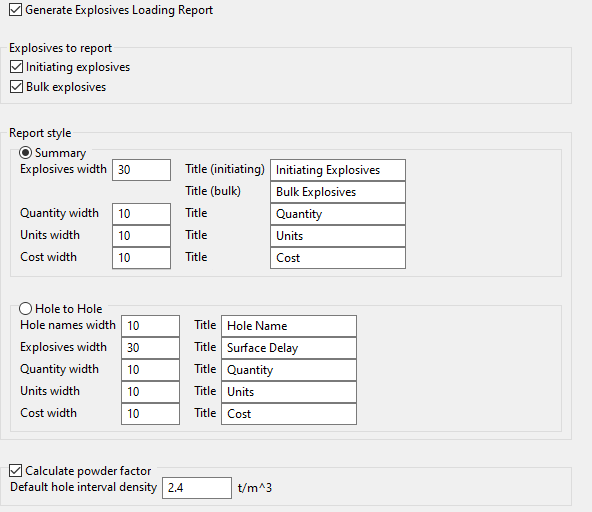
Loading Report - This option allows you to add extra information to the reports using explosives information. By checking the Generate Explosives Loading Report box, options are made available to add explosives cost and quantity information to the report.
-
Select the Explosives to report. You can report on Initiating explosives and/or Bulk explosives. If both boxes are unchecked nothing is reported.
-
Select the Report style.
-
Summary - Summarises explosive cost information at the footer of the report.
-
Hole by Hole - Report adds an extra row at the footer of the report for each type of explosive in each hole with information on the quantity and cost. For example, when using Hole by Hole reporting, a row is generated for the primer, det and bulk explosive quantities, and cost for each hole (i.e. three rows per hole) in the blast.
-
-
-
Surface Delay Report - This option allows you to add extra information to the reports using surface delay information.
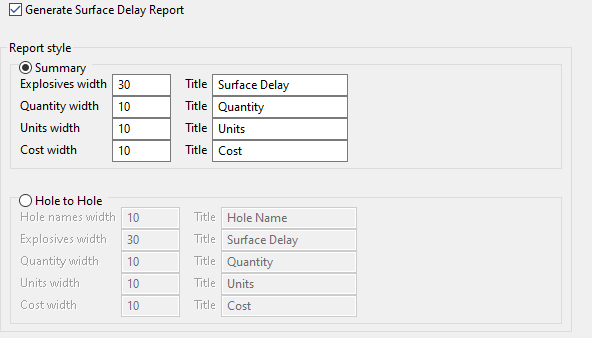
Select the Report style.
-
Summary - Summarises explosive cost information at the footer of the report.
-
Hole by Hole - Report adds an extra row at the footer of the report for each type of explosive in each hole with information on the quantity and cost. For example, when using Hole by Hole reporting, a row is generated for the primer, det and bulk explosive quantities, and cost for each hole (i.e. three rows per hole) in the blast.
-
-
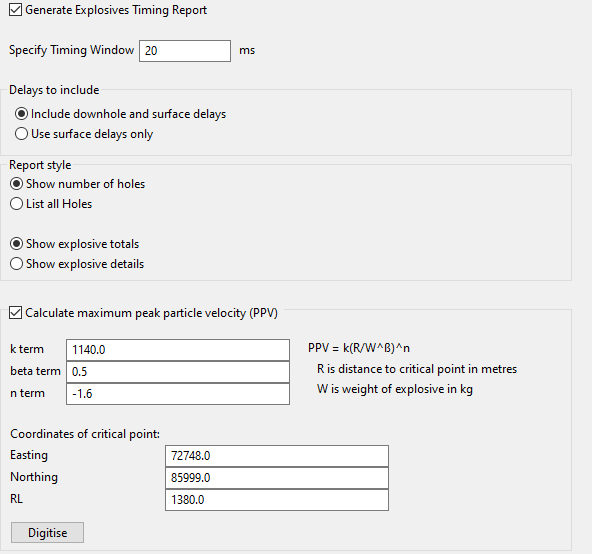
Timing and Vibration - This option allows you to report on the blast at specific intervals. For this report, the explosive tie-ins need to be completed. Selecting Generate explosives timing report will add a timing report to the footer of the report.
-
Enter a time (in milliseconds) into Specify Timing Window. This is the reporting interval. For example, using 20 ms as reporting intervals, information will be generated for 0 to 20 ms, 20 to 40 ms, 40 to 60 ms, etc., until the end of the blast.
-
Select a Report style for holes detonating in a timing window or the explosive quantity detonating in a timing window.
-
Show number of holes - Each timing interval is reported.
-
List all Holes - The hole name(s) that are detonating in that window is reported.
-
Show explosive totals - Reports on the amount of bulk explosive detonated in each timing window.
-
Show explosive details - Reports the amount of each bulk explosive detonated in each timing window.
-
-
Select Calculate maximum peak particle velocity (PPV), if you want an estimation of the PPV at a specific coordinate. The factors used in the calculation must be entered for the terms
k,beta, andn. -
Enter the Coordinates of the critical point by typing in the Easting, Northing, and RL in the appropriate box. You can also click the Digitise button and select the point in the Vulcan window. When the report is created, the maximum PPV and interval in which this occurs is calculated.
-
MineStar Terrain Format (optional)
This section is for the machine guidance system designed for Caterpillar machinery. It supports the selection of polygon coordinates.
The MineStar Terrain format lets you select objects to report on. In this panel you can select the order in which each object is reported on, and the number of decimal places allowed for polygon attributes. Northing, Easting option corresponds to an Y then X order, while Easting, Northing corresponds to a X then Y order for polygon attributes.


