Writing a more complex workflow - component configuration
While the previous example in the section Writing a more complex workflow - connector configuration, focussed on connector configuration, the following example concentrates on setting components. In particular, we want to show how repetitive tasks can be automated using the Workflow Editor.
In the upcoming workflow, we:
-
Feed a list of integers as an input.
-
Modify each integer by a factor of 5.
To create this workflow:
-
Initialise a new workflow.
-
Add a Script Engines > Python Expression component to the workflow.
-
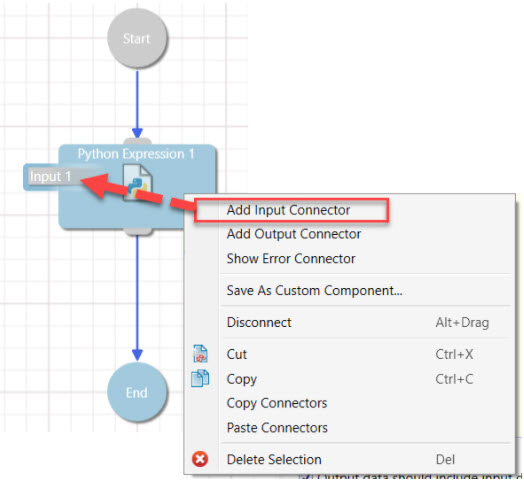
Add an Input connector to the Python Expression by right-clicking the component and selecting Add Input connector.
-
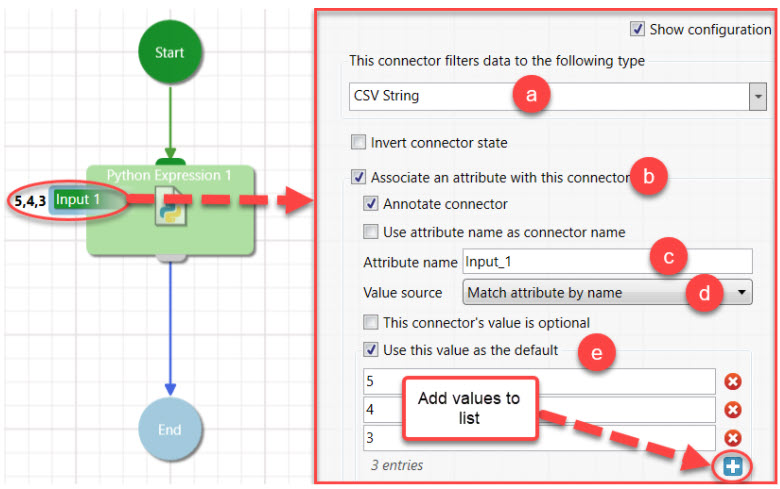
Configure the Input connector by completing the following steps:
-
Set the attribute type to CSV String.
-
Check the Associate an attribute with this connector checkbox.
-
Set the attribute name to Input_1.
-
Check the Use this value as a default checkbox. Set the default value to a list with the following values: 5, 4, 3. You can add more values to the list by clicking on the plus button.
-
-
Add an Output connector to the Python Expression component.
-
Configure the Output connector by completing the following steps:
-
Set the type to Integer.
-
Check the Associate an attribute with this connector checkbox.
-
Set the Attribute name to Output_1.
-
Set the Value source to Match attribute by name.

-
-
Click on the Python Expression component to enable the configuration panel on the right. Configure the Python Expression component by completing the following steps:
-
Write the following code in the text editor. Note that we refer to the iterator name instead of the attribute name.
Output_1 = int(iterator) + 5
-
Expand the Add LOOP section.
-
Set Loop type to Over the items in a list.
-
Set List to From a named attribute.
-
Set Attribute name to Input_1.
-
Leave Iterator name as is (it is automatically set to iterator).
-
Set Loop over to This and subsequent components (we will be adding another component to the workflow).

-
-
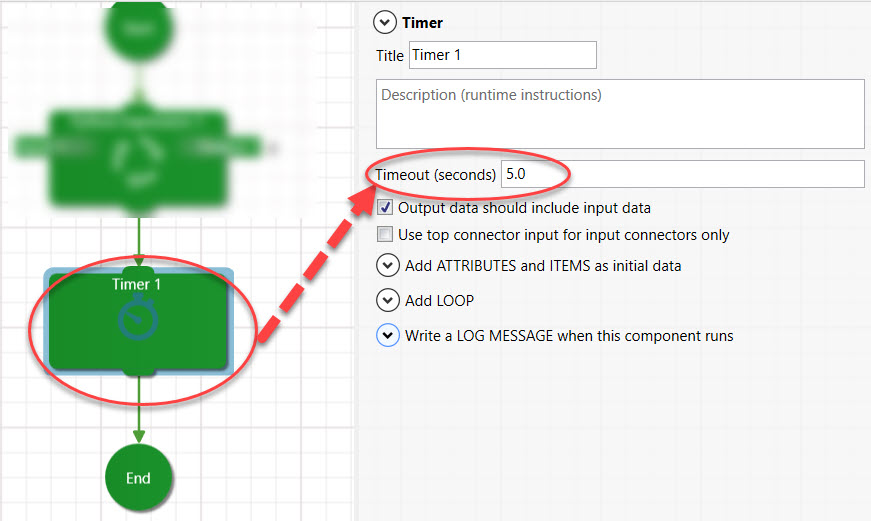
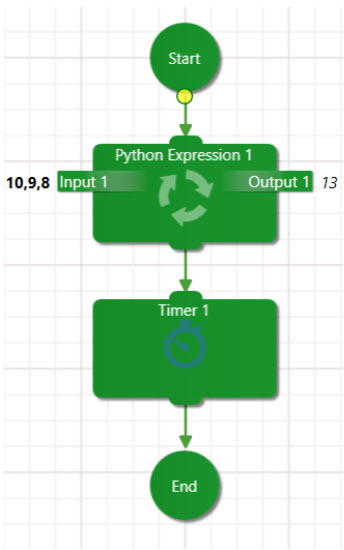
At the moment, if you play the workflow, you will only be able to see the last number in the list update. To properly view all numbers in the list update, add a Timer to introduce a delay for each operation. To add a Timer, go to General > Timer in the Toolbox and add it to the workflow.
-
Click on the Timer to configure it. To configure the Timer, set the Timeout to 3 seconds.
-
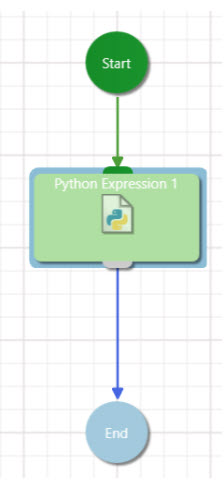
Run the workflow. Your final workflow should look like this.
Next topic: Defining Workflow Details and Settings