Create Task Lists
The Create Task Lists tab allows you to define a sequence of tasks which form a task list. More specifically, you can schedule geometric tasks, virtual tasks, delays and stockpile reclaims in task lists, which you can then assign to equipment in the Resource Allocation tab. Epoch also allows you to import task lists in a CSV file.
This tab contains the following task type sub-tabs:
- Geometric Tasks. This tab displays all of the solids in your setup pit(s), in terms of task keys. For information on defining task keys, see Define Task Keys.
-
Virtual Tasks. This tab displays any virtual solids. For information on creating virtual solids, see Virtual Solids.
-
Delays. This tab allows you to define and view delays.
After adding tasks to a task list, you can control the ending of each task by using ending conditions. Ending conditions allow you to specify if the equipment working on the task list should end a task early based on a given condition. You can also directly schedule stockpile reclaims by adding specific reclaim tasks to the task list.
Creating task lists
To create a task list, follow these steps:
-
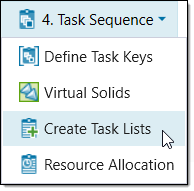
From the Configuration Setup Tabs, in the 4. Task Sequence drop-down, select Create Task Lists.
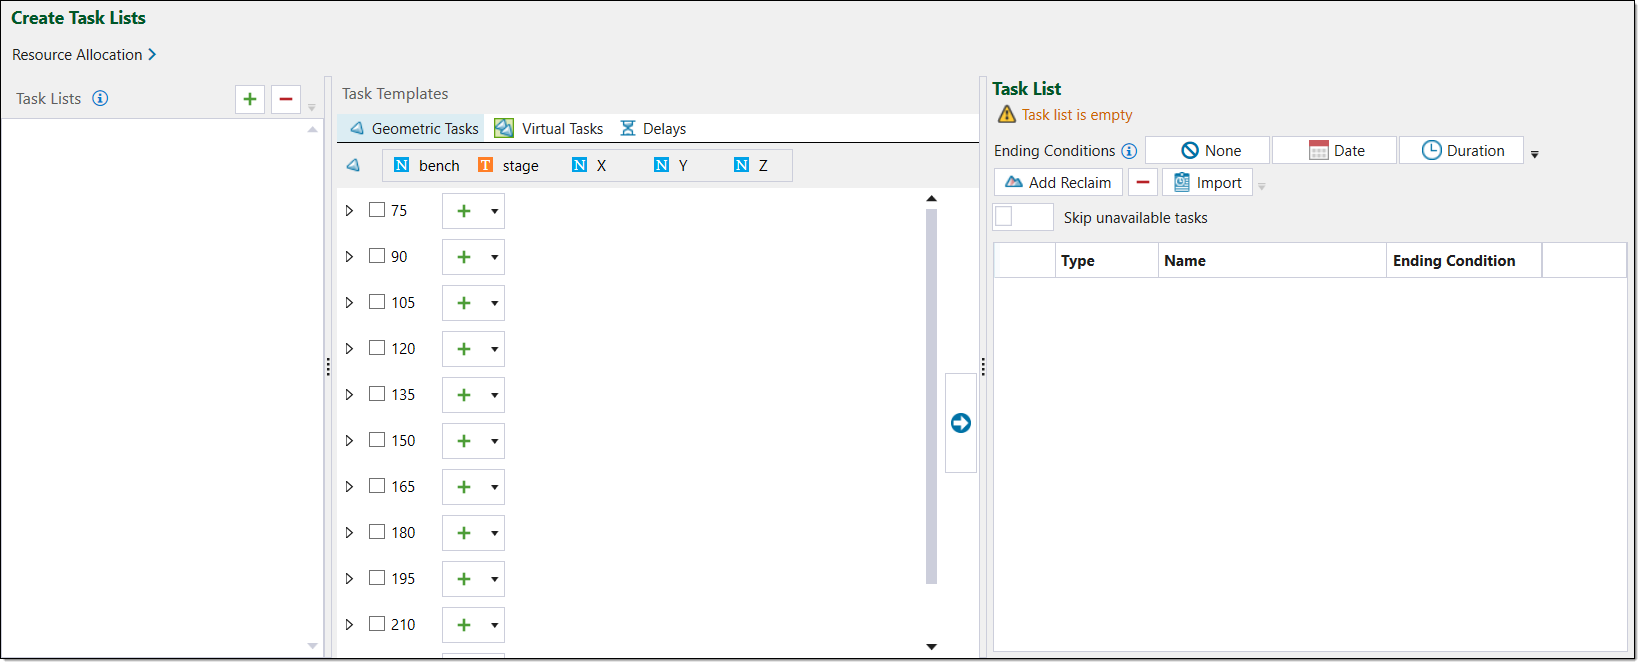
The Create Task Lists window will appear. This window contains three main fields:
- Task Lists. This field contains all of the task lists in your setup.
- Task Templates. This field contains tabs which display all of the tasks in your setup, categorised by task type.
- Task List. This field displays the task list selected in the Task Lists area. The task list is shown in the order the tasks are scheduled to occur.
-
Click
 to add a task list to the Task Lists field.
 -
Optionally, change the name of the task list in the Task Lists field.

-
Add tasks to the task list. Epoch contains three types of tasks which you can add to a task list. Use the following options to add the desired task type:
-
Geometric Tasks
To add geometric tasks, follow these steps:-
Select the Geometric Tasks tab from the Tasks Templates field.

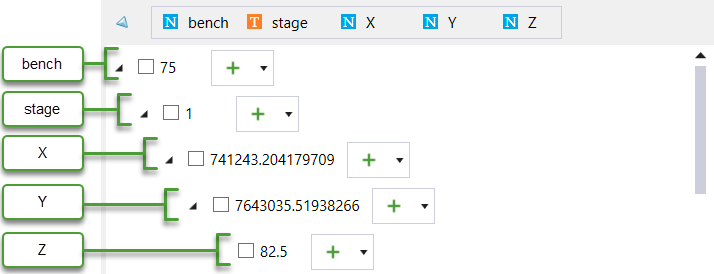
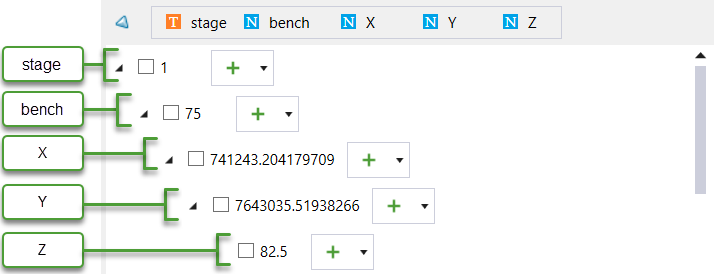
Epoch will display the geometric tasks in order of the task key definition. For example, if the task has the attribute definition of bench, stage, X, Y, Z, then the geometric tasks will appear in this order, in a hierarchical tree structure.
-
Optionally, rearrange the task key attributes to modify the geometric task tree structure. You can do this by dragging the desired attribute to the desired position.

Epoch will update the tree as you make these modifications.
-
Add geometric tasks using the following selection methods:
-
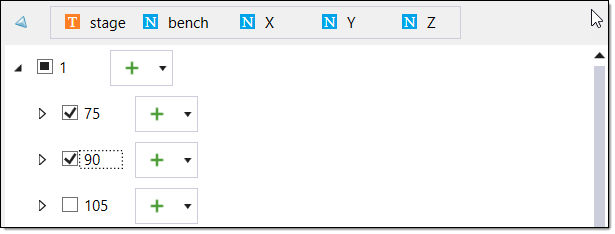
Full checkbox selection. You can select the higher level heading checkboxes to select all of the tasks under the checkbox heading.
You can add the selected tasks to the task list by clicking
 .
.
-
Partial checkbox selection. You can select individual tasks in each heading drop-down. Epoch will flag a heading which contains some selected tasks with the partially selected checkbox
 .
.You can add the selected tasks to the task list by clicking
.
-
Icon selection. You can select groups of tasks or individual tasks using the
icons next to each task heading. After clicking the icon, Epoch will automatically add the corresponding tasks to the task list. 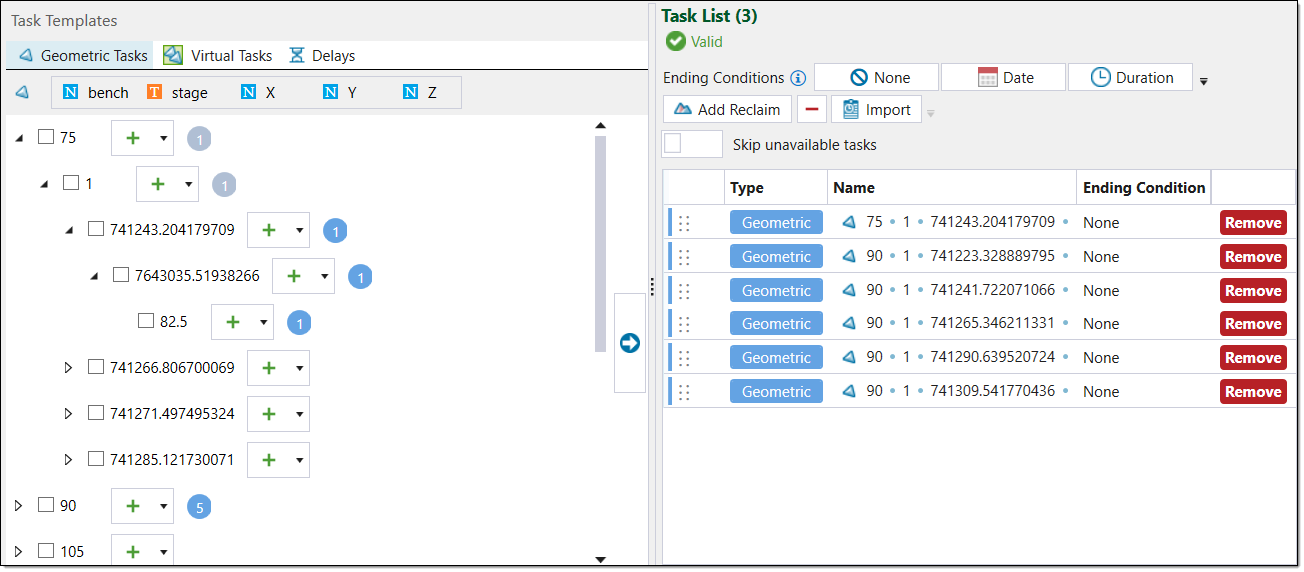
Optionally, you can add the tasks in the reverse order by clicking the
 drop-down and selecting Add in reverse order. Epoch will add the corresponding tasks to the task list, in the reverse order to how they appear in the Task Templates field.
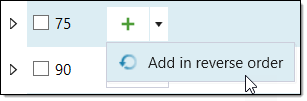
-
-
Optionally, you can rearrange the tasks in the task list by dragging them to the desired areas.
-
-
Virtual Tasks
To add virtual tasks, follow these steps:-
Select the Virtual Tasks tab from the Tasks Templates field. Epoch will display the virtual solids in the Tasks Template fields.
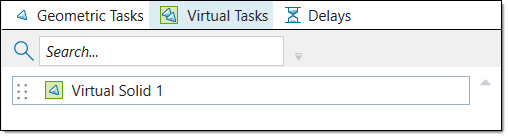
-
Find the desired virtual solid by scrolling through the list or by using the search bar.
-
Drag the desired virtual solid from the Task Template field into the desired position in the task list field.

Epoch will add the virtual solid to the table in the following form.

-
-
Delays
To create and add delays, follow these steps:-
Select the Delays tab from the Task Templates field.
-
Click
 to add a new delay template. A new delay row will appear in the field, with the default name Delay.
-
Optionally, enter a new name for the delay in the name area.
-
Set the duration of the delay by clicking
 and adjusting the days, hours and minutes.
-
Click Close.
-
Drag the delay from the Task Templates field to the desired position in the Task List table.

Epoch will add the delay to the table in the following form.

-
-
-
Optionally, add reclaim tasks to the task list. Reclaim tasks allow you to manually schedule stockpile reclaims to the schedule.
To add reclaim tasks to a task list, follow these steps:
-
Select Add Reclaim.

Epoch will add a Reclaim task row to the bottom of the task list.

-
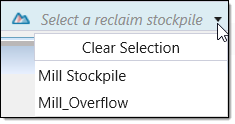
Select a stockpile for the reclaim task, using the Select a reclaim stockpile drop-down.
-
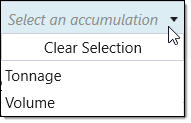
Select an accumulation type for the reclaim task, using the Select an accumulation drop-down.
-
Enter an ending condition value into the Ending Condition column cell of the reclaim row. The equipment assignment to this reclaim will end the reclaim once this value is met.

Tip! Each setup can have manual or automatic stockpile reclaim behaviour. If automatic behaviour is selected, Epoch will ignore any reclaim tasks defined in a task list. To turn on manual reclaiming behaviour, see the Reserve stockpile configuration settings. -
-
Optionally, add ending conditions to the tasks. To do this, follow these steps:
-
Select the desired task from the Task List field. You can also add the same ending condition to multiple tasks by using the keyboard shortcut Ctrl while selecting.
-
Select the desired condition type button.

There are four types of conditions:
-
 None: This condition says the task should be completed in its entirety before the next task begins. In other words, the task has no ending condition.
 -
 Date: This condition ends the task at a specified date.
 -
 Duration: This condition ends the task when a specified duration of time has passed. Delay task types only support duration ending conditions.
 -
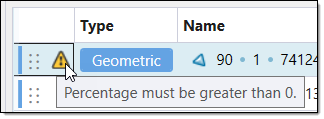
 Percentage: This condition ends the task when a specified percentage of the total work to complete the task, is done.Note:
If a percentage of a task has already been completed, the percentage ending condition is measured from the initial required work of the task and not the remaining percentage of work required.
-
-
Configure the conditions with the following:
-
A None condition requires no configuration.
-
For a Date condition, a date field will appear in the Ending Condition column of the Task List table. Enter the desired date by selecting
 and using the drop-down calendar. Click Close to save the selected date.
-
For a Duration condition, a duration field will appear in the Ending Condition column of the Task List table. Enter the desired duration by clicking
and using the drop-down duration panel. Click Close to save the selected duration.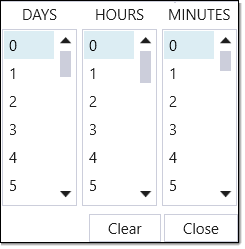
-
For a Percentage condition, a percentage field will appear in the Ending Condition column of the Task List table. You can specify the percentage by double-clicking in the field and entering a value. You can also use the arrow icons to adjust the percentage value.

-
-
-
Optionally, choose to skip unavailable tasks by selecting the Skip unavailable tasks filter.
Importing task lists
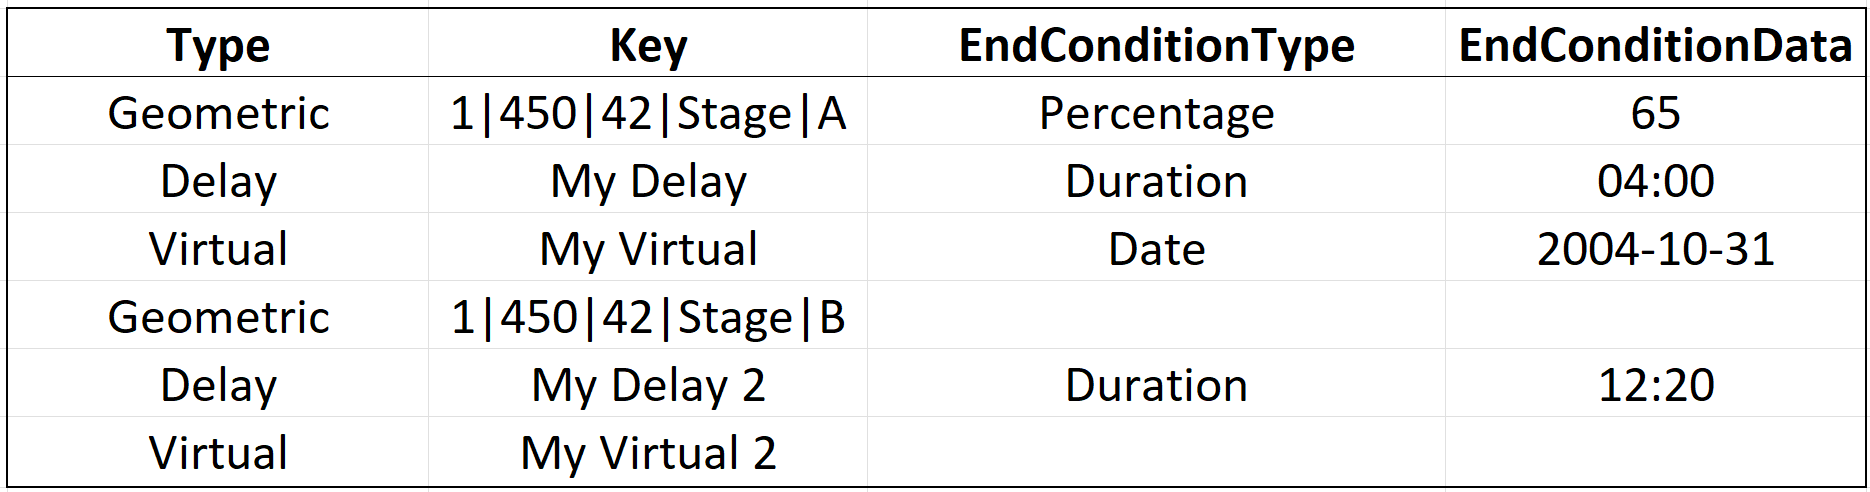
Epoch allows you to import tasks lists in CSV files. The CSV file must contain the following column headings and information:
-
Type. The Type column contains information on the type of each task in the task list. A task can be one of the following types:
- Geometric: A task associated with a solid within a setup model.
- Virtual: Additional site material which has no associated geometry.
- Delay: Ad-hoc delays such as maintenance or breaks.
- Reclaim: Manually scheduled stockpile reclaims.
-
Key. The Key column contains the following for each type:
- For Geometric tasks, the key must be unique.
- For Virtual Solid tasks, the key must match the key of the virtual solid in the setup.
- For Reclaim tasks, the key is the name of the desired stockpile.
-
EndConditionType. The End Condition Type column contains the type of ending condition associated with a task. This column is optional for all tasks except Delays which must have an ending condition. A task can have one of the following ending conditions:
- Date
- Duration
- Percentage
- Accumulation (reclaim tasks only)
-
EndConditionData. The End Condition Data column contains the criteria for an end condition. This column can be left blank unless an End Condition Type is specified. For example, for a percentage EndConditionType, the EndConditionData must be a percentage value.
Note:Delay task types only support duration ending conditions (EndConditionType). Additionally, you can only assign the accumulation ending condition (EndConditionType) to reclaim task types.
An example CSV file format is pictured below.
To import a task list in a CSV file, follow these steps:
-
Select Import.

The file explorer will open.
-
Select the desired task list file (*.csv) from the Task List File explorer.

-
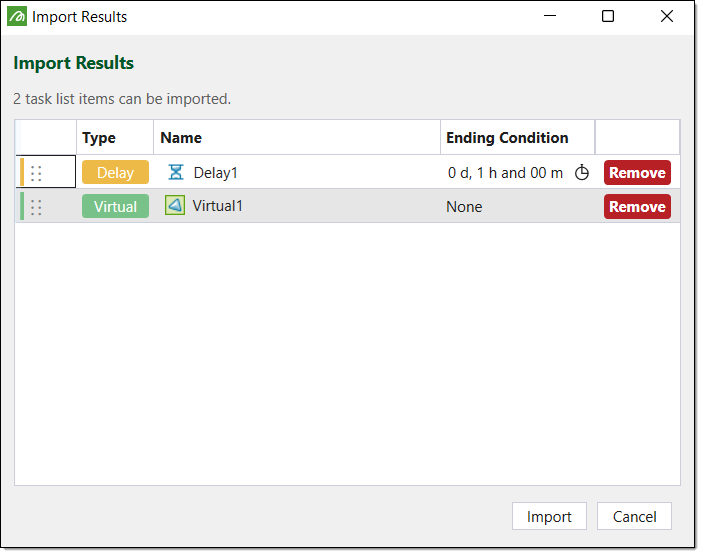
Click Open. The Import Results panel will appear.
-
Click Import to import the task list. Epoch will add the task list to the Task List table field.
Other operations
-
To add a new task list, click
. 
-
To remove a task list, select the desired task list and click
 .
.
-
To remove a task from a task list, select the Remove button corresponding to the task.

-
If the task list contains warnings, you can skip to the tasks with warnings by selecting Next warning.

-
To view the warning message associated with a task, hover over the warning symbol icon. You can still proceed with scheduling without addressing these task warning messages. However, Epoch will ignore these tasks as they are missing information required for scheduling.