Scanning with Maptek Drive
Maptek Drive is a vehicle-mounted mobile scanning platform that allows scans to be acquired while driving. Drive uses an inertial navigation system (INS), an RTK rover, and a GPS receiver to provide accurate position, orientation, and motion information as the vehicle moves.
Note: The GPS receiver must be connected to a GPS base station to provide accurate positioning.
Maptek Drive can be used to acquire the following:
-
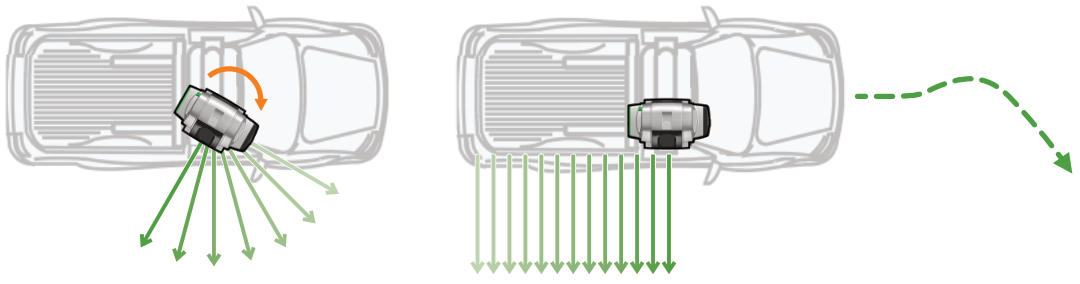
Driving scans. These are conducted from a moving vehicle. The scanner head does not traverse around the base to acquire the scan. Instead, the scanner faces in a fixed direction acquiring vertical columns of data. The vehicle moves at a roughly constant speed to provide the horizontal component.
-
Stationary scans. These are acquired while the vehicle is stationary. The scanner head traverses to acquire data as in a regular stationary scan, with the Drive system providing accurate position and orientation information.
-
Stop and go scans. These are stationary scans normally conducted with the scanner on the vehicle mount, without using GPS and INS.
|
|
|
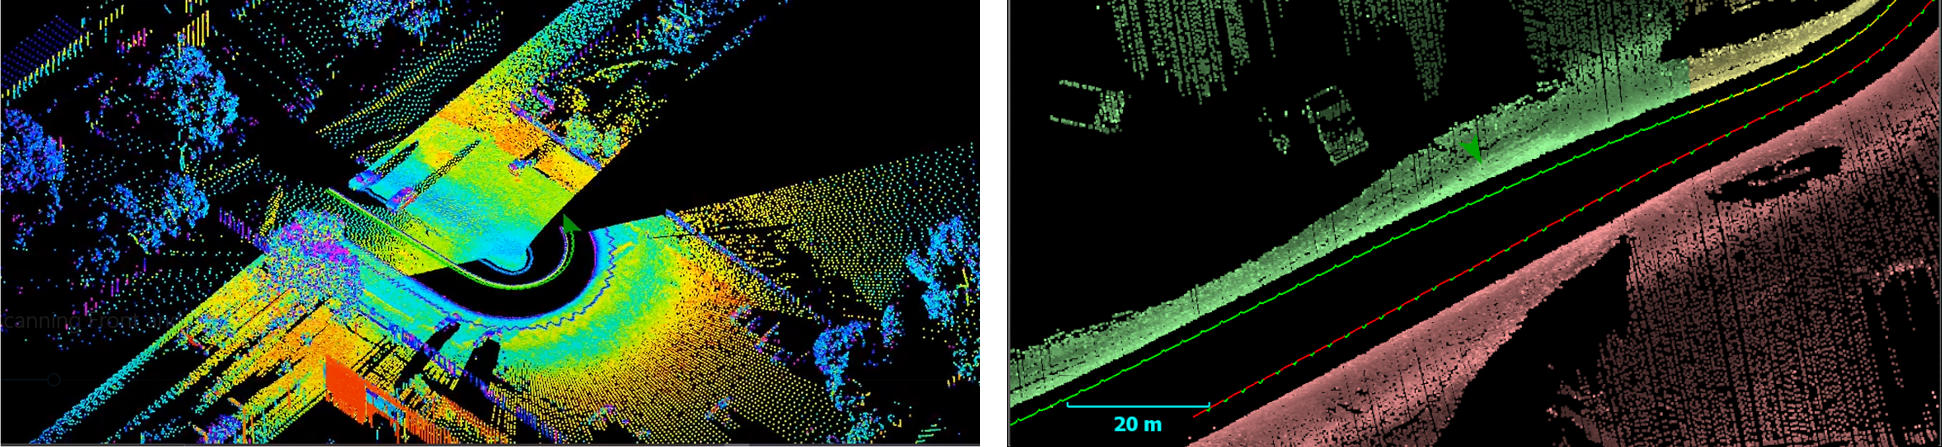
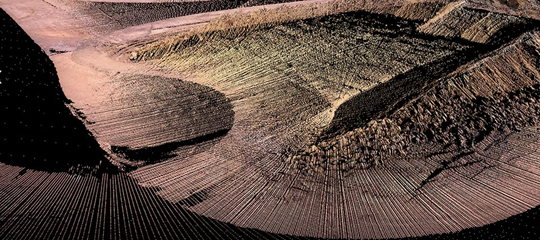
Figure 7-57 Left: A stationary scan acquires data from a traversing scanner head. Right: A driving scan acquires data from a fixed scanner direction while the vehicle is in motion. |
Connecting Drive to FieldHHC
To connect Maptek Drive to FieldHHC, insert the Drive USB cable into the FieldHHC USB port. FieldHHC will detect that Drive is connected and enable Drive-specific features.
When connected, the FieldHHC status bar displays the Drive system status, giving the standard deviations for the INS azimuth and the GPS position. The background of these indicators change from red to yellow to green as the measurement accuracy improves.
|
|
|
Figure 7-58 INS azimuth and GPS position status indicators in the status bar. |

The GPS typically establishes connections to available satellites quickly and is first to provide an accurate scanner position. The INS requires an alignment process to be completed before driving scans can be started.
Performing the alignment routine
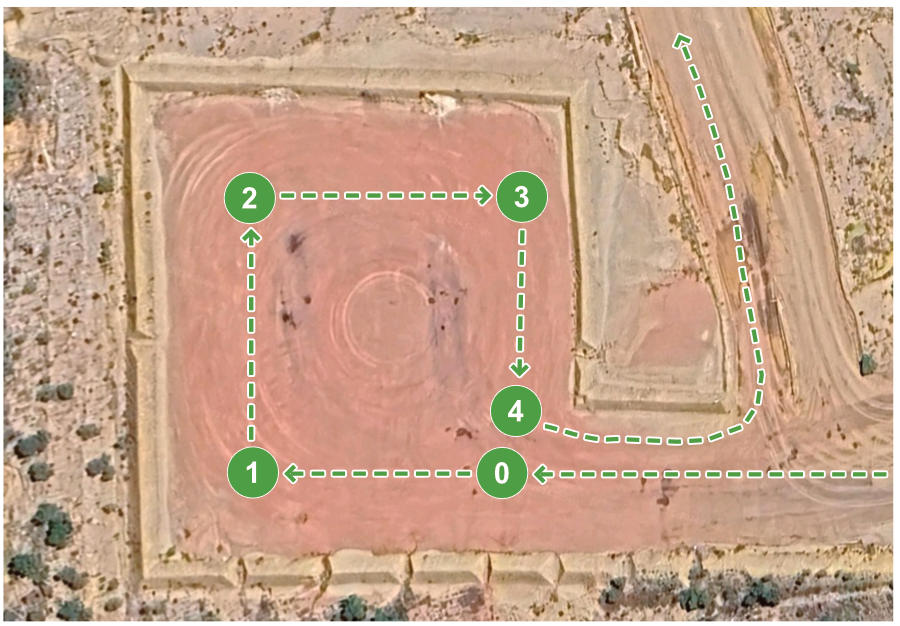
The Drive INS system needs to undergo an alignment routine before you can acquire scans. The routine involves driving along a set course until the required accuracy is achieved. The area where the alignment is performed should:
-
Be relatively flat
-
Be well away from large obstacles that may affect GPS reception
-
Allow you to drive uninterrupted in a square pattern approximately 50 m (160 ft) in length
Follow these steps to carry out the alignment:
-
Ensure that the Drive system is installed correctly, powered on, and connected to FieldHHC.
-
Move the vehicle to the start position (position
 in Figure 7-59) so that the vehicle is pointing in the direction of the first corner of the square (position
  ).
). -
In FieldHHC, switch to the
 Setup tab and make sure the
  Defined Name - Drive subtab is selected.
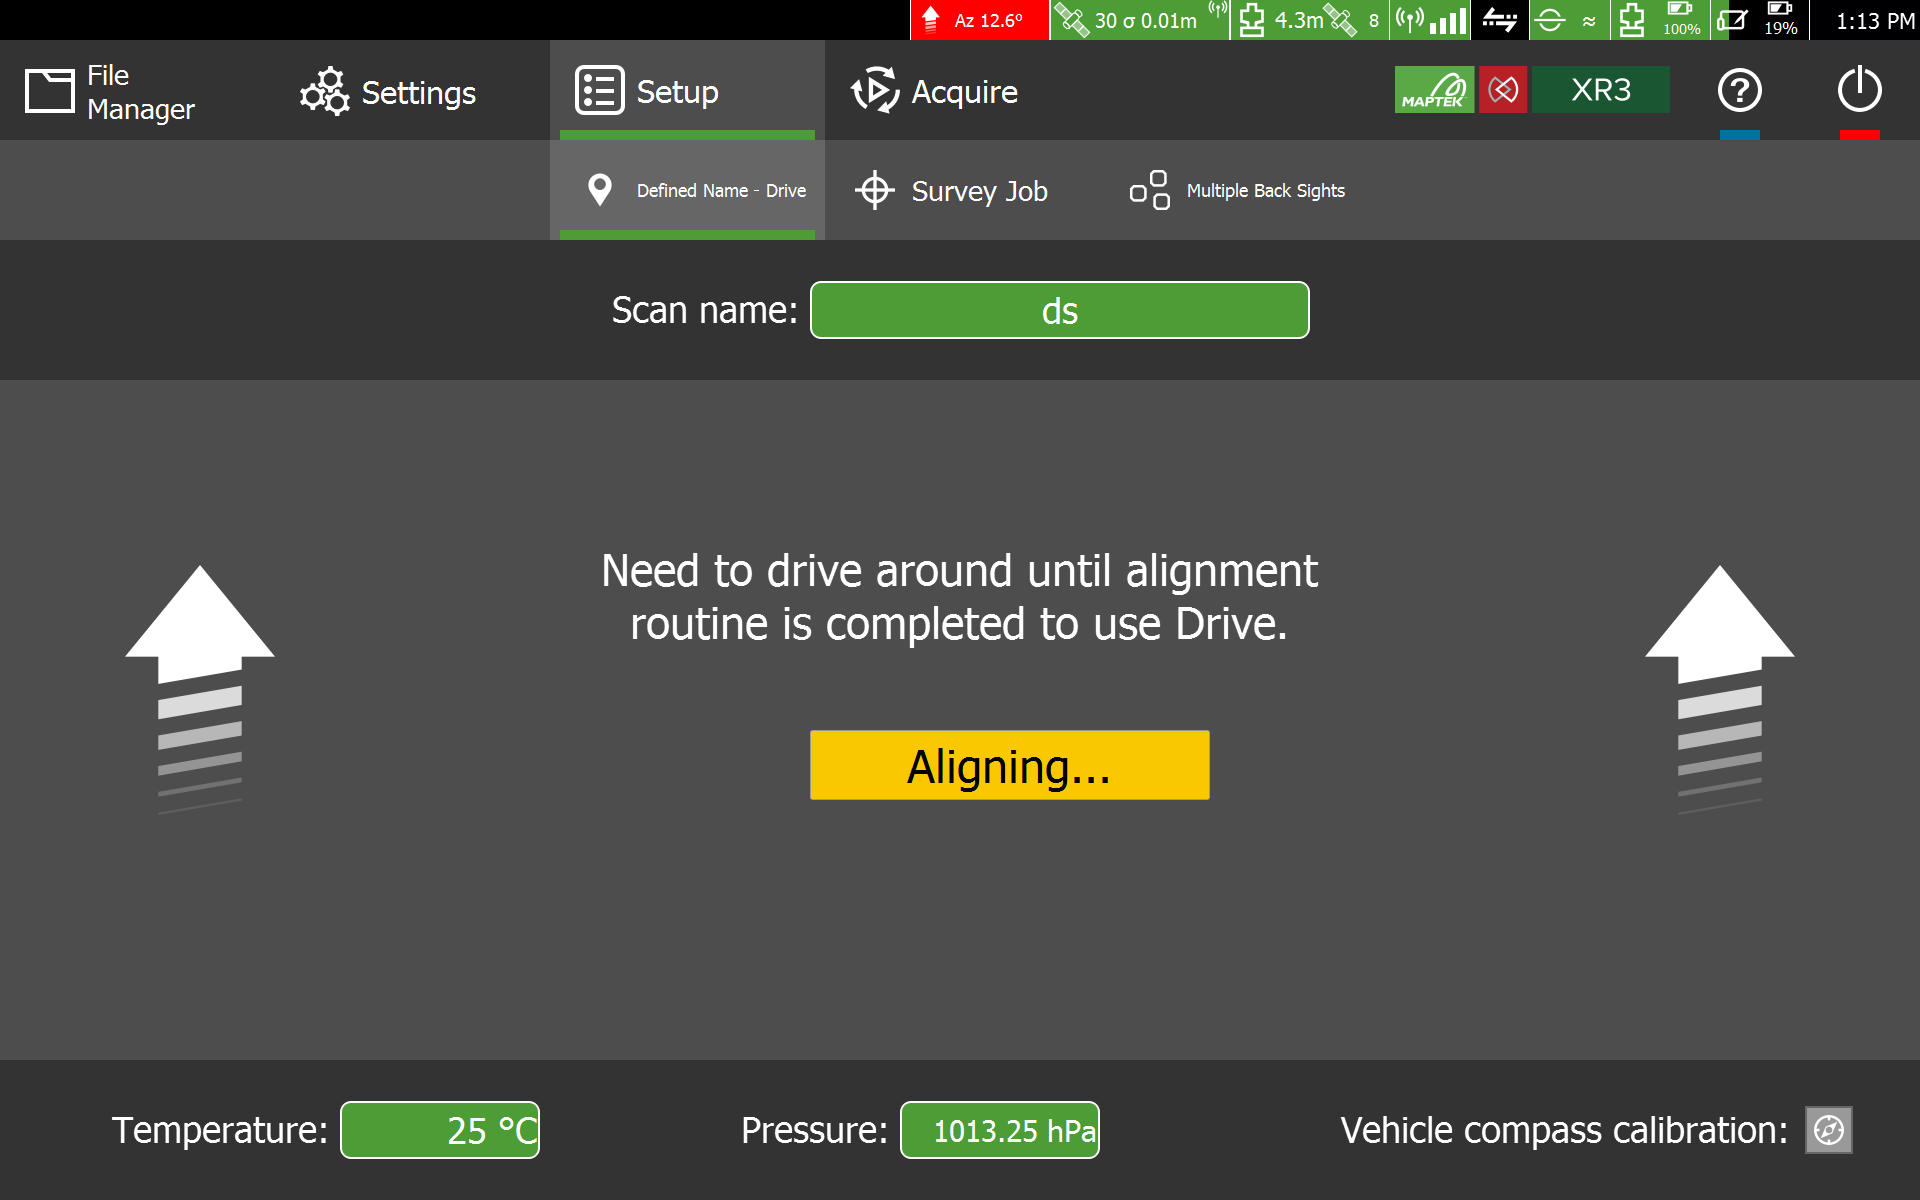
-
Remain stationary until the status bar indicates the following:
-
The GPS position has achieved a good fix.
-
The Az (azimuth) indicator has settled to 20° or less. If necessary, power cycle the Drive system and allow 45-60 seconds for the INS to settle.
Important: The vehicle must remain stationary until the azimuth indicator has settled, otherwise the alignment will not complete.
-
-
Begin driving in a straight line towards the next corner of the square, accelerating to 15-20 kph (9-12 mph), then come to a quick stop when you reach the corner.
-
Wait 10-15 seconds then turn the vehicle towards the next corner.
-
Repeat steps 4 and 5 for each leg of the square. When alignment is complete, the indicator should turn green and a message will display. The Az (azimuth) indicator should turn green and have a value of 0.04° or less.

-
Once alignment is completed, proceed directly to the scanning site and commence scanning. If the INS falls out of accuracy at any time, continue driving around until it falls back within the required level of accuracy.
Acquiring a driving scan
A driving scan is acquired while the vehicle moves. Before commencing a driving scan, make sure that the relevant Drive settings have been configured on the  Settings tab, and that the alignment routine has been completed.
The basic procedure for acquiring a driving scan is as follows:
-
In FieldHHC, switch to the
 Acquire tab.
 -
Note: The scanning speed used for driving scans is set in the
Settings tab under Configuration. See Configuration settings for details. -
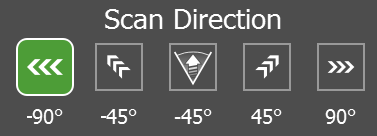
Set Scan Direction to the desired direction the scanner should face while scanning.
-
Configure other scanning settings as required. See Acquiring scans for detailed information.
-
Tap the
 Scan button to commence a countdown sequence. Begin driving your course. Scanning will commence when the countdown ends.
 -
Maintain a constant vehicle speed while scanning. The recommended maximum vehicle speed depends on the Driving scanning speed (scan mode) configured in the
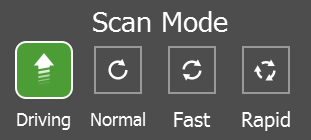
Settings tab, as follows:Scan mode Maximum recommended vehicle speed Normal 7 km/h (4 mph) Fast 14 km/h (9 mph) Rapid 28 km/h (17 mph) See Configuration settings for more information on scanning speeds for Drive.
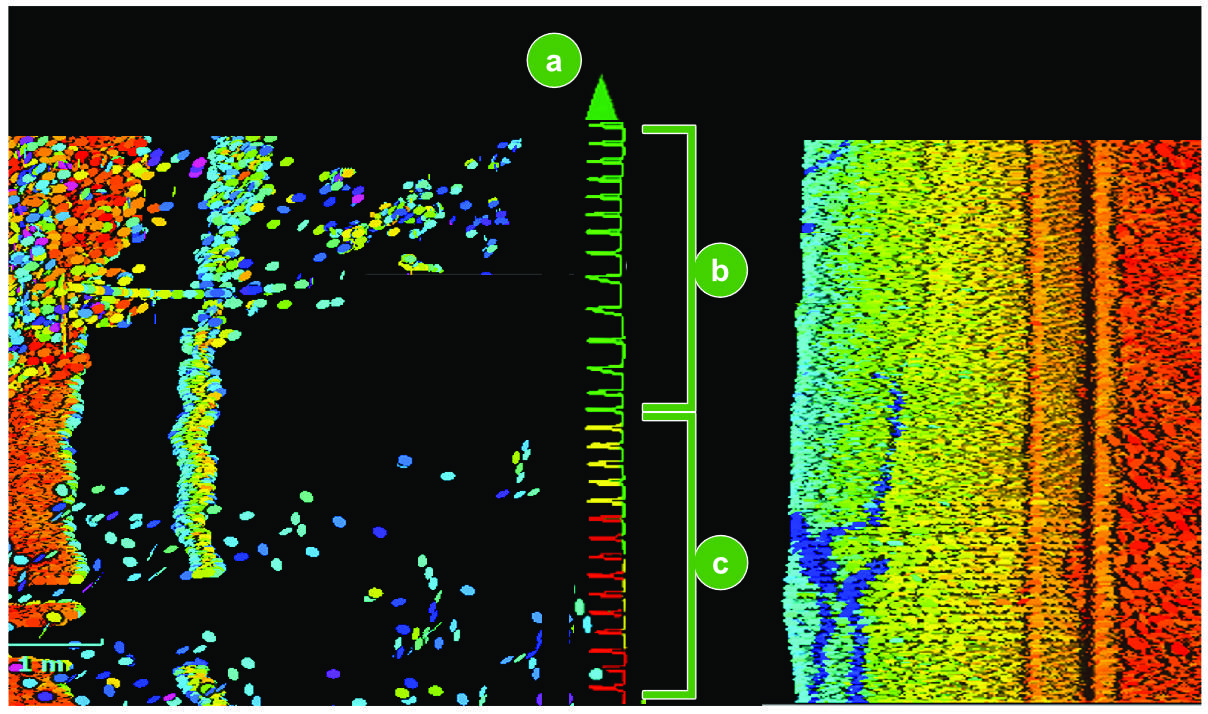
Data will appear in the viewer as you scan (see Figure 7-60). The vehicle’s path is indicated by a line consisting of spikes. These indicate your GPS and INS solutions, colour-coded to correspond with the azimuth and GPS indicators in the status bar (green = good, yellow = marginal, red = poor).

Vehicle direction

Good INS and GPS solutions 
Marginal/poor INS and GPS solutions Tip: Scanning will automatically pause when the vehicle comes to a stop and will resume when the vehicle starts moving again. You can also manually pause and resume scanning using the
 Pause scanning and
  Resume scanning buttons.Tip
While scanning, listen for audible beeps from FieldHHC. They sound in the following situations:
-
When scanning starts after the countdown ends
-
When the GPS position or Azimuth indicators lose accuracy
-
When scanning reaches its maximum running duration of 24 minutes
-
-
Tap the
 button to finish the scan.
Acquiring a stationary scan
You can take normal stationary scans while connect to Drive. These scans use the Drive GPS and INS systems to provide the position and bearing information.
Note: INS tends to drift over time while stationary and needs regular realignment by driving around for a few minutes between scans.
Note: The Drive system records a reference position just after the vehicle stops. Any subsequent movement after stopping may alter the position and alignment of the scanner with respect to this reference position.
For best results with stationary scans, ensure that the vehicle comes to a clean stop and does not move before or during scanning. Observe the following recommendations before taking a stationary scan:
-
When coming to a stop, ensure the vehicle’s direction does not change. This assists with maintaining INS accuracy.
-
Do not allow the vehicle to roll forwards or backwards once stopped.
-
Try not to move around inside the vehicle or exert any force that could make it tilt or sway.
-
Check that the GPS position and azimuth indicators have good readings after stopping (indicators should be green).
To take a stationary scan:
-
In FieldHHC, switch to the
Acquire tab. -
Set Scan Mode to a setting other than Driving, for example, Fast.
-
Configure other scanning settings as required and take previews and scans as normal. See Acquiring scans for detailed information.
Viewing Drive scans
File Manager displays driving scans in the panoramic viewer showing vertical shifts in the scanned scene (see Figure 7-61). This is normal and corresponds to the pitching or rolling motions experience by the scanner. Use the 3D viewer ( ) to view the scan with INS corrections applied.

|
|
3D colour schemes
Driving scans can be coloured using the same colour schemes as regular scans, with the exception that the uniform colour scheme ( ) in the 3D viewer colours scans according to the accuracy of the INS azimuth and GPS position solutions. This colour scheme uses green to indicate good accuracy, yellow for marginal accuracy, and red for poor accuracy.
See Scan colour schemes for more information on the regular colour schemes.
|
|