Load Hole 
Use Load Hole to load blastholes with explosive loadings.
This option can also be accessed by selecting the ![]() Load Hole button from the UG Explosives toolbar.
Load Hole button from the UG Explosives toolbar.
Important: Before you begin, open a blast database. For information on how to do this, see Open Blasthole Database.
Instructions
On the Underground menu, point to Ring Design, then Explosives Loading, and then click Load Hole.
If you have not already loaded a blast database, you will be prompted to do so. For more information on this panel, see Open Blast Database .
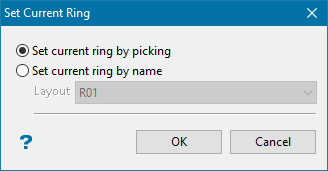
If you have not already set a current ring, you will be prompting you to pick a ring. For more information on this panel, see Display Rings.
The following panel displays.
Explosive Options
Refers to the explosive type used for the explosive columns and the loading interval used in the creation of the explosive columns.
Explosive type
Select the explosive type from the drop-down list. The list contains the explosive library found in the Blast Design Specification file.
Loading interval
When a blasthole is loaded with explosives, it is common practice to load to the nearest metre, foot or yard. This option to create explosive columns according to a loading interval and have the digitised explosive column snap to the closest loading interval. Check marks are displayed at loading interval points along the blastholes.
Load from end of hole
By default, the blastholes are loaded from the toe through to a minimum stem length. By enabling this check box, the To, or end point of an explosive column, is defaulted to the toe of the hole, with only the start or From point of the blasthole needing to be entered.
If the Display a circle around the end points check box is selected, only the start point has a circle displayed.
Display Options
Display stemming
Select this check box to display stemming material on your blastholes. Enter the required length of stemming, and select the colour and line type for the stemming.
Display a circle around the end points
Select this check box to display a circle around the end points. This assists with the creation of explosive columns that adhere to the minimum column spacing. It is possible to display a circle temporarily, with a radius equal to the minimum column spacing and centre, at the end points of an explosive column as it is drawn. If the radius is changed, then it is assumed that the minimum column spacing is being changed as well.
If this check box is selected, you will need to enter the radius for the circle. The radius equals the minimum column spacing for the ring.
Click OK.
Select a hole to load. A series to checks will be placed along the blasthole starting from the toe and working towards the blasthole collar. These checks are placed at the loading intervals of the blasthole.
Figure 1 : Blast hole.
Figure 2 : Select a from point, this is the start (To point) of the explosive column in the blasthole. This point can be dragged up and down the hole. If you selected the Display a circle around the end points option, then a circle with a radius equal to the minimum column spacing displays at the from point.
Cancel when you have finished dragging the from point. It is snapped to the closest loading interval or the end point of the blasthole.
Select the To point. If the Load from end of hole check box was not selected, you are prompted to select a To or end point of the explosive columns on the blasthole.
Like the From point, the To point can be dragged up and down the hole. If you selected the Display a circle around the end points option, then a circle with a radius equal to the minimum column spacing displays at the from point.
Cancel when you have finished dragging the To point. It is snapped to the closest loading interval or the end point of the blasthole.
Confirm the loading. Retain saves the loading and Reject removes it.
Cancel when you have finished digitising the explosive columns for this blasthole. Confirmation is required to save the new explosive columns to the blasthole database.

