Move Holes to Line
Use this option to move multiple blast holes in a selected direction until they intercept a designated line.
Instructions
On the Drill and Blast menu, point to Edit, then click Move Holes to Line.
Follow these steps:
-
Make sure that the drill holes have been loaded on the screen by using Drill and Blast > Files > Load.
Important: The drill holes must be loaded in this manner. If you load the drill holes onto the screen by loading a layer from the Vulcan Explorer they will not be recognised as drill holes.
-
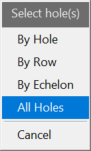
On the Drill and Blast menu, point to Edit, and then click Move Holes. The Select hole(s) dialog box is then displayed.
-
Select a method by which to select the holes using the dialog box. You have the choice of selecting By Hole, By Row, By Echelon., or All Holes.
By Hole - One hole at a time.
By Row - The entire row is selected. For example:
A01, A02, A03, A04,etc.By Echelon - Selection of holes all having the same Echelon ID property.
All Holes - Move all of the holes from a particular blast.
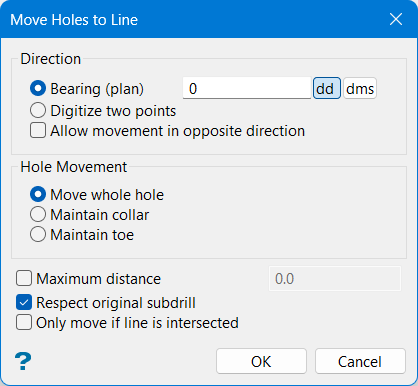
Once chosen, the following panel is displayed.
Note: You can also open this panel by selecting multiple holes, then selecting Move Holes to Line from the right-click context menu.
-
Set the direction to move the blast holes by selecting either Bearing (plan) or Digitise two points.
-
Bearing (plan) - Use this option to enter the exact direction in the space provided. The direction can either be entered in decimal degrees or degrees minutes seconds (ddd.mm.ss). To do so, select the appropriate format option and enter the value.
-
Digitise two points - Two points that represent the direction using the point order. When using this method, a line will be temporarily displayed extending from the first point location.
Note: Information about this temporary line such as distance and azimuth will be displayed in Vulcan Status Bar at the bottom of the window.
-
Allow movement in opposite direction - If the original direction does not intersect the line, check to see if the opposite direction does intersect the line.
-
-
Select the Hole Movement type.
-
Move whole hole - The entire hole will be repositioned.
-
Maintain collar - When repositioned, the position of the collar remains unmoved.
-
Maintain toe - When repositioned, the position of the toe remains unmoved.
-
-
Enable Maximum distance to set a limit on how far the hole will be allowed to move.
-
The Respect original subdrill option will be left enabled by default to maintain the normal use of the move tool, in which the subdrill will be maintained to the original value or calculated depending on an intersecting surface. If this option is disabled (unchecked), the subdrill value will be recalculated in order to maintain the distance from the start of the subdrill (the point) and the toe of the hole. This distance is in the direction of the vector of the hole.
-
Select Only move if line is intersected if you want to allow a hole to be repositioned only if it will intersect the line in the given direction. If the hole does not intersect the line, it will not be repositioned.
