Data
The Data group of the Home ribbon contains tools that allow you to import and export data in BlastLogic.

 Import
BlastLogic allows you to import the following objects:
- Blasts or selection of holes as CSV or DXF files
- Surfaces as triangulations (*.00t) or grid (*.**g) files
- Hole actual parameters and charge plans for import into SHOTplus
- Charge Rules as BLCAT files
- Charge data as CSV files
- Points from holes as a point text file (*.txt)
- Any published attachment, such as videos and scanned documents
To import a file, follow these steps:
-
On the Home ribbon, in the Data group, select
Import. The Import panel will appear.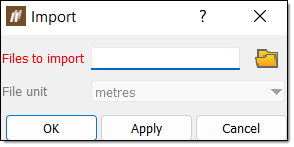
-
Click
 . The file explorer will open.
 -
Select the desired file and click Open.
-
Click OK or Apply to import the file.
Importing a CSV file
To import a CSV file, follow these steps:
-
On the Home ribbon, in the Data group, select
Import. The Import panel will appear.
-
Click
. The file explorer will open. -
Select the desired file and click Open. The Import panel will appear displaying the file content. The top row of text in each column displays the text in the comment header of the file.
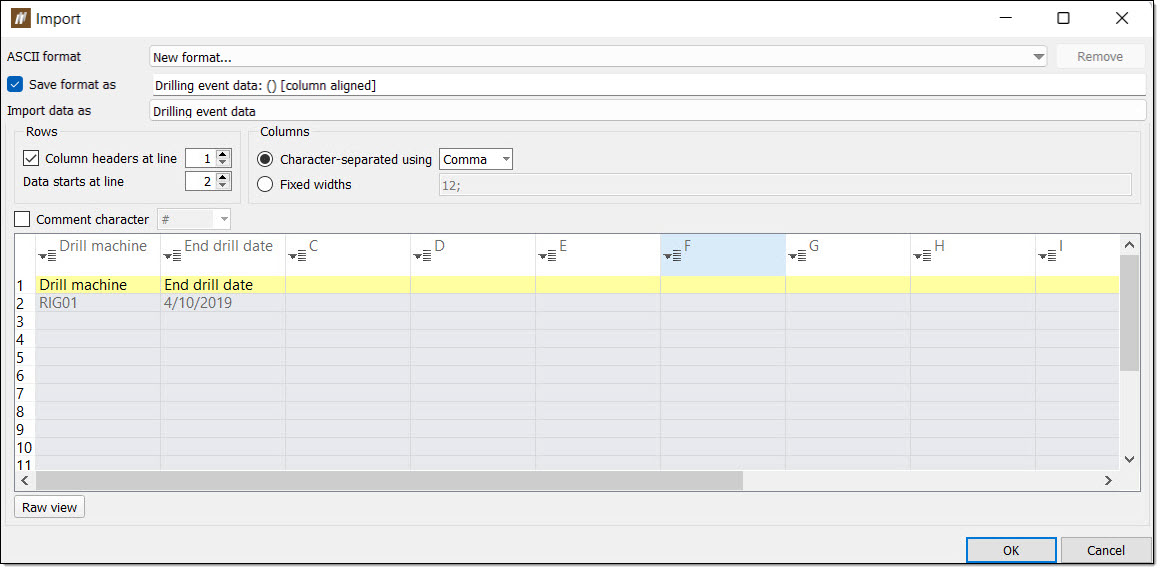
- Select New format... from the ASCII format drop-down. Note: Once you define and save the custom format, you can reuse this format the next time you import a blast with the same format.
-
Select an information type from the Import data as drop-down. This will automatically set the Save format as field.
-
To save the format, select the Save format as checkbox and optionally, rename the custom format in the corresponding field.
-
Configure the Rows and Columns sections to define the format you wish to use for the file.
-
If you are importing a file with explanatory text (comments), select the Comment character checkbox and enter the comment character used in the file. BlastLogic will ignore the lines of text after this character during the import.
-
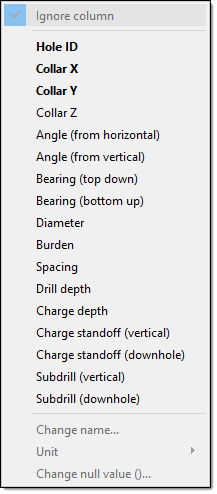
To assign a value to a column, click on the column header and select the column contents from the drop-down list. Do this for each column you wish to define.
Note:Options in bold are mandatory columns that you must define.
-
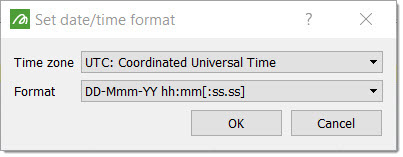
Optionally, set the column date format. After you define a date column, the Set date/time format panel will appear. Select the desired time formats using the Time zone and Format drop-downs and click OK.
-
Complete the CSV import for the desired data type. Use the following options to finish importing the file:
 Expand for steps on importing a blast.
-
Click OK.
-
Click OK or Apply in the original Import panel. BlastLogic saves the blast to the blasts container in the data explorer.
Expand for steps on importing drill measurement data.
-
Click OK.
-
Click OK or Apply in the original Import panel. The Import Drill Measurements panel will appear.
- Specify a blast in the Blast field. You can do this in the following ways:
Drag the blast from the blasts container in the data explorer to the field, using the middle mouse button.
Enter the blast location into the field, using the format /blasts/<blast name>.

-
Select an overlap policy using the Overlap policy radio buttons.
Expand for more information on the overlap policy options.
You can select the following options using the associated radio buttons:
-
Override preserves new measurements and slices existing measurements if required.
-
Insert preserves existing measurements and slices new measurements if required.
-
Discard ignores the new measurements which overlap with existing measurements.
-
-
Optionally, edit the drill measurements. Select the Edit... button in the Drill measurements column which corresponds to the entry row you wish to edit. The Import Drill Measurements panel will appear. Click in a cell to edit the measurement value and click OK after making the desired edits.
-
Click OK or Apply. BlastLogic will import the measurements. You can view these measurements by selecting the associated blast and then selecting the View Drill Measurements tool. You can find this tool in the Drill Measurements group, on the Drilling ribbon.
Expand for steps on importing dipping or backfilling data.
-
Click OK. If you are importing dip data, the Dip Data Entry panel will appear. Alternatively, if you are importing backfilling data, the Import backfill data panel will appear.
-
To edit the panel, select the appropriate information from the Crew and Supervisor drop-downs. You must also select the published holes associated with the imported data.
-
Check the imported data and edit as necessary by clicking in the table cells. BlastLogic displays the last known measurements in the table on the right of the panel.
-
Click OK. BlastLogic saves the imported data to a new dip or backfill sheet. You can locate these sheets in the Sheets container under each blast associated with the selected holes.
-
Click OK or Apply in the original Import panel.
Expand for steps on importing survey data.
-
Click OK.
-
Click OK or Apply in the original Import panel. The Import survey data panel will appear.
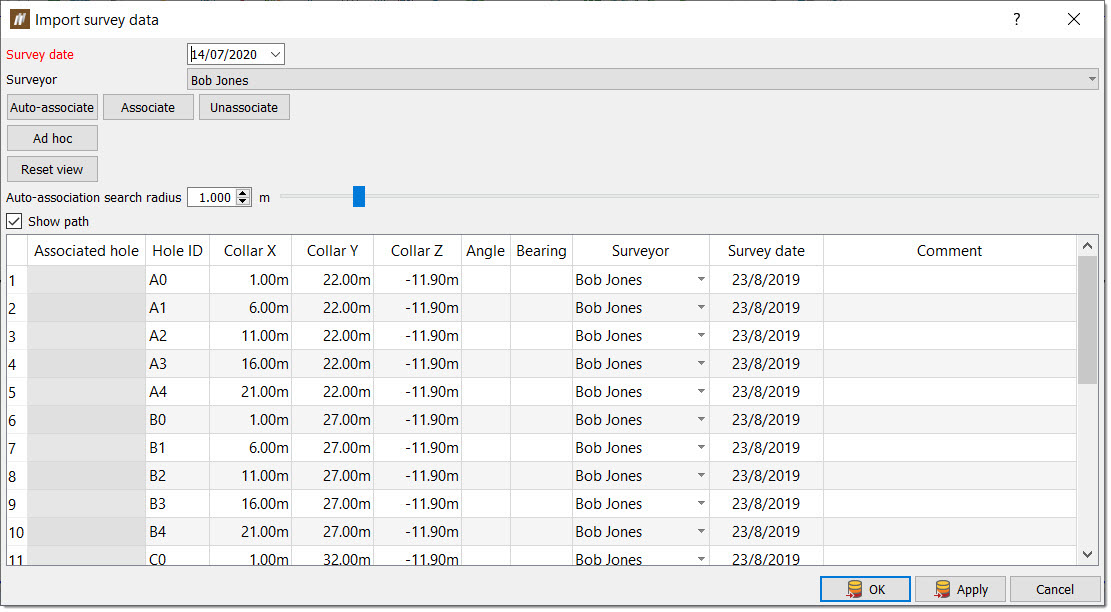
BlastLogic automatically searches for holes near the data and loads them into a view window. A two-dimensional view of the path will also appear in the view. You can hide this view by de-selecting the Show path checkbox. If you close the view and wish to redisplay it, select Reset view.
-
Select the appropriate information from the Survey date and Surveyor drop-downs.
-
Enter a value into the Auto-association search radius field, using the text box or slider. This value represents the allowed distance between the designed holes and surveyed holes.
Note:If the distance between the holes is greater than this value, BlastLogic will not automatically associate the holes. The default value is the collar error tolerance set in process tolerances tab of the site setup panel. To open this panel, select the Site tool, located in the Setup group, on the Home ribbon. For more information on site tolerances, refer to the Process tolerances section of the setup page.
-
Select Auto-associate. BlastLogic automatically associates all holes within the auto-association search radius.
Note:BlastLogic uses the following colour scheme to identify the hole association:
- A yellow hole collar denotes that a hole is associated.
- A red hole collar denotes that a hole is unassociated.
-
Manually associate or unassociate any remaining survey and design holes using the following steps:
-
Click on the surveyed hole
-
Hold the Shift key and click on the design hole.
-
Select Associate to associate the holes or Unassociate to remove the association between the holes.
-
-
Optionally, create an ad hoc hole by following these steps:
-
Highlight the desired survey entry in the table.
-
Click Ad hoc. The Ad hoc entry panel will appear.
-
Enter the appropriate information into the Blast drop-down and Hole ID field.
-
Click OK.
-
-
Click OK or Apply. BlastLogic will not save the data of any survey entries that are not associated with a design hole in the database.
-
Click OK or Apply in the original Import panel.
Expand for steps on importing vibration data.
-
Ensure you define either peak particle velocity (PPV) or overpressure in the table.
-
Click OK.
-
Click OK or Apply in the original Import panel.
Expand for steps on importing spatial measurement data.
-
Click OK.
-
Click OK or Apply in the original Import panel.
Expand for steps on importing drilling event data.
-
Define an End drill date column. This is necessary so BlastLogic can identify the imported data when validating the data. You can perform this validation by selecting the Validate Drilling tool, from the Validation group, on the Drilling ribbon. For more information on drilling validation, refer to the Validation page.
-
Optionally, we recommend defining columns for the collar X, collar Y, collar Z, angle, bearing, length, and hole ID.
Tip!To prevent holes lacking GPS data from being incorrectly placed, the columns defined as collar X, collar Y and collar Z must also have a null value set to the value corresponding to a blank entry (e.g. 0.00). To do this, select a column, define the column, and then select Change null value from the drop-down.
 Expand for information on the angle and bearing headings
-
Angle
You can choose to define the angle as either from the horizontal or from the vertical, by selecting Angle (from horizontal) or Angle (from vertical) from the drop-down menu. The diagram below illustrates the orientations of these options.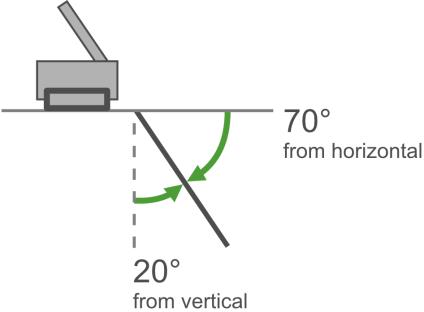
-
Bearing
You can choose to define the bearing as either top down or bottom up, by selecting Bearing (top down) or Bearing (bottom up) from the drop-down menu. The diagram below illustrates the top down view of a hole with a bearing of 270°. As the bearing is the angle of the orientation of a hole from North, this hole is oriented West. Selecting the correct definition is important as if this bearing was defined as bottom up, the hole would appear to be oriented East.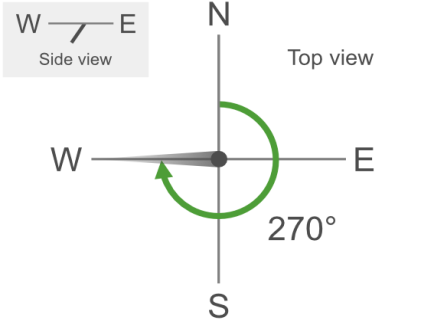
-
-
Click OK.
-
Click OK or Apply in the original Import panel.
-
BlastLogic prints a confirmation of the imported data to the report window. If any errors occurred BlastLogic also prints the error and any rows which were not imported to the report window.
Importing blasts with a Vulcan project file
There are two methods to import a Vulcan project file (*.dgd.isis) into BlastLogic:
The ribbon method
To import Vulcan project files using the BlastLogic ribbon, follow these steps:
-
On the Home ribbon, in the Data group, select Import. The Import panel will appear.
-
Click
. The file explorer will open. -
Select the Vulcan project file (*.dgd.isis) containing the blast you wish to import and click Open.
-
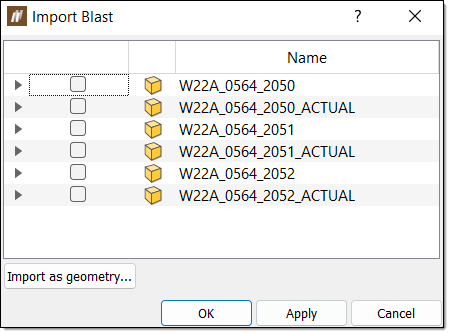
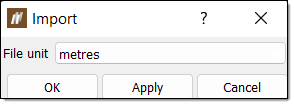
Select the desired units using the File unit drop-down and click OK. BlastLogic uses this unit to measure distance in the selected file. The Import blast panel will appear.
-
Select one or more blasts to import by following these steps:
-
Expand the folders to view the contained blasts.
-
Select the checkboxes of folders or blasts you wish to import.
Note:Optionally, you can import a blast's geometry as CAD objects into BlastLogic from Vulcan. To do this, select the desired folder or blast and click Import as geometry.... The Select layers from <name> to import panel will appear, containing the layers in your selection.
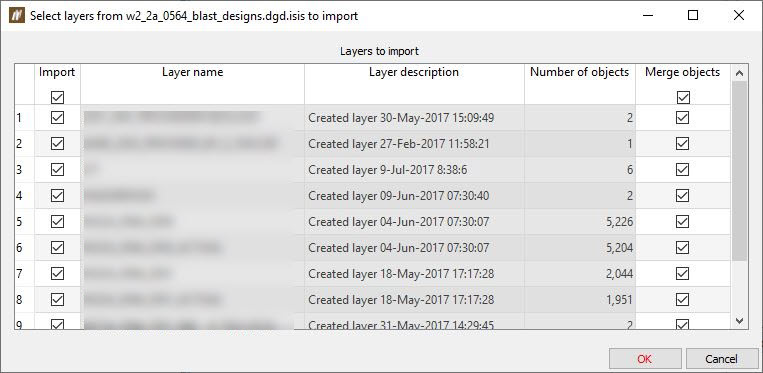
Select the layers you wish to import and click OK. BlastLogic saves the data in a secondary container in the site data container.
-
Click OK or Apply.
-
-
Assign charge rules. If you assigned loading styles or intervals to the blast in Vulcan, the Import blast panel will appear.
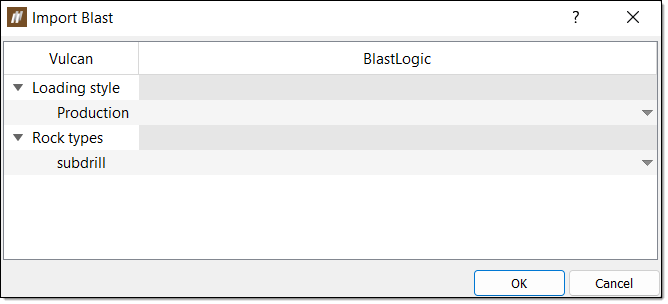
You can assign charge rules to specified loading styles and match intervals from Vulcan to intervals in BlastLogic using the drop-downs. Click OK to continue.
Note:You can only assign standard charge rules to the loading styles.
BlastLogic adds the unpublished blast(s) to the blasts container in the data explorer.
The drag and drop method
To import Vulcan project files using drag and drop functionality in Vulcan, follow these steps:
-
Ensure both Vulcan and BlastLogic are open.
-
Open the Vulcan window tab and drag the BlastLogic view window tab such that it floats on the page. For more information on docking and floating tabs, refer to the Floating and docking windows section of the view objects page.
-
Reselect the Vulcan window tab to view the Vulcan data explorer.
-
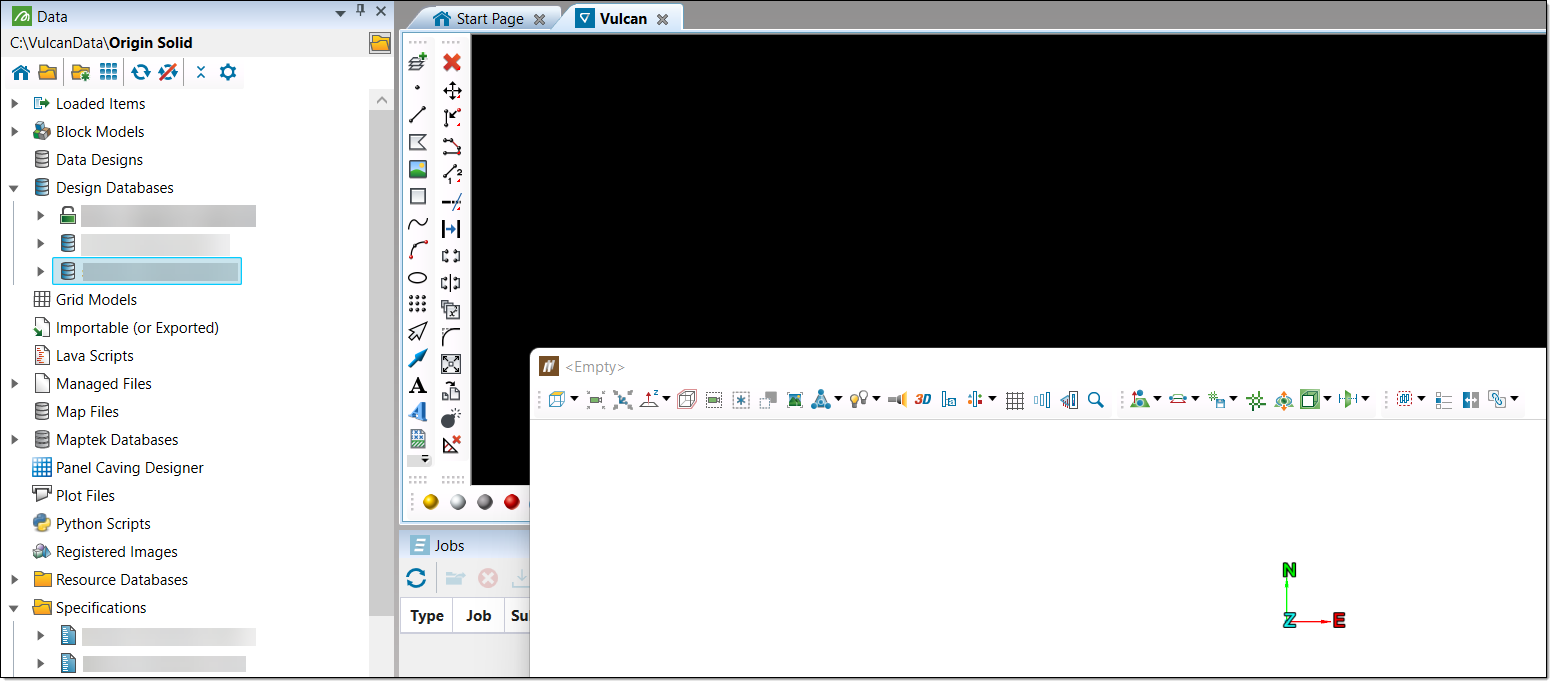
Drag the desired dgd.isis file into the BlastLogic view window tab using the left mouse button. The Import panel will appear.
-
Select the desired unit using the File unit drop-down and click OK or Apply. The Import Blast panel will appear.
-
Select the checkboxes corresponding to the blasts you wish to import and click OK. BlastLogic will load the blasts into the view window.
 Export
BlastLogic allows you to export the following objects:
- Blasts or selection of holes as CSV or DXF files
- Surfaces as triangulations (*.00t) or grid (*.**g) files
- Hole actual parameters and charge plans for import into SHOTplus
- Points from holes as a point text file (*.txt)
- Any published attachment, such as videos and scanned documents
To export data, follow these steps:
-
On the Home ribbon, in the Data group, select
Export. The Export panel will appear.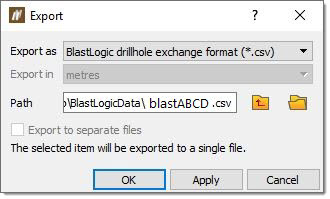
-
Select the data you wish to export in the data explorer.
-
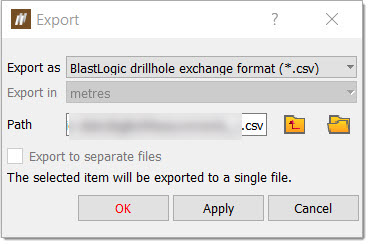
Select the desired export format from the Export as drop-down.
-
Specify the location you wish to save the export to in the Path field. You can either type the location path into the field or select
to browse to the location in the file explorer. -
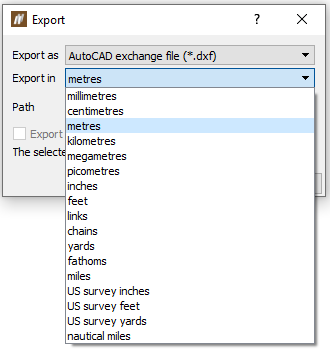
If you are exporting .dxf or .00t files, select the appropriate unit from the Export in drop-down.
-
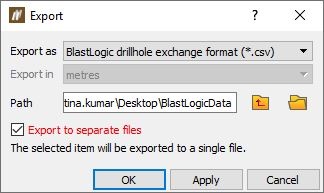
If you are exporting multiple objects, select the Export to separate files checkbox to export them to separate files.
-
Click OK or Apply.
Exporting loaded decks
To export loaded decks, follow these steps:
-
On the Home ribbon, in the Data group, select the drop-down option next to
Export.
-
Select Export Loaded Decks from the drop-down.
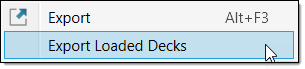
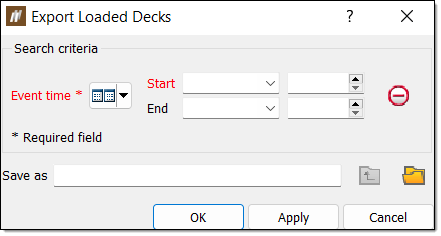
The Export Loaded Decks panel will appear.
-
Specify the export search criteria. Select the desired event time range using the Start and End drop-downs.
-
Specify a location to save the export by selecting
. The file explorer will appear. -
Select a folder to save the export and click Select Folder.
-
Select OKor Apply.
Exporting drill measurements
BlastLogic supports the export of drill measurements or measure while drilling (MWD) data. There are three ways to export drill measurements:
Via the export panel
To export drill measurements via the export panel, follows these steps:
-
Select a blast with drill measurement data in the data explorer.
-
On the Home ribbon, in the Data group, select Export. The Export panel will appear.
-
Click OK or Apply. The Export holes panel will appear.
-
Select the Export drill measurements to checkbox.
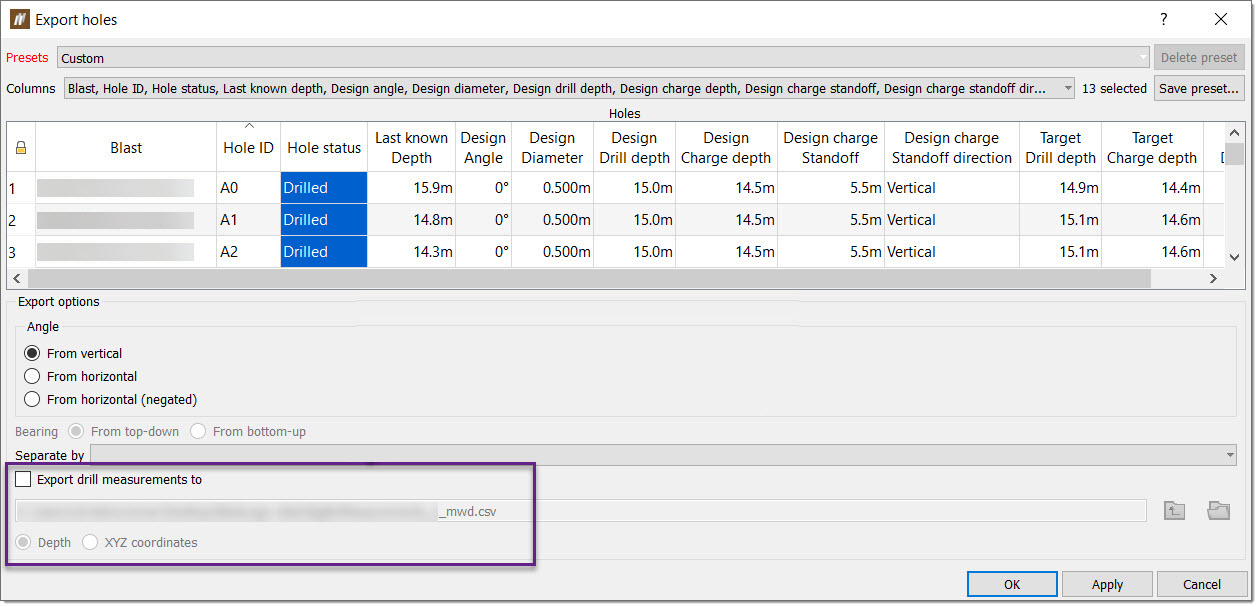
-
Specify a location to save the export by entering the location path or selecting
to browse the file explorer. -
Select from the radio buttons to export by depth or coordinates.
-
Click OK or Apply.
Via the hole tabular view
To export drill measurements via the hole tabular view, follows these steps:
-
Select holes with drill measurement data.
-
Press the keyboard shortcut Ctrl + T. The Hole Tabular View panel will appear.
 Expand for more ways to open the Hole Tabular View panel
You can also open the Hole Tabular View panel in the following ways:
- On the Home ribbon, in the Hole group, select Hole Tabular View.
- On the Query ribbon, in the Data group, select Hole Tabular View.
- On the Hole context ribbon, in the Query group, select Hole Tabular View.
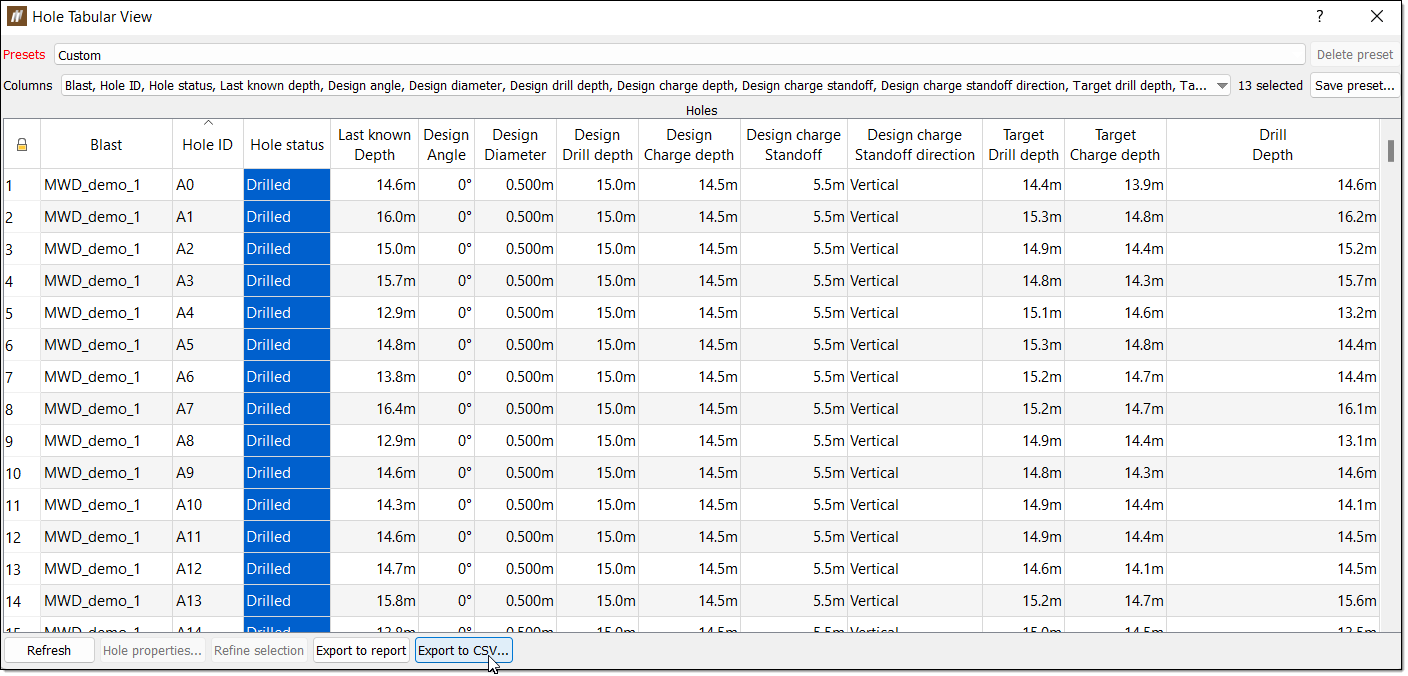
-
Click Export to CSV. The file explorer will appear.
-
Select a location to save the export and click Save. The Export Options panel will appear
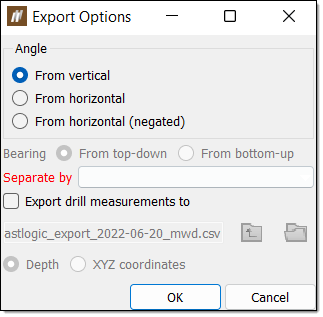
-
Select the Export drill measurements to checkbox and choose to export by depth or coordinates using the radio buttons.
-
Click OK.
Via the validate drilling panel
To export drill measurements via the validate drilling panel, follows these steps:
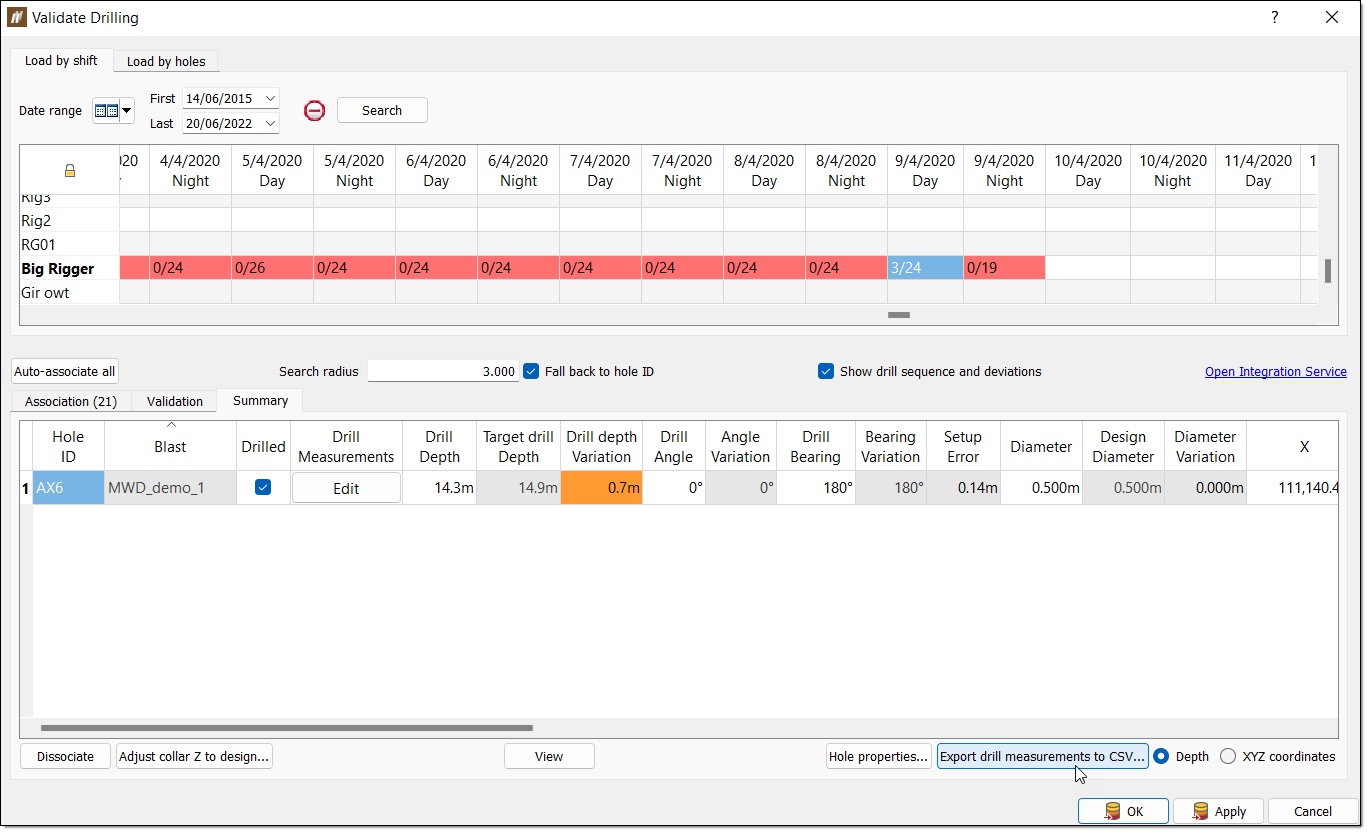
-
On the Drilling ribbon, in the Validation group, select Validate Drilling. The Validate Drilling panel will appear.
-
Specify the drill date range using the Date range drop-downs and click Search.
-
Select the desired data in the calendar table.
-
Select the Summary tab.
-
Specify to export by depth or coordinates using the radio buttons.
-
Select Export drill measurements to CSV.... The file explorer will appear.
-
Select the desired location in the file explorer and click Save.
-
Click OK or Apply in the Validate Drilling panel.
Exporting snapshots
BlastLogic allows you to export snapshot data as DGD ISIS (*.dgd.isis) files. For more information on snapshots, see Snapshot.
To export a snapshot, follow these steps:
-
On the Home ribbon, in the Data group, select
Export. The Export panel will appear.
-
Select the blast you wish to export in the data explorer or view window.
-
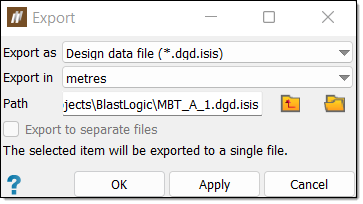
Select Design data file (*.dgd.isis) from the Export as drop-down.
-
Optionally, select the desired export unit from the Export in drop-down.
-
Specify the location you wish to save the export to in the Path field. You can either type the location path into the field or select
to browse to the location in the file explorer. -
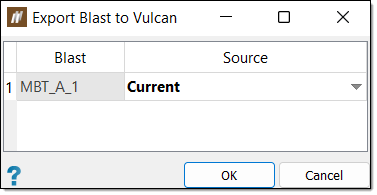
Click OK or Apply. The Export Blast to Vulcan panel will appear.
-
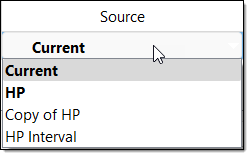
Select the desired data source from the Source column drop-down.
 Note:
Note:You can select from the following options in the drop-down:
-
Current
Select the Current option to export reconciled data. If there is no reconciled data, BlastLogic will export the plan data instead (but not any loaded data). This option is in bold to signify that it is a special data type and not a snapshot. -
Reference design snapshot
The name of the reference design snapshot will appear as an option in the drop-down. For example, the snapshot HP is in bold to represent that it is the reference design snapshot. Select this option to export the reference design snapshot data. -
Other snapshots
Any other snapshots related to the blast will also appear in the drop-down. Select the name of the desired snapshot to export that snapshot’s data. These snapshots will not be in bold.
-
-
Click OK.
