Applying Colour to Dip and Strike
Colour by dip and strike colours facet networks based on the dip or strike values of the individual facets. This helps to highlight discontinuities and planar areas and makes it easy to see fractures.
This tool is a preliminary way of marking exposed discontinuities. The resulting information can be used for further analysis using the geotechnical tools.
Note: For accurate colouring of dip and strike,
the surface used must be created using spherical surface,
scan surface or a fusion surface. Topographic surfaces are not suitable for geotechnical analysis as they are
created in a top-down manner that does not provide sufficient detail on
rock slopes.
-
On the Geotechnical ribbon tab navigate to the Colour group and select
 Colour Dip and Strike.
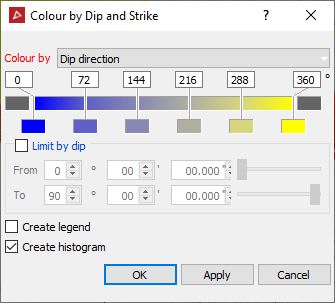
-
Set the Colour by from the drop-down menu to Dip, Strike or Dip direction.
-
You can use the default colours, however if the colours are not suitable they can be replaced by:
- Single clicking the colour swatch to open the standard palette colours to choose from.
- Double clicking the colour swatch to open the basic palette colours panel with more advanced colour choices.
-
The Limit by dip can be used to limit the colouring to a particular set. This highlights which fractures are part of the same set.
-
Tick the Create legend checkbox to create a legend named Colour by dip and strike legend in the legends container.
-
Click OK or Apply.
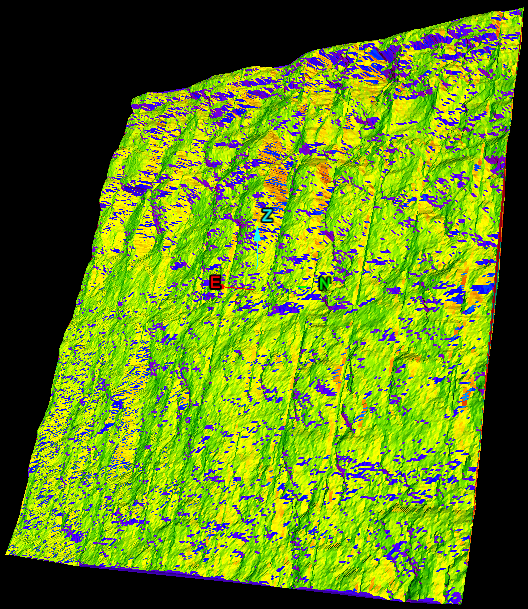
The histogram shows the colour at a particular dip and strike and the distribution of dip and strike values.
The below image displays the histogram and the dip and strikes coloured according to their angle trend.