Creating a Topographic Surface
Used to create a surface from a scan or a group of scans or surfaces from polygons.
This function
works in the XY plane, that is, it triangulates straight down. This means
that if there are areas of undercut walls, these will not be modelled
accurately (in this case, use ![]() Spherical
Surface).
Spherical
Surface).
This option
is used once scans have been registered (using ![]() Register
Scans by Name,
Register
Scans by Name, ![]() Matching Point
Pairs or
Matching Point
Pairs or ![]() Translate or
Translate or ![]() Rotate) and
Rotate) and
filtered (using ![]() Polygon,
Polygon, ![]() Isolated Points,
Isolated Points, ![]() Topography
and
Topography
and ![]() Intensity).
Intensity).
-
On the Create ribbon tab navigate to the Surface group and select
 Topographic Surface.
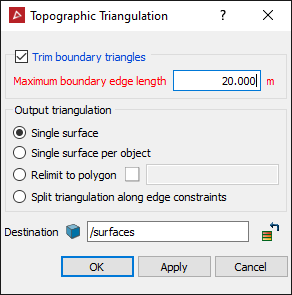
- Trim boundary triangles eliminate long, incorrectly generated boundary triangles. A maximum length is specified, which prevents triangles greater than this being created.
Note: This option is only applicable to boundary triangles; large voids in the centre of the data will still be modelled.
-
Select an Output triangulation / surface type by clicking a radio from the following:
- Single surface - Creates a single surface from the selected objects / scans.
- Single surface per object - Creates a single surface for each selected object / scan.
- Relimit to polygon - Constrains the model to a polygon, for example a pit boundary.
- Split surface along edge constraints - Splits the surface into separate objects based on any lines or polygons highlighted in the project explorer when the surface is created.
-
Ensure the scan data is highlighted in the project explorer.
-
Click OK.
The surface is saved in the surfaces container by default.
Note: Once the surface
has been created, it may require minor editing via Edit > ![]() Despike.
Despike.
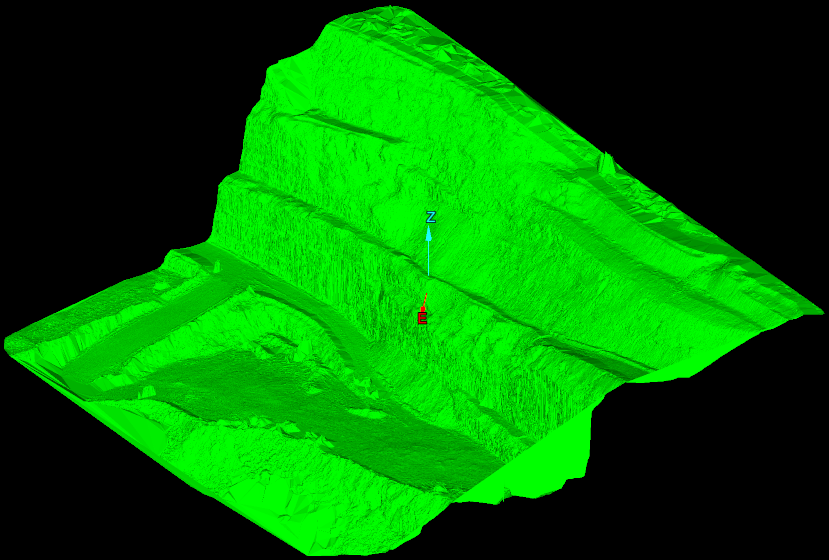
The example
below shows a topographic surface of a pit relimited to a polygon.