Drilling Format
Use the Drilling Format section to configure the contents of the drilling report.
- Collar Information
- Pivot Point Information
- Toe Information
- Direction Information
- Dimension Information
- Custom Column Information
Collar Information
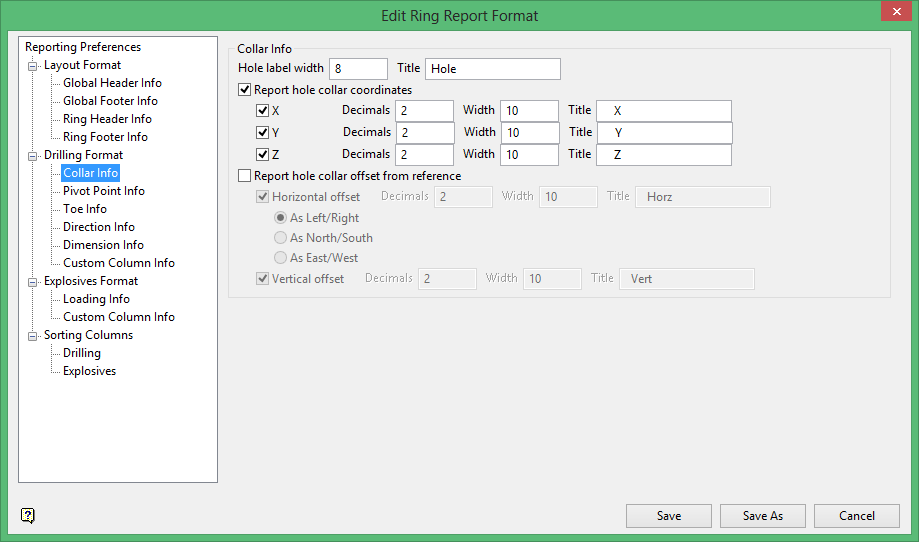
Collar Info
Hole label width
Enter the width of the column containing the hole numbers.
Title
Refers to the column heading for the hole collars.
Report hole collar coordinates
Select this check box to report the Easting ( X ), Northing ( Y ), Level ( Z ) coordinates of the blasthole collars. For each required location specify the number of decimals, the column width and column heading.
Report hole collar offset from distance
Select this check box to report collar offsets. Collar offsets can be reported as horizontal or vertical offsets or as both.
- Horizontal offset
Specify the required number of decimals, column width and column heading. Horizontal offsets may be Left/Right, North/South, East/West distances in the working plane with respect to a reference line passing through the working plane. The sense of Left/Right is determined by the direction of the nominated reference line. When looking along the reference line in the direction of increasing point sequence, holes collared to the left of the pierce point with the working plane are reported as Left offsets. - Vertical offset
Specify the required number of decimals, column width and column heading.
Note: Left/Right, North/South and East/West are only indicators of the direction of offset. The offset distances are always measured in the working plane.
Pivot Point Information
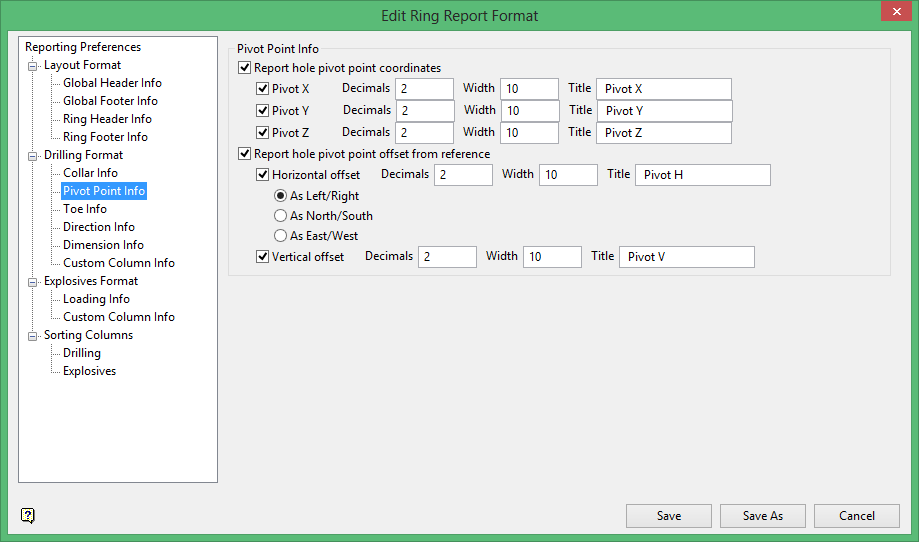
Like the Report hole collar coordinates and Report hole collar offset from reference options from the Collar Info, this section allows you to specify the reporting of the Report hole pivot point coordinates and Report hole pivot point offset from reference in a similar manner.
Toe Information
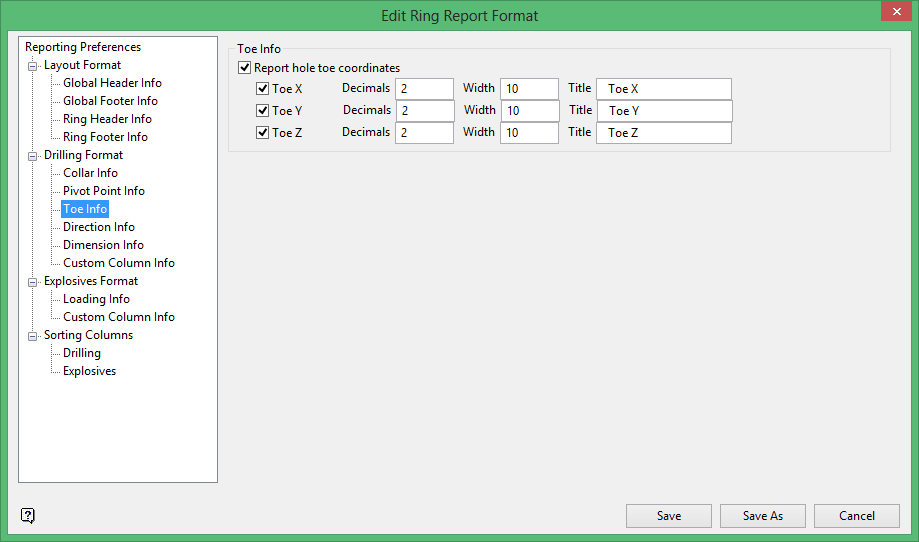
Toe Info
Report hole toe coordinates
Select this check box to report the Easting ( Toe X ), Northing ( Toe Y ) and Level ( Toe Z ) coordinates of the blasthole toes. For each location specify the number of decimals, the column width and column heading.
Direction Information
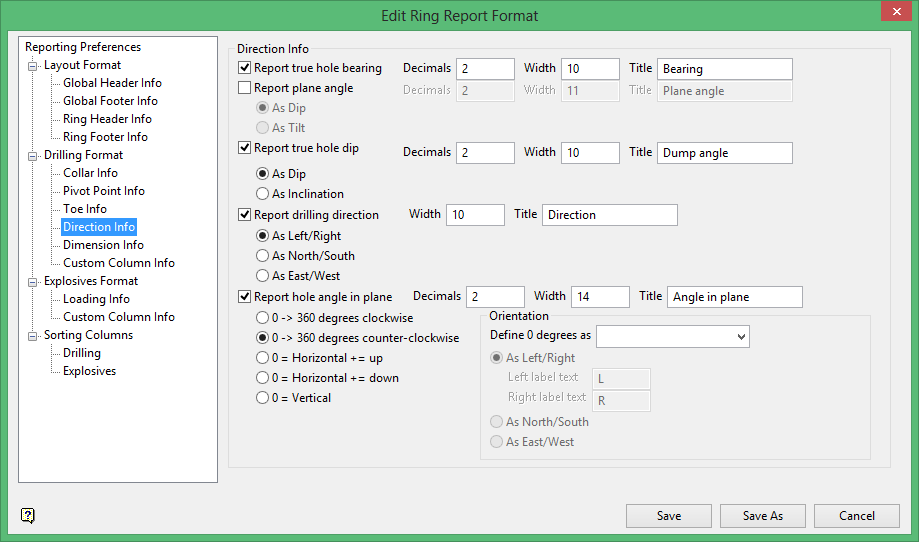
Direction Info
Report true hole bearing
Select this check box to report the bearing of each hole in decimal degrees. This value refers to the bearing of the blasthole when viewed in Plan view, with 0 degrees equal to North.
Report plane angle
Select this check box to report the plane angle.
Report true hole dip
Select this check box to report the true dip of the blasthole measured from horizontal.
Select As dip if the blasthole angle is positive for blastholes drilled downwards and negative for those blastholes drilled upwards. Select As inclination if the blasthole angle is negative for down holes and positive for up holes.
Report drilling direction
This refers to the general direction of drilling, measured with respect to the reference line or to compass directions. Enter the width of the column, as well as the column title.
The output is L/R, N/S or E/W describing the orientation of the hole.
As Left/Right
When looking along the reference line in the direction of increasing point sequence numbers, the blasthole is described as being drilled towards the left or right of the collar point.
As North/South
The blasthole is described as being drilled in a Northerly or Southerly direction from the collar point.
As East/West
The blasthole is described as being drilled in an Easterly or Westerly direction from the collar point.
Report hole angle in plane
Select this check box to report the orientation of the blasthole measured as a rotation in the plane of the "ring" of blastholes about the pivot point of a radial blasthole. The rotation may be measured several different ways to suit various drilling configurations.
Enter the number of decimal places to be used when reporting the angle in plane, as well as the column width and title.
0 -> 360 degrees clockwise and 0-> degrees counter-clockwise
With a selection in either of these options, use the Define 0 degrees drop-down choose the orientation where 0 degrees is in relation to the section line.
0 = Horizontal, + = up
With up holes (in the plane) being reported as positive rotation angles from the horizontal and down holes (in the plane) being reported as negative angles. Hole angles are in the range from 0 to positive or negative 90 degrees.
0 = Horizontal, + = down
With down holes (in the plane) being reported as positive rotation angles from horizontal and up holes (in plane) being reported as negative angles. Hole angles are in the range from 0 to positive or negative 90 degrees.
0 = Vertical
Where rotation angles range from 0 to 180 degrees. The "vertical" up holes have a rotation of 0 degrees and "vertical" (in the plane) down holes have an angle of 180 degrees (horizontal holes have an angle of 90 degrees.
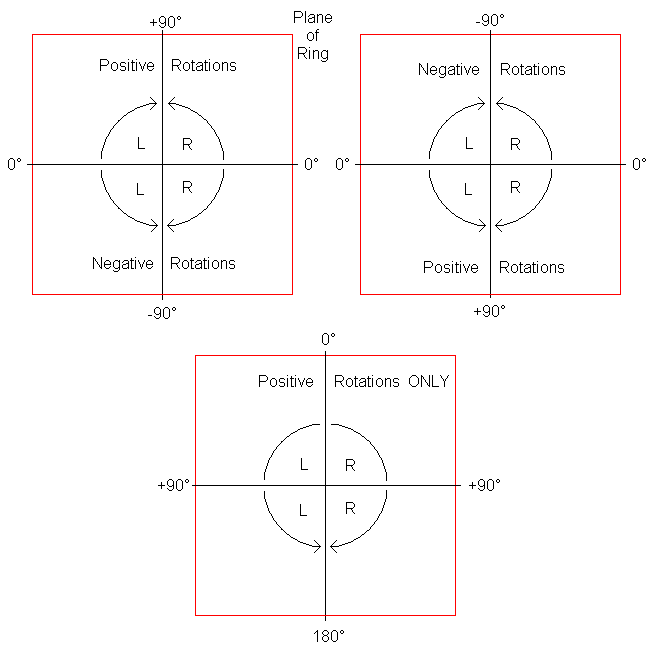
Figure 1 : Angle of Rotation
Orientation
Define 0 degrees as
Select the direction where 0 degrees is in relation to the section line. Choose from left, right, up, and down.
Note: The above option only takes effect when the 0 -> 360 degrees clockwise or the 0 -> 360 degrees counter-clockwise option is selected.
As Left/Right
The direction of the drill hole rotation can be reported as to the left or right of the collar point. Alternatively, this may be reported as Northerly/Southerly from the collar point or Easterly/Westerly.
The labels displayed in the resulting plot can contain up to 6 alphanumeric characters per label. If the available fields are left blank, then the default labels of Left and Right will be used instead.
As North/South
See Left/Right.
As East/West
See Left/Right.
Dimension Information
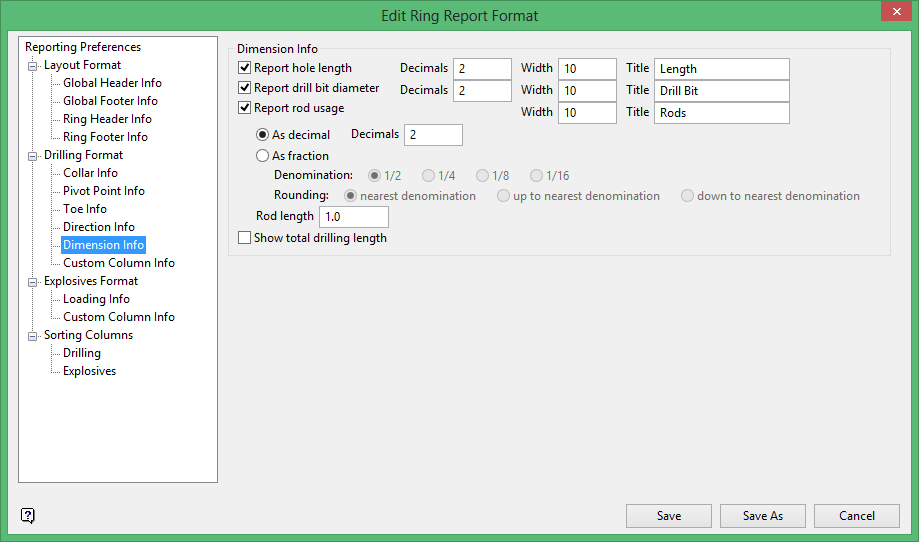
Dimension Info
Report hole length
Select this check box to report the length of each drill hole. The length is taken from the collar point to the toe point. Enter the number of decimal places to be used when reporting the hole length, as well as the column width and heading.
Report drill bit diameter
Select this check box to report the drill bit diameter of each drill hole. Enter the number of decimal places to be used when reporting the drill bit diameter, as well as the column width and heading.
Report rod usage
Select this check box to report the number of rods required to drill the hole. The number of rods is calculated by dividing the hole length by the specified rod length. The result of the division can be reported as a decimal value or as a fraction. This number does not take into account any rod length out of the hole.
The unit of measurement for the rod length will be as specified in the .dg1 specification file.
Show total drilling length
Select this check box to report the sum of the hole lengths for all holes included on the report.
Custom Column Information
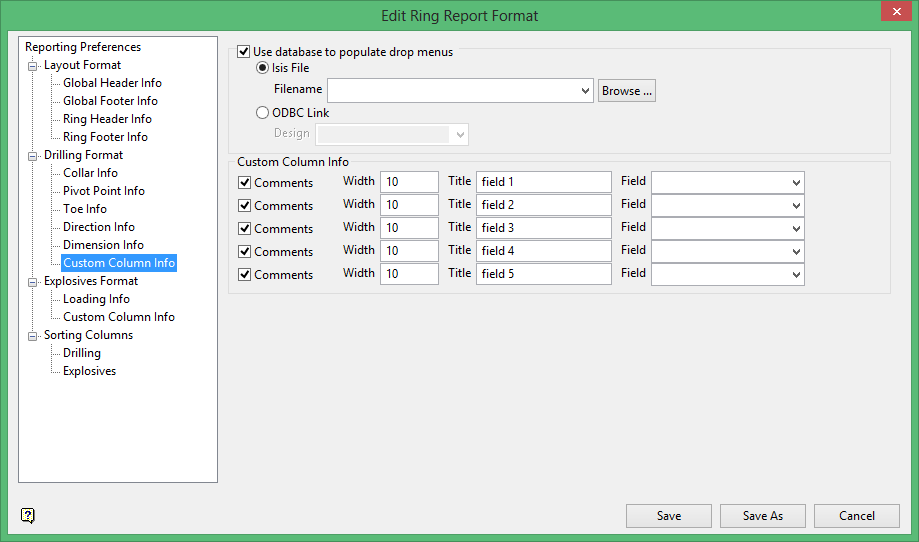
Use database to populate drop menus
Select a database to use to define custom fields from a drop-down list.
Custom Column Info
Use this section to include comments columns for people who require the report, for example for the driller to report that the hole was drilled to full depth or broke through early. The Comments column will be the last column on the report unless changed in the Sorting Columns section. You will need to specify the column width and title.
Use the Fields column to specify the fields in the database you want to use for user-defined comments.
Related topics

