Importing a Dynamic Solids Pit
Operation sequence
Follow these steps to add a dynamic solids pit to your setup:
-
Select
 Pit (Dynamic Solids) in the New Model group of the Evolution ribbon.
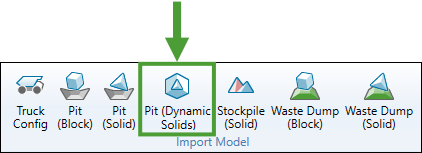
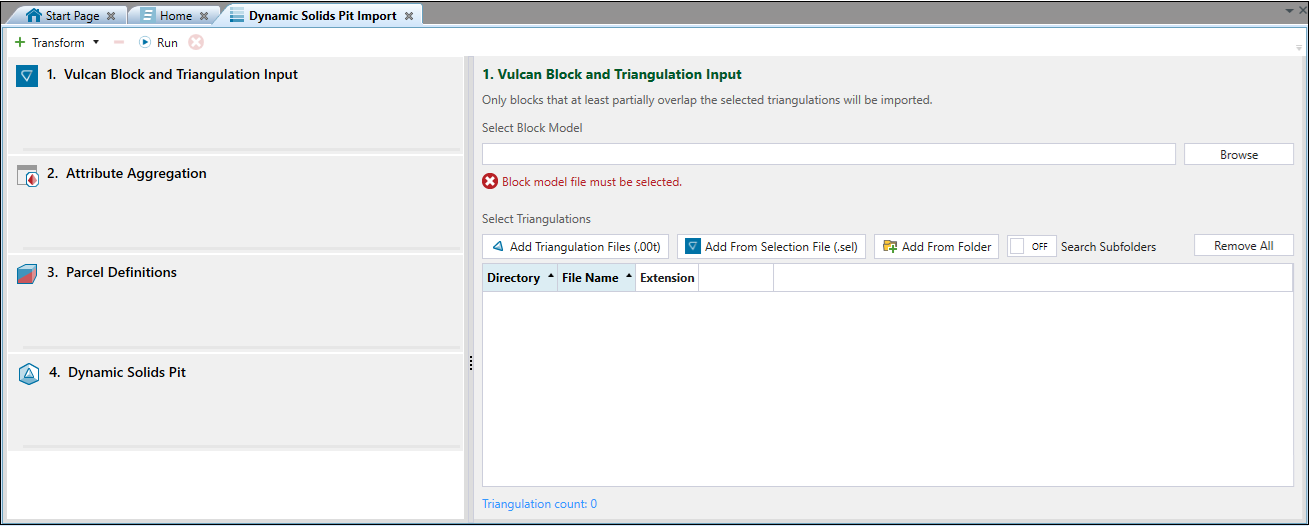
Evolution will add the Dynamic Solids Pit Import file to the project explorer and open it in a new tab in your workspace.
Note: If you create more files of this type, a consecutive number will be assigned to each of them. You can change the default name by right-clicking on the file and selecting
 Rename.
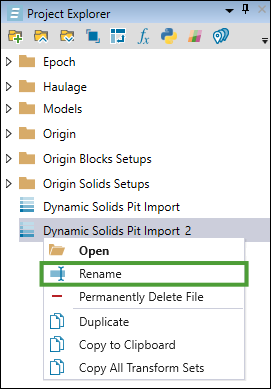
-
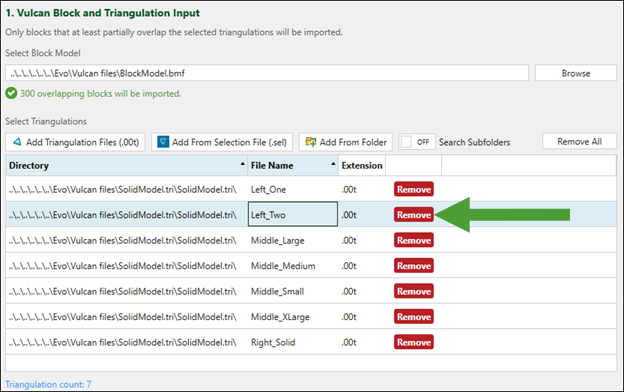
In the Vulcan Block and Triangulation Input panel, click Browse to select a Vulcan block model file (
.bmf) based on which you wish to create a dynamic solids pit.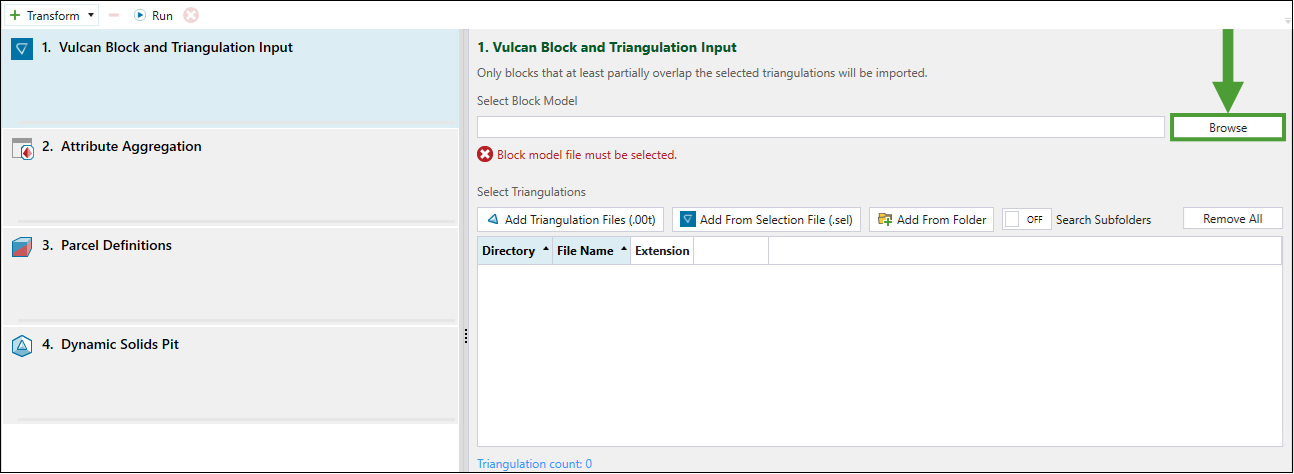
-
Select the triangulations you want to import. You can do so by clicking the following buttons:
-
 Add Triangulation Files (.00t): Select and upload Vulcan triangulation files (
.00t) directly. -
 Add From Selection File (.sel): Select the required triangulations by supplying a Vulcan selection file (
.sel). Expand for more information on adding triangulations from
 .selfiles.The Add Triangulations panel will appear when you click the
Add From Selection File (.sel) button.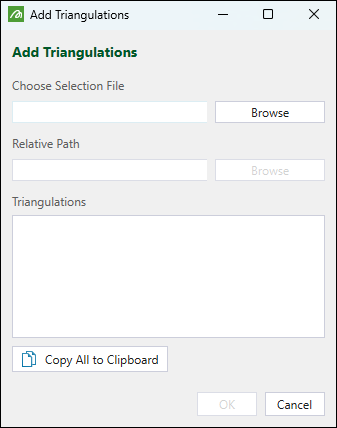
Click Browse to specify the required file and confirm your selection by clicking OK.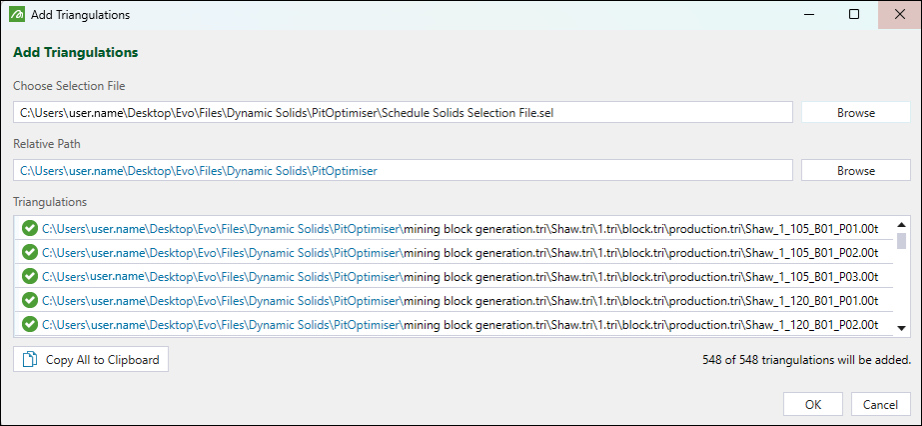
Note: Once you choose a Selection File, Evolution will assume that the Relative Path is the same folder where the
.selfile is located, as shown above. If the triangulations (.00tfiles) are located relative to a different folder, click the Browse button in the Relative Path and select the correct folder. This will change the blue parts of the triangulation paths.The triangulations will be loaded to the Vulcan Block and Triangulation Input panel.
-
 Add From Folder. Select the folder containing the triangulations that you want to add.
Tip: Expand the search scope by enabling the Search Subfolders option.
 Note
NoteAfter loading triangulations from the specified location, you can remove the ones that are not required in the following ways:
-
Click the Remove button that corresponds to a single triangulation.
-
Click the Remove All button. Evolution will display a pop-up asking you to confirm your selection.
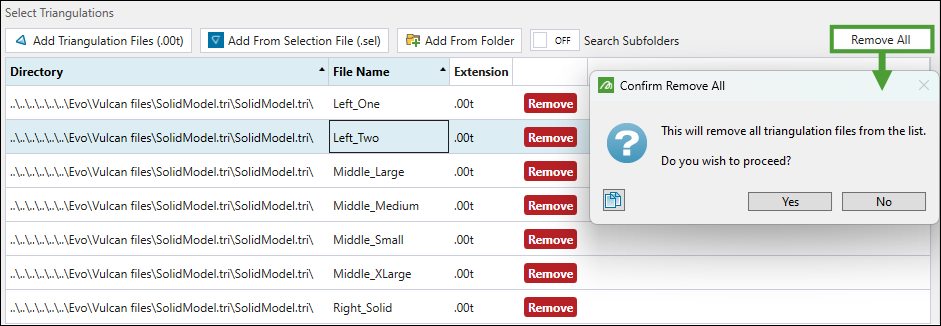
Tip: Click the arrow in the Directory and File Name column to sort the triangulation files alphabetically. This can help you identify the files to delete, especially when there are two solids with the same name but in different locations. Evolution uses the file name as the solid ID, so importing triangulation files with the same name is not possible.
-
-
-
Optionally, modify your triangulation attributes by selecting the following from the
 Transform drop-down at the top of the Vulcan Block and Triangulation Input panel:
-
Expand for more information on maths script transforms.
Use
 Maths Script to create attributes or to modify the existing ones in a model.
Note: Maths scripts can only be run on the block component of the dynamic solids model.
The
Math Script panel consists of the following tabs:-
Summary: Customise the name of the transform and enter any relevant comments.
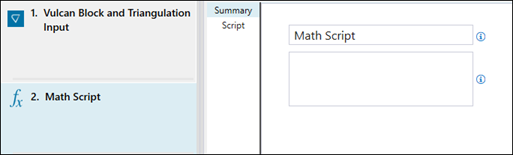
Note: The name of the script that you enter will replace the default name (Math Script) in the Vulcan Block and Triangulation Input panel.
-
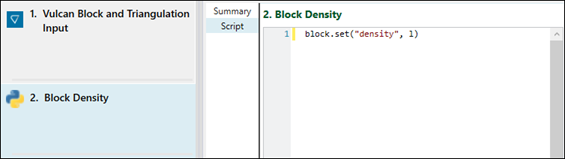
Script: Write the required script.
Example
If you apply the following equation as a maths script:availability = 0.95,
then every block within the dynamic solids model will have its availability attribute set to0.95.See also: Applying a Maths Script
-
-
Expand for more information on python maths transforms.
Use
 Python Maths to create attributes or to modify the existing ones in a model.
Note: Python maths scripts can only be run on the block component of the dynamic solids model.
The
Python Maths panel consists of the following tabs:-
Summary: Customise the name of the transform and enter any relevant comments.
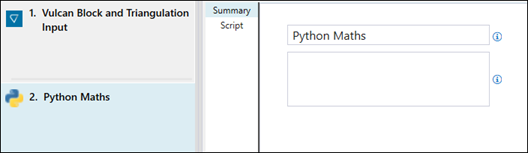
Note: The name of the Python script that you enter will replace the default name (Python Maths) in the Vulcan Block and Triangulation Input panel.
-
Script: Write the required script.
-
-
 CSV AttributesExpand for more information on CSV attribute transforms.
Use
CSV Attributes to add new attributes or update existing ones in the block model.Note: Attributes for blocks that are missing from the imported CSV file will be assigned based on the default values that you provide in the CSV Attributes panel.
To load a file with attributes, click Browse to select it from the file explorer. Evolution will load a preview in the
CSV Attributes panel.The file that you load should be formatted as follows:
-
Contain one column for each block centroid coordinate (X, Y, Z).
If labels of these columns correspond to each coordinate (for example, XC, YC, and ZC), Evolution will automatically fill in the Coordinates drop-downs. You can also map the columns with coordinates manually, by selecting the required attribute from the X, Y, and Z Attribute drop-down.
-
Contain the attributes that you want to assign the blocks with.
Example
As shown below, the low, middle, and high grade attributes are listed for each coordinate.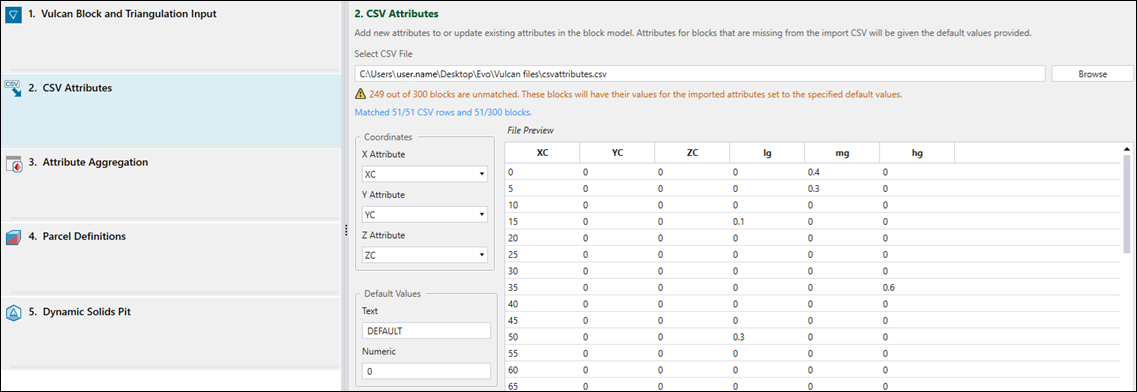
-
Tip: Click
 (Delete the selected transform) to remove the optional transforms ( Maths Script, Python Maths, and CSV Attributes) from the Dynamic Solids Pit Import.
 -
-
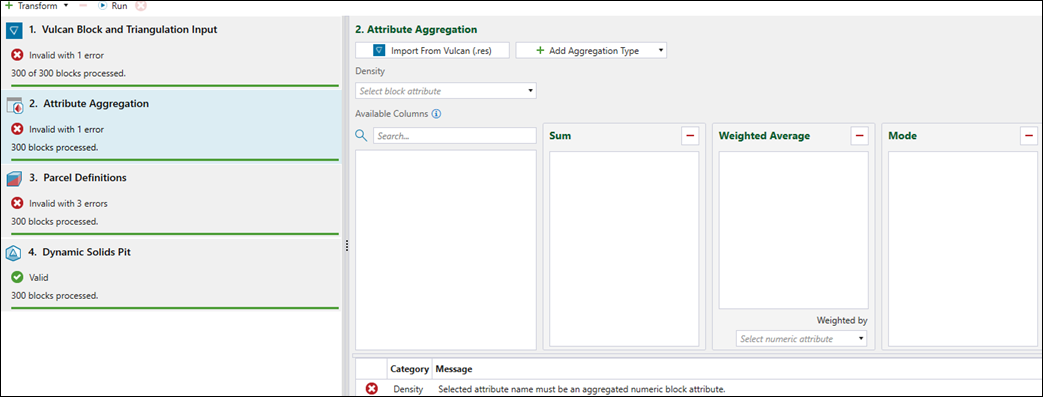
Configure the
 Attribute Aggregation panel as follows:
-
Select the density attribute from the Density drop-down.
-
Click
Add Aggregation Type and select the required aggregation groups from the drop-down.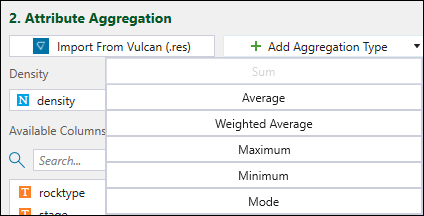
Note: For the Weighted Average aggregation, select the attribute by which you want the aggregation to be weighted. You can add multiple weighted average groups with different attribute weights.

Tip: Click the
 button to remove the selected aggregation group.
 -
Assign the attributes listed in the Available Columns to the required aggregation type. You can do so manually (by dragging each attribute to the aggregation type) or by importing the aggregation information from a Vulcan reserve specification file (
.res).Note: Columns that are not assigned an aggregation behaviour will not be imported.
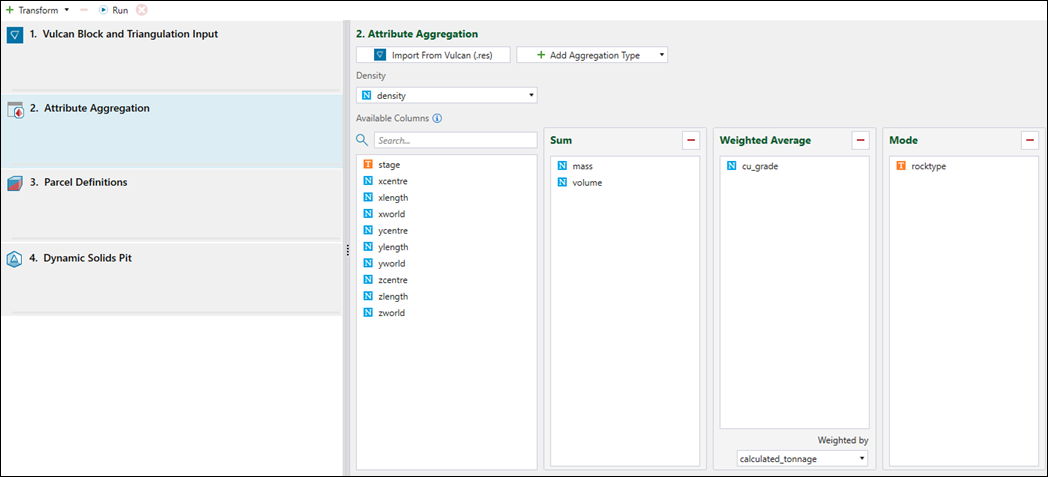
Tip: In huge block models with many attributes, use the search bar to quickly find the required columns.
-
-
Configure the Parcel Definitions panel to define how you want your blocks to be parcelled. You can do so manually or by importing defined parcels from a Vulcan reserve specification file (
.res).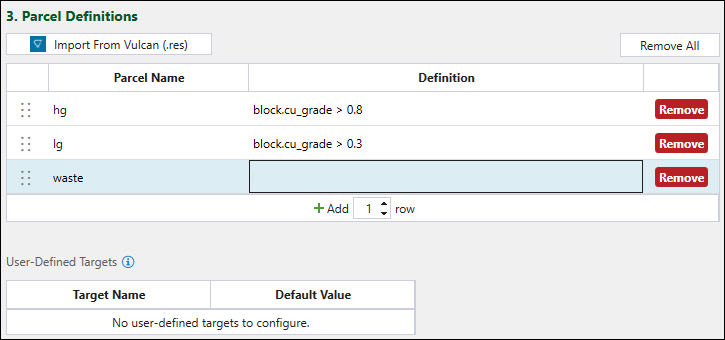
Evolution will check the definitions one by one starting from the top of your list and determine which parcel each block belongs to. If you leave the definition of your last parcel blank, all blocks that did not pass any other parcel definitions will automatically be assigned to it.You can also define custom targets among your parcel definitions. For each custom target that you use in a parcel definition, you must specify the Default Value in the User-Defined Targets table.
Example

Note: You can later change the default value for each parcel on a period-by-period basis in the
 User-Defined Targets tab of an Epoch setup that contains the imported dynamic solids model. See User-Defined Targets for more information.
-
Add rows to the table by entering the required number and clicking
Add. -
Remove the parcels that are no longer needed by clicking Remove in the rows corresponding to them.
-
Click Remove All to remove all parcels from the table.
See also: Parcel Reporting in Epoch
-
-
Configure the
Dynamic Solids Pit panel by setting the following:-
Name. Enter the name of your dynamic solids model.
-
Stage. Choose one of the following ways to set the stage attribute:
-
Turn on the Use Default Value toggle button.
This will allow you to create a new stage attribute and set a default stage value for all solids.

-
Turn off the Use Default Value button.
This will allow you to set the stage by choosing one of the following ways:
-
Using an attribute from an existing model.
Select either
 Solid or
  Block model and specify the attribute from the drop-down.
Note: When you select
Block, only the attributes that have been assigned an aggregation behaviour defined in the Attribute Aggregation panel will be shown.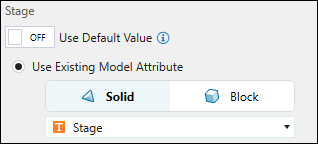
-
Extracting the stage attribute from triangulation names.
Enter the name for the stage attribute and set the stage attribute value by configuring one of the following:
-
Separator. Enter one or more characters as the Separator and specify the position.
Example
In the example below,_(an underscore) was entered as the Separator.
Evolution will select Left when you set the position to1and _One when you set the position to2.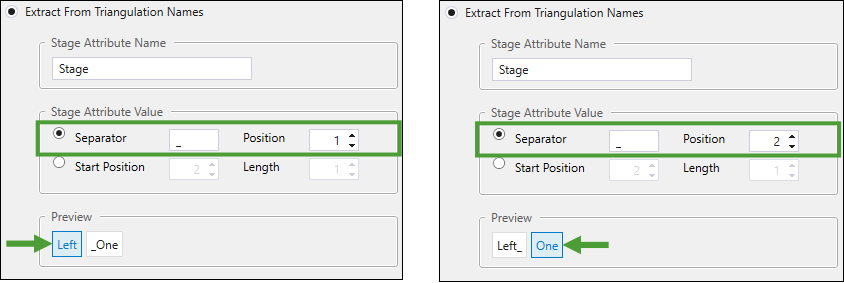
-
Start Position. Choose the starting character and the length by entering the appropriate values.
Example
To set Left as the stage attribute, enter1as Start Position and4as Length. To set One as the stage attribute, enter6as Start Position and3as Length.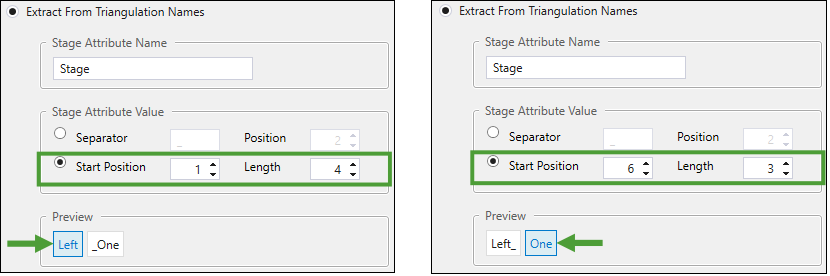
-
-
-
-
Bench. Choose one of the following ways to set the bench attribute:
-
Turn on Use Default Value toggle.
This will allow you to create a new bench attribute and set a default bench value to all solids.

-
Turn off Use Default Value.
This will allow you to set the bench by choosing one of the following ways:
-
Using an attribute from an existing model.
Select either
Solid or Block model and specify the attribute from the drop-down.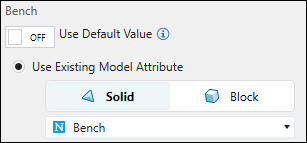
-
Extracting the bench attribute from triangulation names.
Enter the name for the stage attribute and set the stage attribute value by configuring one of the following:
-
Separator. Enter
_(an underscore) as the Separator and specify the position.Example
Evolution will select Left when you set the position to1and One when you set the position to2.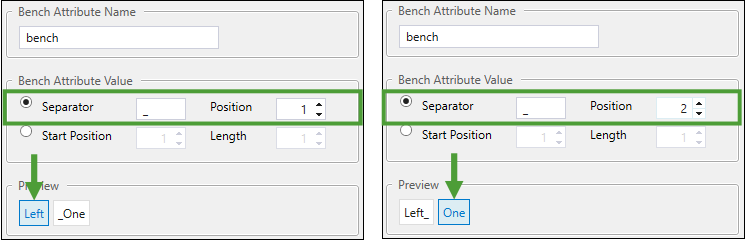
-
Start Position. Choose the starting character and the length by entering the appropriate values.
Example
To set Left as the stage attribute, enter1as Start Position and4as Length. To set One as the stage attribute, enter6as Start Position and3as Length.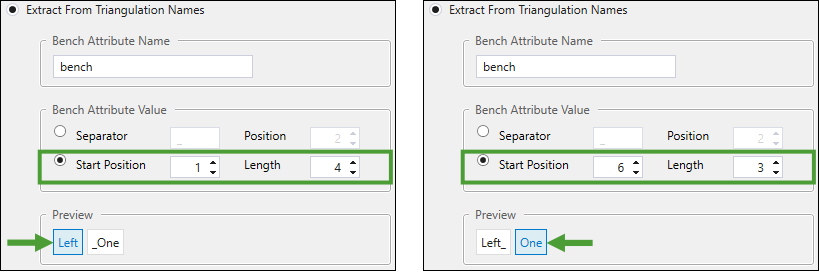
-
-
-
-
-
After configuring all the panels for your dynamic solids pit import, click
 Run. Evolution will process the configuration you have set. When successful, your model will be added to the project explorer.
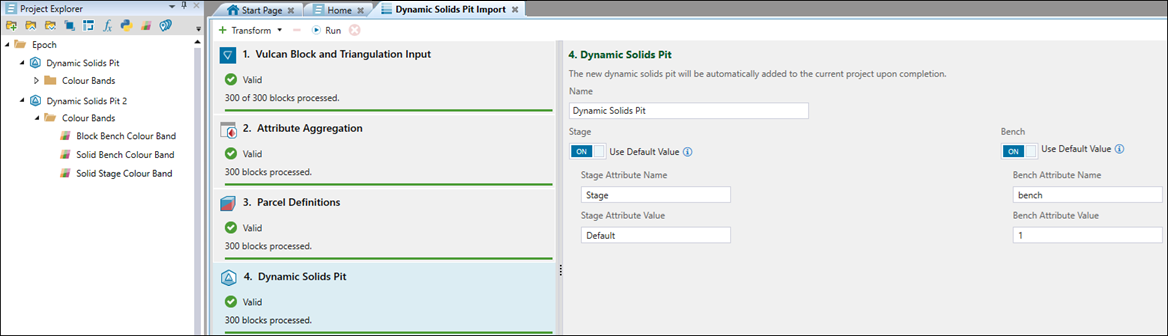
To change the name of the imported model, right-click on it in the project explorer, select
Rename, and enter the new name.Note: If Evolution finds errors in your configuration, it will indicate what needs to be modified in each panel.
You can update your imported model by right-clicking on the imported model in the project explorer and selecting
 Transform… from the context menu.
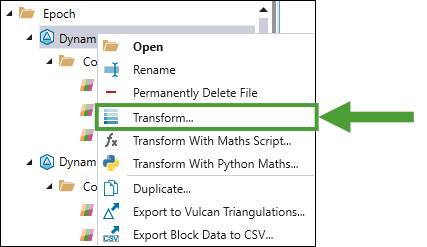
This will open a transform containing all of the original parameters used to import the model. You can modify these parameters and then click
Run to update the model.Important: Updating the model will cause any setup-level solid cuts to be reset.
Note: You can also transform your imported model using
Maths Script or Python Maths. To do so, right-click on the imported model in the project explorer and select the required transform type from the context-menu.
See Maths Script and Python Maths for more details.Tip: You can also create a new model based on the previously imported dynamic solids model, which will allow you to modify the previously set configuration. To do so, right-click on the model in the project explorer and select
 Duplicate… from the context menu. Evolution will create the <Imported model name> Transform file in the project explorer and open it in a new window. Apply the required changes according to the steps described in this topic and click Run to generate your new dynamic solids model.
To apply the imported dynamic solids model into a setup, drag it from the project explorer into the required setup.
Properties of the dynamic solids models
You can check the properties of your imported dynamic solids model by opening it in the viewer. To do so, double-click the model in the project explorer or right-click on the model in the project explorer and select ![]() Open from the context menu.
Open from the context menu.
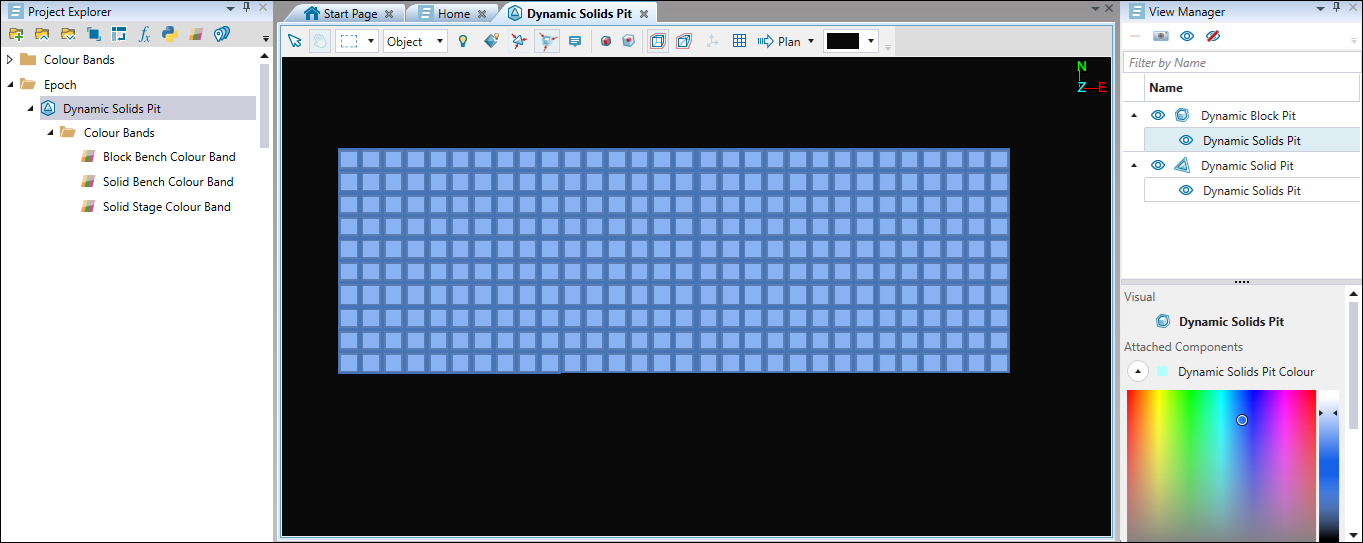
Note: You can apply dynamic colours and dynamic filters to both the solid and block components of your dynamic solids model in the viewer the same way as in other models. See View Manager for more information.
Next, go to the ![]() (Interactive Mode) selection, select the required solid in your view, and open the Properties panel.
(Interactive Mode) selection, select the required solid in your view, and open the Properties panel.
Tip: Shift+click to select multiple solids.

Tip: Check the properties of the required blocks by changing the selection type to Block and selecting them in the viewer.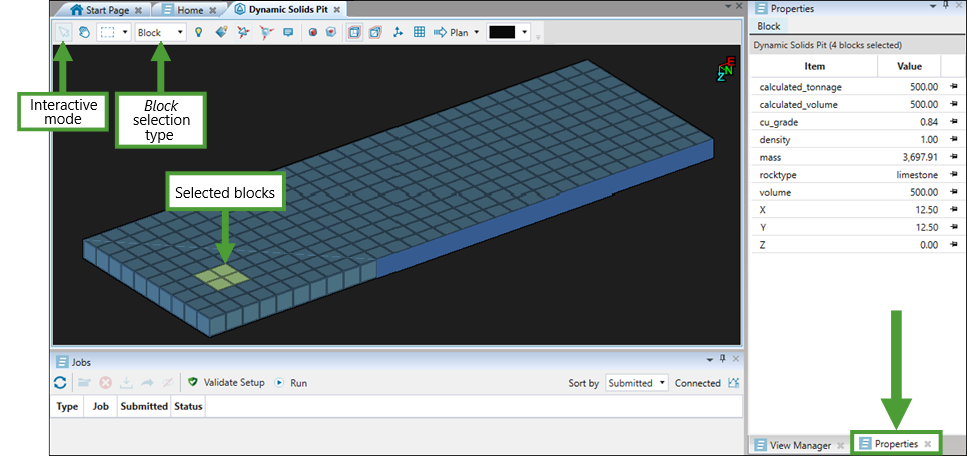
The Properties panel displays the information on the total amount calculated for each defined model attribute and the properties of each parcel that you have defined in your imported dynamic solids model.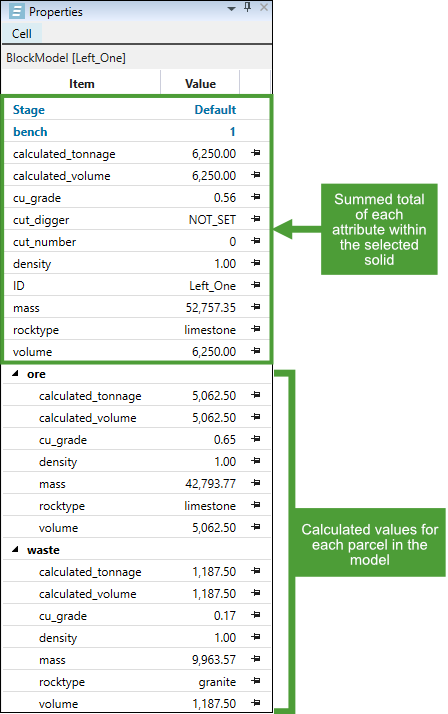
Note: The values are calculated based on the aggregation behaviour that you specified while importing the dynamic solids model. In the example above, cu_grade is a weighted average and rocktype is mode. See step 5 of the procedure for importing a dynamic solids pit.
Tip: Click the ![]() button to pin the selected attribute on the top of the Properties tab. To unpin a pinned attribute, click the
button to pin the selected attribute on the top of the Properties tab. To unpin a pinned attribute, click the ![]() button. Save the pinned attributes in the Properties tab by clicking
button. Save the pinned attributes in the Properties tab by clicking ![]() Save in the Evolution Home ribbon or by pressing Ctrl+S.
Save in the Evolution Home ribbon or by pressing Ctrl+S.
See also: Solid Cuts, Viewer guidelines
