Working with Applications
This page explains the basics of working with your installed Workbench applications. It assumes your applications are already downloaded, installed, and licensed. If not, consider reading Downloading Applications and Licensing Applications first.
Setting the data folder
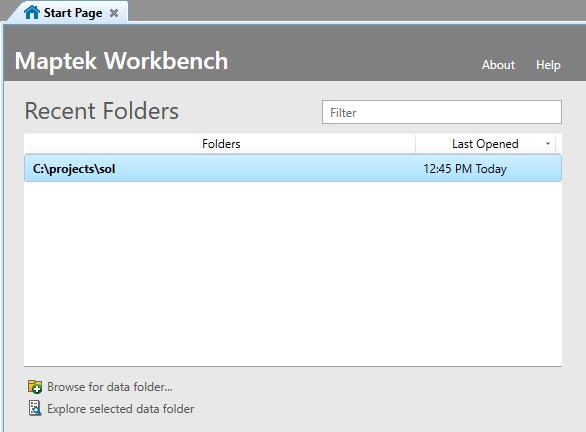
Some applications, such as Vulcan and Vulcan GeologyCore, require a folder to be set which specifies the main location of files in your project. This is called the data folder. You can set the data folder on the Start Page (![]() >
> ![]() Start Page). The data folder affects what you see in the data explorer. You can also change the data folder from the data explorer. See Workbench Utilities > Data explorer for more information on the data explorer. The data folder also influences what you see in the Workflows and Python Scripts lists on the Maptek Extend ribbon.
Start Page). The data folder affects what you see in the data explorer. You can also change the data folder from the data explorer. See Workbench Utilities > Data explorer for more information on the data explorer. The data folder also influences what you see in the Workflows and Python Scripts lists on the Maptek Extend ribbon.
-
To set the data folder, click Browse for data folder….
Recently set data folders appear in the Recent Folders list.
-
Double-click on a folder in the Recent Folders list to open the folder in the default application.
Tip: The default application is the application on the Start Page with the active
 icon appearing below its tile. To change the default application, click the inactive icon under the tile of the application you want to set as the default.
See also: Configuring Preferences > Data
Launching your application
There are several ways to launch your application, as follows:
-
From the Start Page
Your installed Workbench applications are listed under the Applications heading on the Start Page. Simply click the application tile.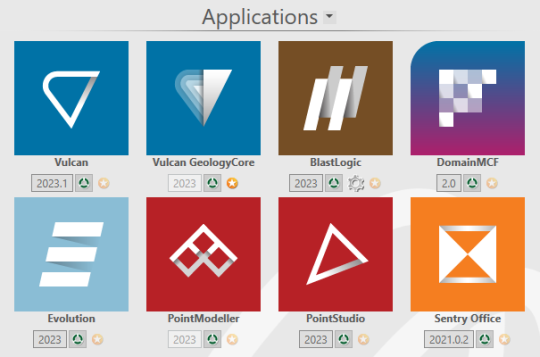
If you wish to launch a specific version of an installed application, you can do it from the Start Page. See Launching a specific version of an application below for details.
-
From the Launch Button
Your installed Workbench applications can all be launched from the Launch Button ( ) located in the top-left corner of Workbench. This is a convenient method to launch applications when the Start Page has been closed.
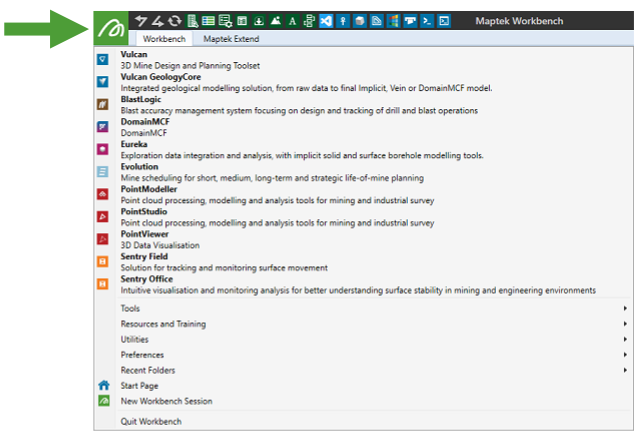
-
From Windows desktop
Many Workbench applications add an icon to the Windows desktop during installation. You can launch such an application by double-clicking its icon on the Windows desktop. -
From a specific Maptek database
If your application uses Maptek databases (.maptekdb), you can open the database in Workbench by dragging the MAPTEKDB file from a Windows File Explorer onto the Start Page. You will then be prompted to choose the application to open the database in.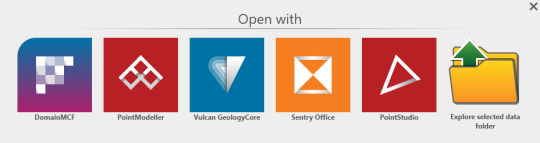
Launching a specific version of an application
You might occasionally need to open a specific version of an application that is not the latest version, for example, to guarantee the compatibility or reliability of a script, workflow, or macro developed with a specific version.
Before you can open a specific version of application, it must be installed. You can do this in the Download Manager. See Downloading Applications > Installing a specific version of an application for more information.
If the specific version of the application you want to run is installed, you can open it by clicking the version selector beneath the application icon and selecting the version you wish to launch.
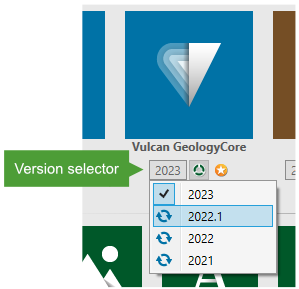
Note: The version you select in the version selector will be remembered between Workbench sessions, unless overridden by explicitly opening a specific application version from Windows.
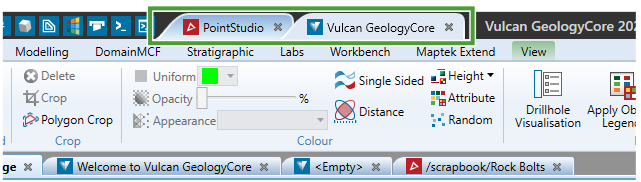
Switching between active applications
When you launch an application, a tab for that application appears in the Workbench title bar. Only one application can be active at any given time. Click on an application tab to activate that application.
-
Click on an application tab to activate that application. Activating an application will cause Workbench to show the application’s menus and explorers, and switch to the last active document for that application.
-
To close an application, click the
 button in the application tab.
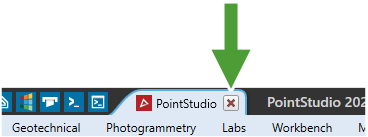
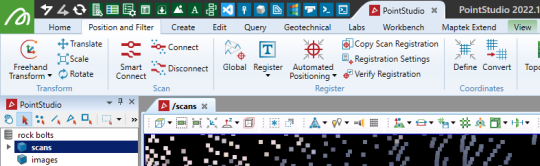
Accessing tools
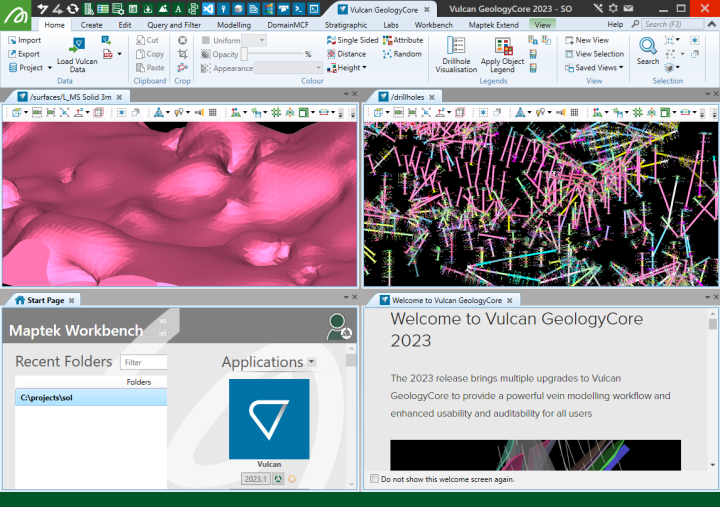
Maptek Workbench applications use ribbon menus or traditional menus and toolbars to present their tools and commands. As mentioned above, when you switch to an application, Workbench will show the menus, toolbars, and explorers specific to that application. The menus and toolbars of other open applications will be hidden until you switch to that application.
|
|
|
A Workbench application with a ribbon user interface displaying tools and commands. |
Tip: You can choose whether Workbench uses a ribbon or menus-and-toolbars user interface in the Workbench preferences (see Configuring Preferences > Preferred User Interface).
Tip: You can customise an application’s predefined menus and toolbars, or create new menus and toolbars. See Customising Applications.
Searching for tools and commands
The Search tool located in the top-right corner of Workbench allows you to quickly find Workbench or application tools that you know the name of, but can’t remember the location of.
Simply start typing into the Search field, and a list will appear of all the tools matching the text you enter.
Note: The Search tool will only list tools for the active application and Workbench itself.
Tip: Press F3 to put the keyboard focus onto the Search field from any application.
Working with Document Windows
Workbench is a multiple-document interface (MDI), which means you can have multiple documents for multiple applications open at the same time. You can switch to any document by clicking on its tab in the document area, which makes the document active. The active document, indicated by having its title bold in the document tab, has keyboard focus. Activating an application document will also make the parent application active.
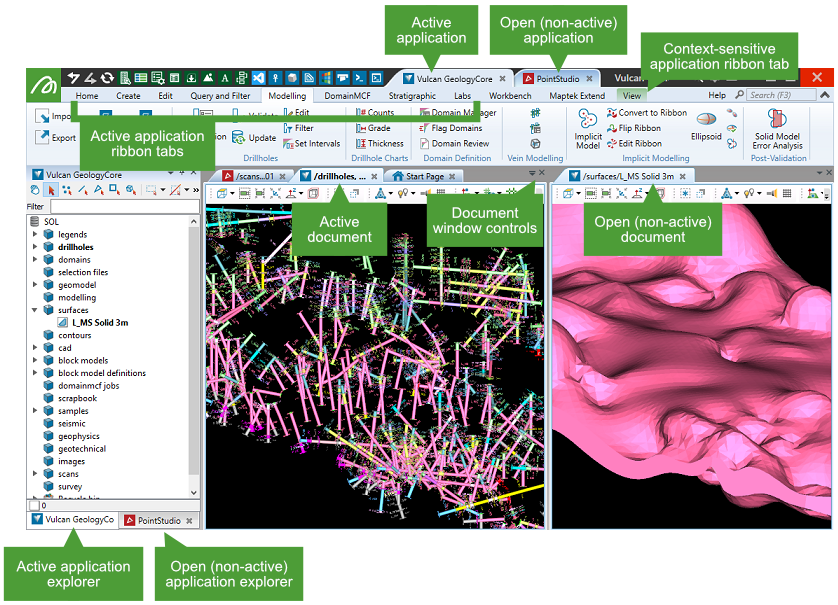
The document area is highly customisable: you can float document windows (detach them from Workbench, for example, to display on another monitor), dock them to display in different locations within the document area, or stack multiple documents on top of each other.
Floating and docking document windows
There are many ways of configuring document windows and the main document area.
By default, when you open a document (e.g. a view window), it appears as a tab in the main document area. Each new document adds a tab to this area; documents are stacked on top of each other and you switch between documents by clicking on the document’s tab.
-
To float a document, simply drag its tab to a new location. A floating document is no longer a child of the main Workbench window; it can be moved to another monitor and treated as an independent window.
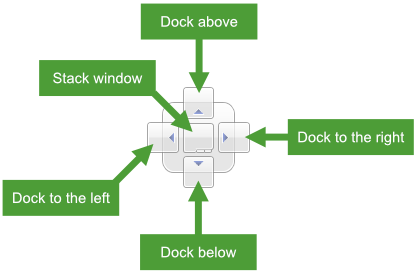
When you float a document window over the main Workbench document area or over another document window (including floating windows), dock targets appear that indicate locations to which you can dock the document window.
-
To dock a floating document window into a new position relative to an existing document, drag the document over a positional dock target (left/right/above/below) and release the mouse button.
-
To stack a floating document window onto another document, drag the document over the centre dock target (“Stack window” in the image above) and release the mouse button.
Tiling documents
Tiling documents means arranging them in a tile pattern within the main document area so that each document is visible.
-
To quickly tile all open documents that are stacked in the central part of the document area, on the Workbench ribbon, in the Tile group, click
 Tile.
Tile.
Tiling and tying views
Many applications also support tying two or more 3D view windows together. Tied view keep their camera perspectives in sync so that panning, rotating, and zooming in any of the views will pan, rotate, and zoom all of the tied views.
-
To tile and tie 3D view windows, on the Workbench ribbon, in the Tile group, click
 Tile and Tie. All 3D view windows that support being tied will be tied together.
Note: Open views from different applications will also be tied.
-
To untie a view window, click the coloured untie button (e.g.
 ) in the view window toolbar.
Fullscreening
Many application view windows support going full screen.
-
To enter full screen mode on a view window, make sure the view has keyboard focus by clicking inside the view, and then press F11.
-
To exit full screen mode, press F11 again.

Saving document layouts
You can save specific arrangements of document windows as layouts. See Saving and Loading Layouts for more information.
Getting assistance
There are several ways you can get assistance with your specific Maptek application.
Accessing help documentation
All Maptek products have dedicated help documentation to help you learn and understand the product.
-
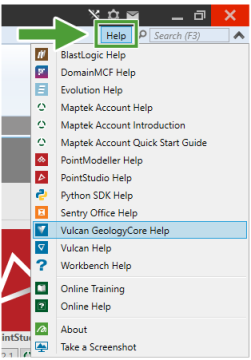
To access the help documentation for your installed Workbench application, go to the Help menu in the top-right corner of Workbench, and select an application. The help documentation for many applications is also available at help.maptek.com.
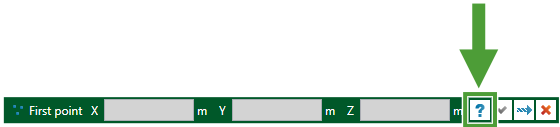
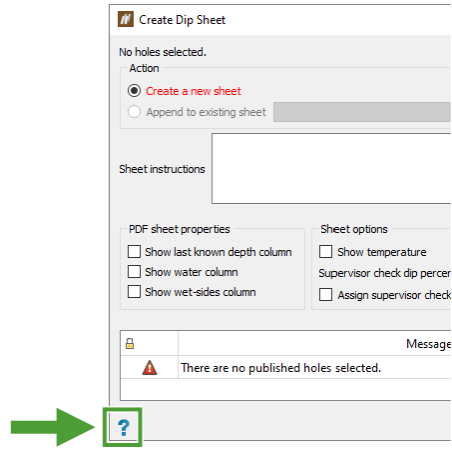
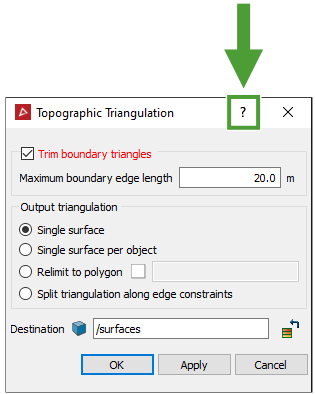
Many Workbench applications also support context-sensitive help. Panels or other areas that have context-sensitive help available provide a ? (Context-sensitive help) button. Click the ? button to view the help for that context.
|
|
|
Context-sensitive help button in a status bar request. |
|
|
|
Context-sensitive help button in panels. |
Requesting support
You can request technical support from Maptek, or suggest a feature or bug, from within Workbench.
-
Click the
 (Request Support) button located in the Workbench title bar and select the desired option.
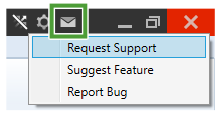
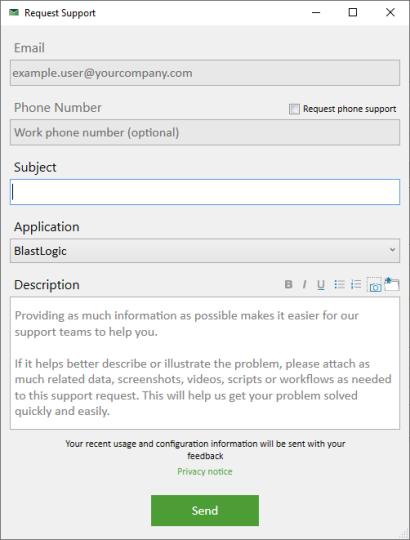
Fill out the panel with as much information as possible.
-
Click the
 button located above the Description field to take a screenshot and attach it to the request. Don’t worry—the support panel itself will not be included in the screenshot.
 -
Click the
 button located above the Description field to upload a file and attach it to the request.
Tip: You can also drag objects or files from Workbench data or project explorers or Windows File Explorer to anywhere on the support panel to include them in the support request. You will be prompted to export objects to a file format suitable for inclusion in the request.
-
Click Send to send your request. A Maptek representative will get in touch with you as soon as possible.
-
Online Training
Maptek Online Training allows you to enhance your knowledge and skills in specific areas. Visit Maptek Online Training at www.maptek.com/training/online. You can also access the Online Training portal from ![]() Start Page > Resources and Training >
Start Page > Resources and Training > ![]() Online Training.
Online Training.
Next topic: Configuring Workbench
