Create and edit drillholes
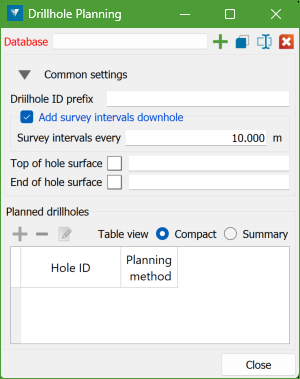
The Drillhole Planning panel lets you create a planning database and configure settings to create and edit drillholes.
On the Modelling ribbon menu, in the Drillhole Planning group, click Drillhole Planning.
Drillhole planning database
Choose an existing drillhole planning database from the drop-down list, or create a new one using the controls on the right. You can also use these controls to copy, rename, or delete a drillhole planning database.
|
|
Create a new drillhole planning database |
|
|
Make a copy of the current drillhole planning database |
|
|
Rename the current drillhole planning database |
|
|
Delete the current drillhole planning database |
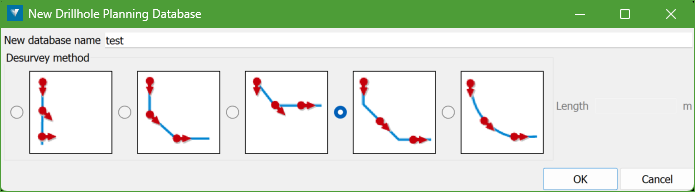
Create a drillhole planning database
Click the ![]() Add button to open the database creation panel.
Add button to open the database creation panel.
-
Enter a name for the new database.
-
Select a desurvey method:
-
No desurvey: No desurveying is applied when creating the database.
-
Segment following: Each interval after a survey measurement is positioned using that measurement.
-
Segment preceding: Each interval before a survey measurement is positioned using that measurement.
-
Tangent: Each interval around a survey measurement is positioned using that measurement as a tangent.
-
Tangent with given length: Additional survey measurements are interpolated at a given length down the hole. Each interval around a survey measurement is then positioned using that measurement as a tangent. An implicit tolerance of 10% of the given length is applied.
Note By default, the Tangent method is selected as the desurvey method. -
-
Click OK to create the database.
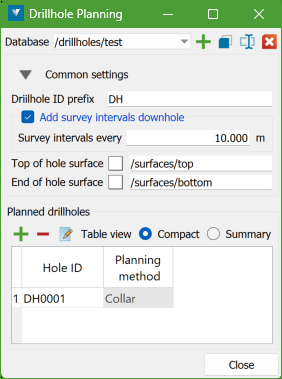
Common Settings
The settings section on the main panel lets you define a drillhole name prefix and choose whether to record downhole deviation as survey intervals. You can also specify optional top and bottom surfaces or solids to extend or clip the drillhole.
Planned drillholes
All drillhole names and collar data appear in the datagrid on the panel.
You can view this datagrid in two modes: Compact or Summary.
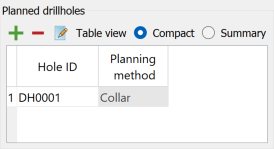

Drillholes can be added, edited, or deleted using the controls on the top-left corner of the datagrid.
|
|
Add a new drillhole to the drillhole planning database |
|
|
Delete selected drillhole(s) from the drillhole planning database |
|
|
Edit the selected drillhole |
You can also rename drillholes directly in the table, as long as each new drillhole ID is unique within the database.
Create drillholes
Click the ![]() Add button to open the Add New Drillhole panel.
Add button to open the Add New Drillhole panel.
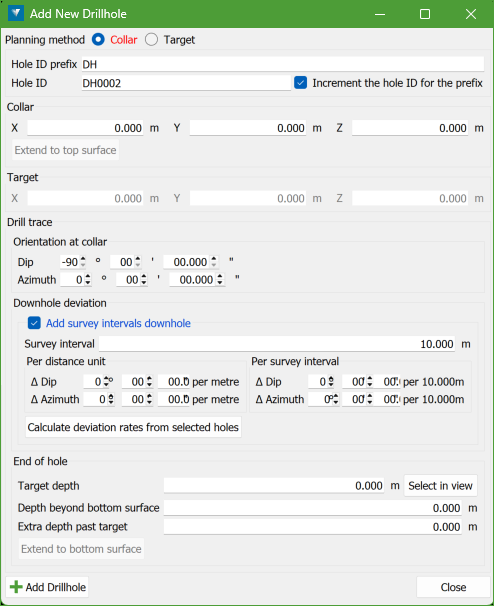
The Hole ID prefix is taken from the common settings on the main panel, but you can change it if required.
You can use the automatically generated Hole ID or type in your own. When Increment the hole ID for the prefix is enabled, the Hole ID counter increases each time a new drillhole is created. You can choose whether the counter increments separately for each prefix or not.
The prefix itself is optional. Any drillhole name is allowed as long as it is unique within the database.
New holes are added using the Add Drillhole button at the bottom-left of the panel. Multiple holes can be created without closing the panel.
Planning method
Two planning methods are available for defining a drillhole:
-
Collar: requires collar point coordinates.
-
Target: requires target point coordinates.
Define collar and target points
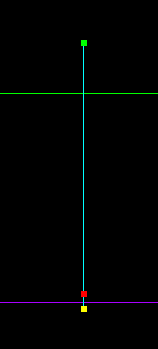
The collar, target, and end-of-hole points are displayed in the current view.
You can pick coordinates directly from the view (typically a section view) or enter the location manually on the panel.
Add survey intervals downhole
Adding survey intervals is optional.
If enabled, dip and azimuth values are added at depth increments defined by the survey interval.
Important: The survey interval must be greater than zero when adding survey intervals downhole. The range must be ≥ 0.001m.
Deviation rates can be defined either per survey interval or per distance unit. Both values are shown and kept in sync on the panel.
Deviation rates from other drillhole databases
Select Calculate deviation rates from selected holes to open the Drillhole Deviation Calculator panel.
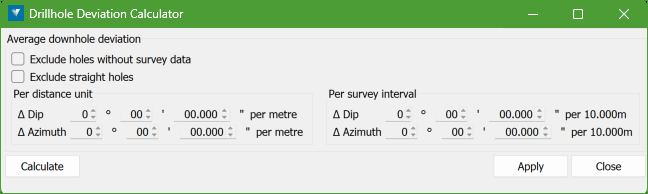
This tool calculates the average dip and azimuth deviation from other drillhole databases or selected subsets of holes.
Click Apply to transfer the calculated values back to the Add New Drillhole or Edit Drillhole panel.
Extend and clip a drillhole to top and bottom surfaces
Select the top and bottom surfaces on the main panel. Both closed and open surfaces are supported.
-
Extend to top surface extends or clips the hole to the top surface.
-
Extend to bottom surface extends or clips the hole to the bottom surface.
If a value is entered for Depth beyond bottom surface, the drillhole will extend that additional distance past the bottom surface.
Edit existing drillholes
To edit a drillhole, select it from the datagrid and click the ![]() Edit button. The Edit Drillhole panel will open, displaying the selected drillhole.
Edit button. The Edit Drillhole panel will open, displaying the selected drillhole.

You can modify any of the drillhole parameters, as described in Create drillholes.
Click the Save Drillhole button to save your changes. The panel will close, returning you to the main panel.
