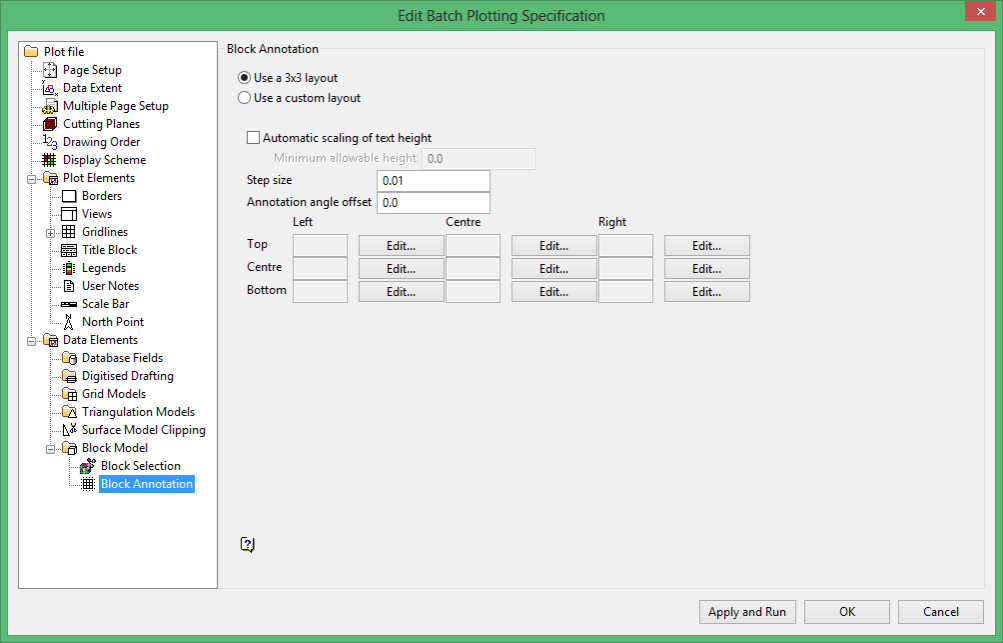
Block Annotation
Use a 3 x 3 layout
Select this option to use a 3 x 3 grid for the annotations. Refer to 3 x 3 Layout .
Use a custom layout
Select this option to use a custom layout for the annotations. The panel options displayed on the panel will change. Refer to Custom Layout .
Automatic scaling of text height
Select this option to scale automatically the text height. You must enter, in plotter units, the minimum text height.
Step size
Enter the increment by which the text height is scaled automatically. This forces the annotations into set sizes and hence improves the appearance of the plot.
Example:
The auto scaling produces the following text sizes: 0.167 0.223 0.351 Step Size: 0.1 With this step size, the text heights become: 0.100 0.200 0.300
Annotation angle offset
Enter the angle for the annotations. The angle is measured from horizontal, negative below horizontal and positive above. This option is most useful when you are plotting a section of a dipping block model. Have this angle set to the angle of dip and the text will be parallel to the blocks. However, if you apply a vertical exaggeration to the section, then you must alter the annotation angle. A rule of thumb (though not exact) for changing the angle, so that the text is parallel to the blocks is that for every whole amount of vertical scaling, add to the current annotation angle the dip of the block model.
For example: for a block model dipping -5?, at no exaggeration, use an annotation angle of -5?. For the same model with a vertical scale of 2x (that is 1:1200 horizontal and 1:600 vertical), use an annotation angle of -10?. For a vertical scale of 3x, use an angle of -15?
3 x 3 Layout
If you have chosen to use a 3 x 3 layout for the annotations, then each block is separated into 9 sections.
| Top Left (TL) | Top Middle (TM) | Top Right (TR) |
| Middle Left (ML) | Centre (C) | Middle Right (MR) |
| Bottom Left (BL) | Bottom Middle (BM) | Bottom Right (BR) |
To specify the annotations for each section, select the Edit button beside the appropriate section. The Block model variable annotation panel is then displayed.
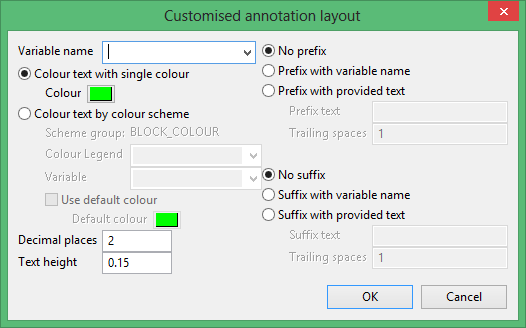
Variable name
Select, from the drop-down list, the variable name.
Colour text with single colour
Select this option if you want the block model annotation to be a single colour. You will need to specify the colour.
Colour text by colour scheme
Select this option to use a scheme to colour your block model annotation in the plot. You will need to select the scheme name and variable from the drop-down lists.
check the Use default colour Select this check box to specify the colour of the annotation of blocks with the default value.
Decimal places
Enter the number of decimal places that you want to be included in your annotation.
Text height
Enter, in plotter units, the height of the text.
No prefix
Select this option if you do not want to include a prefix with the annotations.
Prefix with variable name
Select this option to prefix the annotation with the variable name.
Prefix with provided text
Select this option to enter the text for the prefix for the annotations. You must also specify the number of spaces after the prefix.
No suffix
Select this option if you do not want to include a suffix with the annotations.
Suffix with variable name
Select this option to suffix the annotation with the variable name.
Suffix with provided text
Select this option to enter the text for the suffix for the annotations. You must also specify the number of spaces before the suffix.
Custom Layout
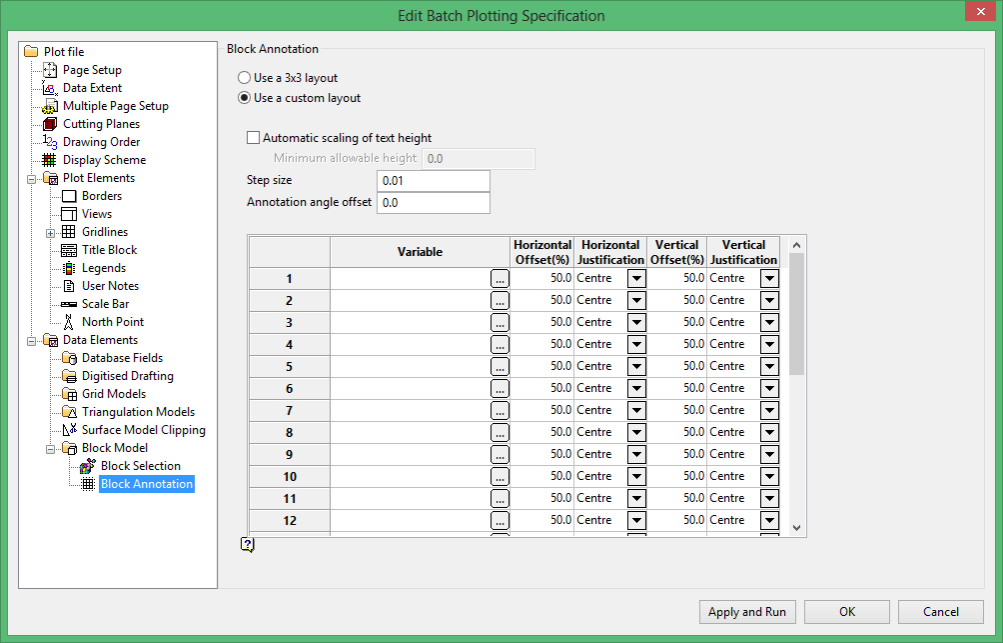
If you have selected to use a custom layout for the block annotations, then you can specify up to 25 variables. You also specify the horizontal and vertical offsets and the text justification.
Variable
Click in the cell to display the Customised annotation layout panel.
Variable name
Select, from the drop-down list, the variable name.
Colour text with single colour
Select this option if you want the block model annotation to be a single colour. You will need to specify the colour.
Colour text by colour scheme
Select this option to use a scheme to colour your block model annotation in the plot. You will need to select the scheme name and variable from the drop-down lists.
check the Use default colour Select this check box to specify the colour of the annotation of blocks with the default value.
Decimal places
Enter the number of decimal places that you want to be included in your annotation.
Text height
Enter, in plotter units, the height of the text.
No prefix
Select this option if you do not want to include a prefix with the annotations.
Prefix with variable name
Select this option to prefix the annotation with the variable name.
Prefix with provided text
Select this option to enter the text for the prefix for the annotations. You must also specify the number of spaces after the prefix.
No suffix
Select this option if you do not want to include a suffix with the annotations.
Suffix with variable name
Select this option to suffix the annotation with the variable name.
Suffix with provided text
Select this option to enter the text for the suffix for the annotations. You must also specify the number of spaces before the suffix.
Related topics

