Getting StartedSource file: getting-started.htm |
Follow the instructions in this chapter to start using .
Workbench access
Sentry Office is hosted by Maptek Workbench, allowing for interoperability with other Maptek applications.
The Workbench Start Page is the launchpad for Maptek tasks, projects, and applications, including the following:
-
Contact Maptek to request support, suggest features, and report bugs.
-
Access common tools such as spreadsheet and text editors.
-
Keep your Sentry version up-to-date via the Download Manager.
-
Integrate Sentry processes with other Maptek products such as PointStudio, using Workflow Editor.
The Download Manager and the Workflow Editor are accessible from the quick access toolbar, the Workbench ribbon tab, or Workbench Start Page.

Launching Sentry Office
Follow the instructions below to get started using Sentry Office.
-
Click the Sentry Office tile
 in Workbench.
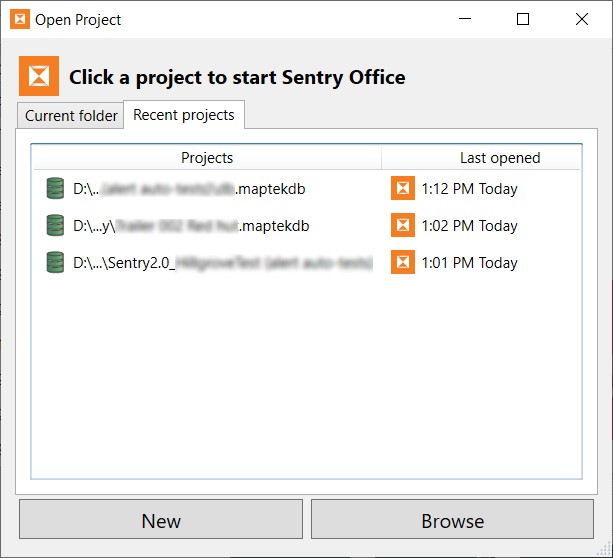
The Open Project panel will appear.
-
Either open an existing project, or create a new project, as follows:
-
To open an existing project, either:
-
Select an existing project from the Recent projects or Current folder list
-
Click Browse to open a file browser; navigate to the folder containing a Maptek database file (
.maptekdb) and click Open.
Or
Note: You can open projects that were created in either Sentry Office or Sentry Field.
NoteWhen opening an existing project created in an older version of Sentry, a message similar to the one below will appear. Select the appropriate option.
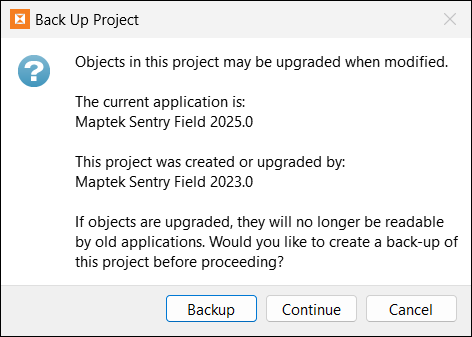
Backup and upgrade may take a long time and occupy a large amount of disk space if the project is large. Choose Upgrade only if you do not intend to open the project in the older version of Sentry again. See File Management for more information.
-
-
To start a new project, click New to open a file dialog; specify a file name and location for the new project. After pressing Save, the application will open and prompt you to create a new scene.
The Create Scene tool will guide you through the process.
You can create a scene either directly from scan files or from archives generated by Sentry.
-
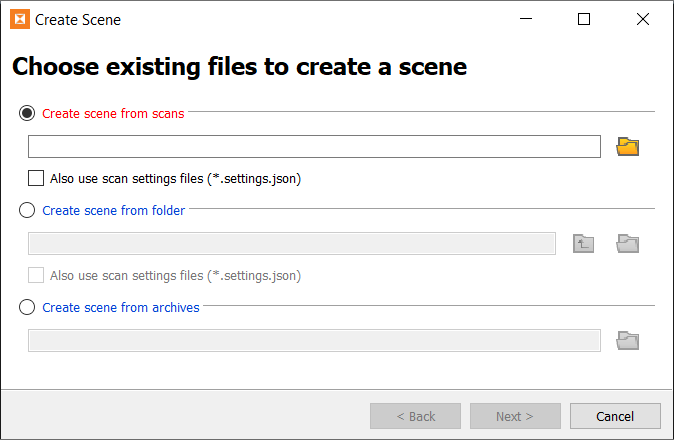
Creating a scene from scan files
To create a scene from scan files:
-
Choose either of the following options:
-
Create scene from scans. Select this option when you want to select a specific subset of scan files. Click the
 button to open a file browser. Select the scans you want to import and click Open.
 -
Create scene from folder. Select this option when you want to import an entire folder of scans. Click the
button to open a file browser. Select the folder containing the scans you want to import and click Select Folder.
Or
-
-
(Optional) If you are creating a scene from scan files and there are connected settings files available, select the Also use scan settings files (*.settings.json) checkbox.
-
Click Next >.
-
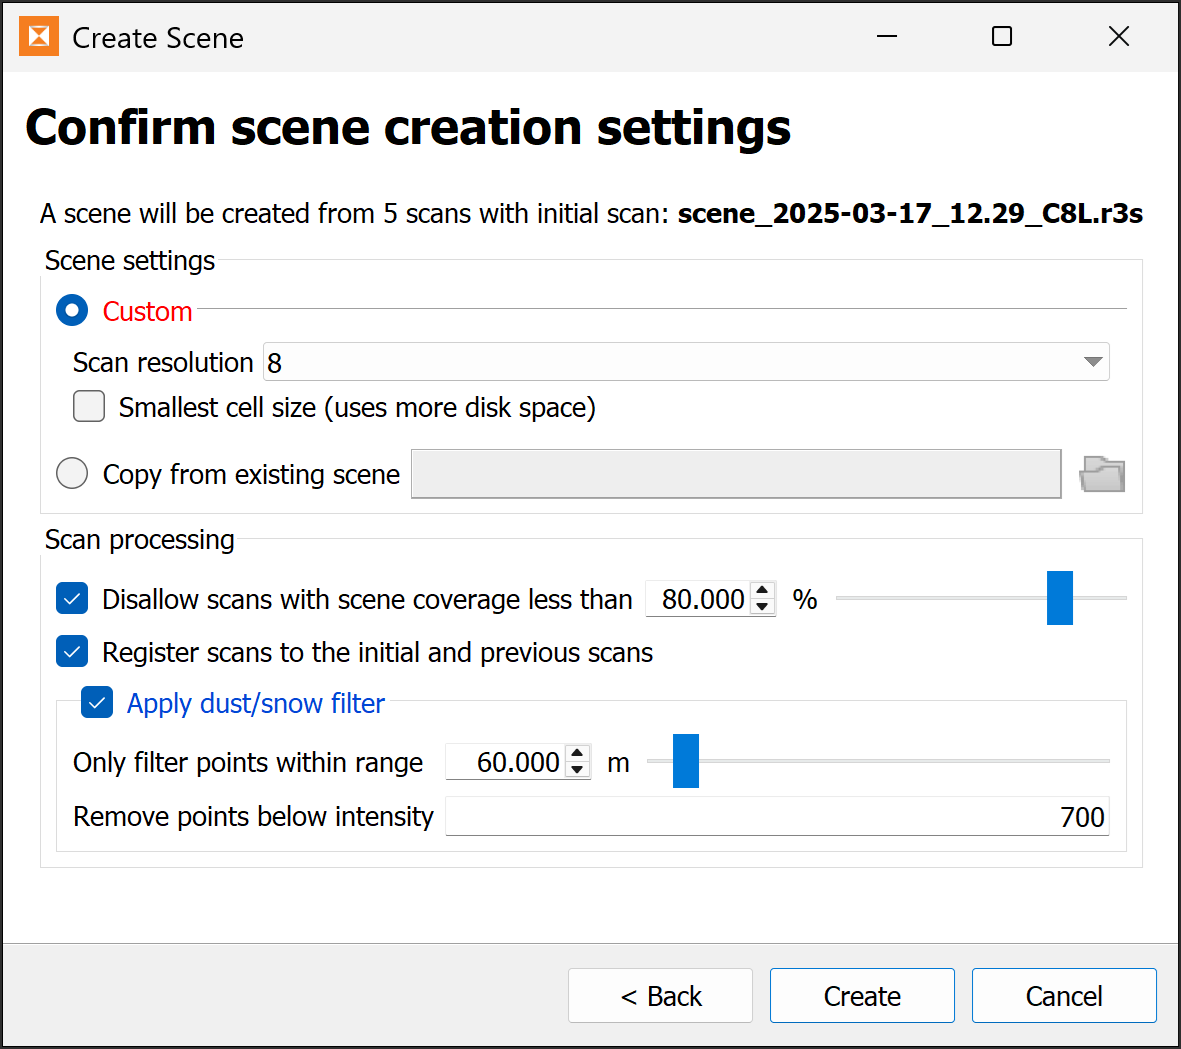
Configure the settings you would like to apply to the scene.
-
Under Scene settings, select an option for initialising the scene settings:
-
Select Custom to use default scene view settings, but with the options to select a different scan resolution and to use the smallest cell size.
Note: The scan resolution is initially set to the resolution of the first scan. If you select a higher resolution than is available in the scan, Sentry Office will use a smaller cell size, resulting in a lower than normal point count per cell.
-
Select Copy from existing scene to use the scene settings from an existing scene. You can find scene settings from an existing Sentry project in a file named
scene.jsonwithin a project subfoldersentry.active. For example,myproject.maptekdb\sentry.active\Scene\scene.json.
-
-
Under Scan processing, configure the settings to apply when processing each scan into the scene:
-
Select Disallow scans with scene coverage less than to tell Sentry to ignore scans that do not overlap the scene by the specified percentage. This is useful when you have scans with some data missing, which is a common problem associated with fog, mist, or rain. Specify the percentage of valid scan data (coverage area) below which to exclude a scan. The first scan in the scene will be used as the reference scan; ensure it consists entirely of valid data.
-
Select Register scans to the initial and previous scans to tell Sentry to register each successive scan to both the scan preceding it and the initial scan (recommended). If not selected, scans will not be registered before being added to the scene.
-
Select Apply dust/snow filter to apply a filter to each scan before it is added to the scene (recommended, except for scans of underground environments).
Note: If you are creating a scene from a single scan, the first two scan processing options are not available.
-
-
-
Click Create to finish.
Creating a scene from archives
Follow these steps to create a scene from Sentry archives:
-
Choose Create scene from archives.
-
Click the
button to open a file browser, select the ZIP archive (.zip) files you want to import and click Open.Archive files are created in Sentry Field or Sentry Office. See Archiving for more information on creating archives.
-
Click Next >.
Sentry displays a confirmation message.
-
Click Create to finish.
Importing scans using workflows
Source file: getting-started.htm
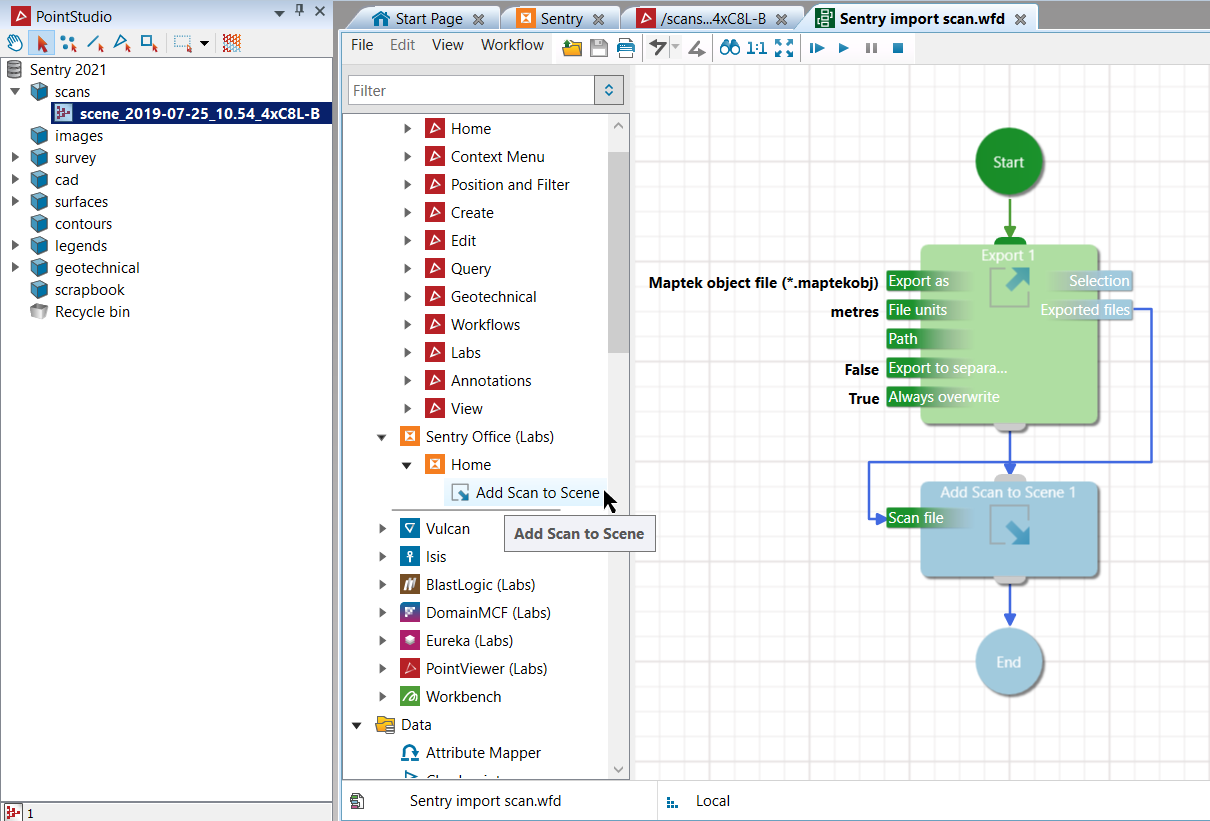
![]() Workflow Editor is a Maptek Workbench tool that facilitates cross-product interaction. It provides ways to link and coordinate the capabilities of various Workbench applications and tools. Workflows present business processes in a visual and easy to comprehend manner where the end user can interact and track the process of the work being done. The Workflow Editor provides a means to document and orchestrate repetitive tasks to make this work easier for workflow users.
Workflow Editor is a Maptek Workbench tool that facilitates cross-product interaction. It provides ways to link and coordinate the capabilities of various Workbench applications and tools. Workflows present business processes in a visual and easy to comprehend manner where the end user can interact and track the process of the work being done. The Workflow Editor provides a means to document and orchestrate repetitive tasks to make this work easier for workflow users.
Maptek PointStudio is a point cloud processing tool with which you can analyse 3D spatial data sets, create surface models, calculate volumes, analyse geometry (angles, distances, volumes), and output data for publication in 2D and 3D plans suitable for import to mine design and CAD packages.
Maptek PointStudio also offers some more advanced registration tools. You can import scans registered in PointStudio into Sentry Office using workflows. The Workflow Editor will accept a supported scan file and add it into the currently viewed scene.
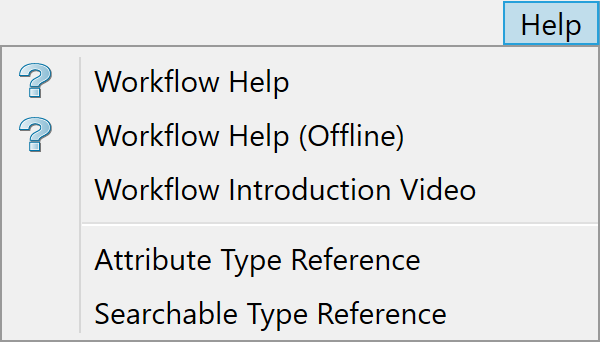
Workflow Editor has its own help documentation along with an introduction video.
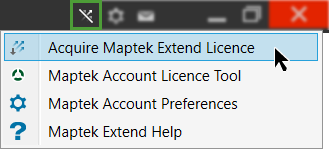
Workflow is licensed under Maptek Extend and requires users to set up a Maptek Account.