Preferences
The Preferences tool allows you to configure global settings in BlastLogic, such as language, date, and unit settings. To open this tool, navigate to the Home tab, in the Setup group and select ![]() Preferences.
Preferences.
Tip: You can also enter Preferences by clicking the ![]() (Preferences) icon at the top right of your screen and selecting
(Preferences) icon at the top right of your screen and selecting ![]() BlastLogic Preferences.
BlastLogic Preferences.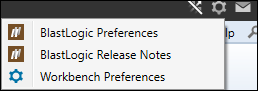
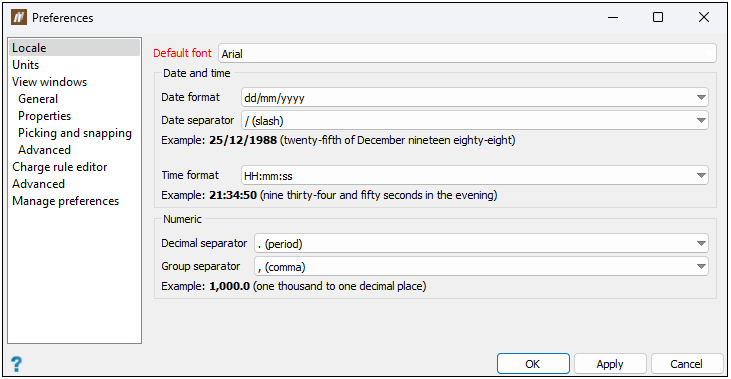
Locale
The Locale tab contains the font, date, and numeric settings. You can edit each setting by selecting the desired format from the drop-down menus.
Note: English is the only language available in BlastLogic.
After setting the required properties, click OK to apply them in your view and close the Preferences panel, or click Apply to apply your settings and stay in the Preferences panel.
Note: These settings will only take effect in new views. Close any existing views and reopen them to see the changes.
Units
Units are configured in Workbench preferences. Click Manage Workbench Preferences... to modify units preferences.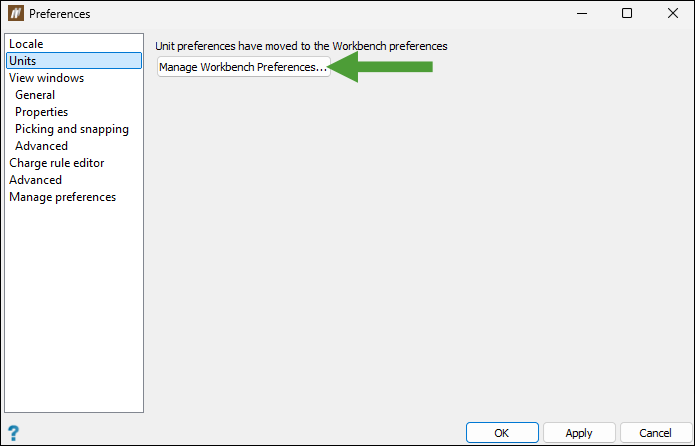
See Configuring Preferences > Units in Workbench Help for details.
View windows
The View windows tab contains the following four subtabs:
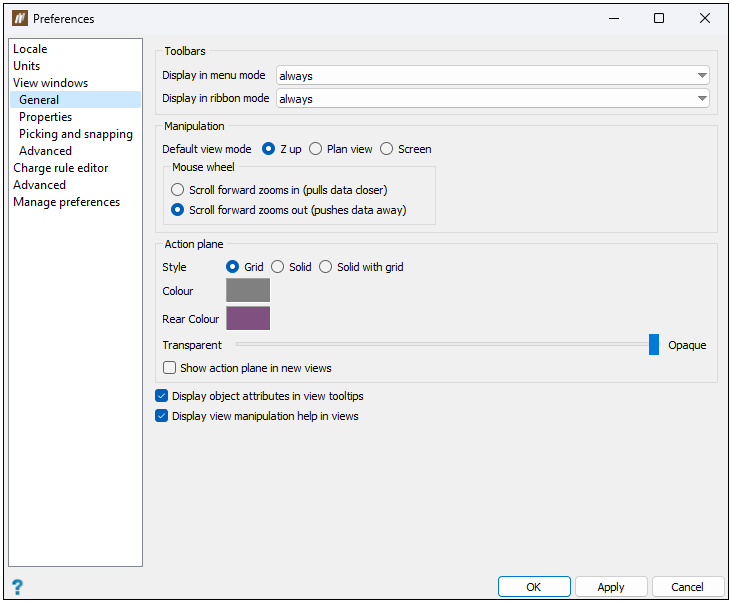
General
The General subtab contains the default preferences for the view windows, including the functionality of the mouse wheel.
Specify the basic view window options by setting the following:
-
Toolbars: Choose when view window toolbars are displayed in either ribbon mode or menu mode:
-
always: Toolbars are always displayed.
-
never: Toolbars are always hidden.
-
when floating: Toolbars are displayed when the view window is floating, but not when docked.
-
-
Manipulation: Choose the default manipulation mode and mouse wheel behaviour. See Manipulation modes for more information.
-
Select Z up, Plan view or Screen.
Note: Look from mode is not available here because it requires the user to select a location.
-
Select preferred scroll wheel zoom direction.
Tip: Scroll forward zooms in matches other Windows apps.
-
-
Action plane: Set the default action plane characteristics.
-
Style: Choose to display the action plane as a grid, solid or combination.
-
Colour: Set the default colour of the plane.
-
Rear colour: Set a different colour to indicate when the plane is being viewed from behind.
-
Transparent-Opaque: Adjust the slider to the preferred level of transparency.
-
Show action plane in new views: Select to display the action plane automatically in new view windows.
-
-
Display object attributes in view tool-tips: If selected, an object’s attributes (if any) will appear as a tool-tip on mouse over.
-
Display view manipulation help in views: If selected, a temporary tip will appear at the top of the active view window when an applicable tool is clicked.
After setting the required properties, click OK to apply them in your view and close the Preferences panel, or click Apply to apply your settings and stay in the Preferences panel.
Note: These settings will only take effect in new views. Close any existing views and reopen them to see the changes.
Tip: To customise the way BlastLogic Help displays individual view windows, right-click on the view window background and select the required view properties from the context menu.
Properties
The Properties subtab contains the background colour settings as well as line and point settings for objects (such as holes, lines, and polygons).
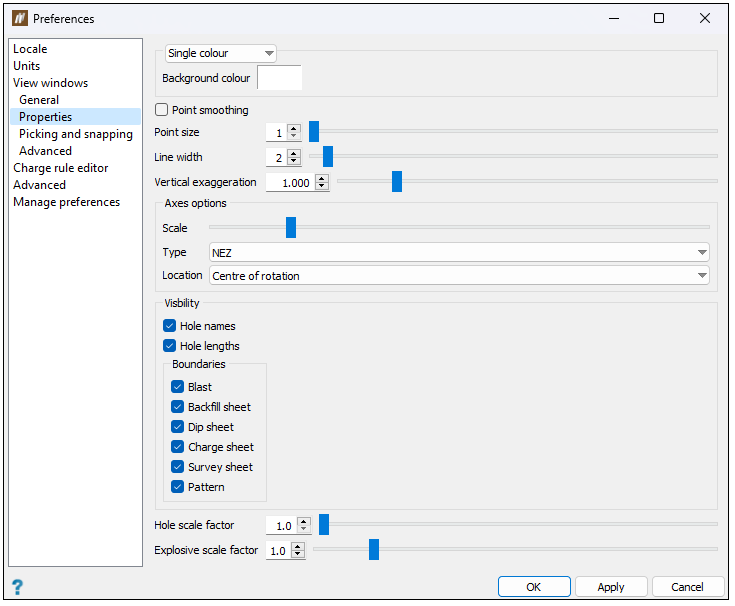
Configure the additional view window properties by setting the following:
-
Background colour: Choose a background colouring style from the drop-down list, as follows:
-
Single colour: The background is a single, uniform colour. Click the swatch and select a background colour from the palette.
-
Screen gradient: The background transitions from one colour at the bottom to another at the top, regardless of view direction. Click the swatches and select bottom and top background colours from the palettes.
-
Sky gradient: The background transitions with the Z axis. Select a predefined gradient style from the Available gradients drop-down list.
-
-
Point smoothing: Select to display rounded points. This is most noticeable with increased point size.
-
Point size: Set the default point display size.
-
Line width: Set the default line display width.
-
Vertical exaggeration: Stretch or compress data visualisation in the Z direction. Set the exaggeration scale for optimal viewing.
-
Axes options: Choose the appearance and location of axes.
-
Show axes in new views: Select the checkbox to display the direction axes in each new screen that you enter.
-
Scale: Adjust the slider to change the size of axes.
-
Type: Select the style of axes from the drop-down.
-
Location: Put the axes at the centre of rotation or in one corner of the view.
-
-
Visibility and Boundaries: Select the required checkboxes to customise the way the holes and boundaries are displayed in your view.
-
Hole scale factor: Adjust the slider or enter the required value (within the range 1–20) manually to set the size of holes displayed in your view.
-
Explosive scale factor: Adjust the slider or enter the required value (within the range 1–4) manually to set the size of explosive displayed in your view.
After setting the required properties, click OK to apply them in your view and close the Preferences panel, or click Apply to apply your settings and stay in the Preferences panel.
Note: These settings will only take effect in new views. Close any existing views and reopen them to see the changes.
Picking and snapping
Through Picking and snapping subtab BlastLogic provides options for drawing 2D CAD objects in the view, such as lines and polygons. BlastLogic Desktop application does not provide full support for drawing 2D lines and polygons. To create a line or polygon on a 2D plane, display the action plane and then draw the line or polygon by picking points on the plane.
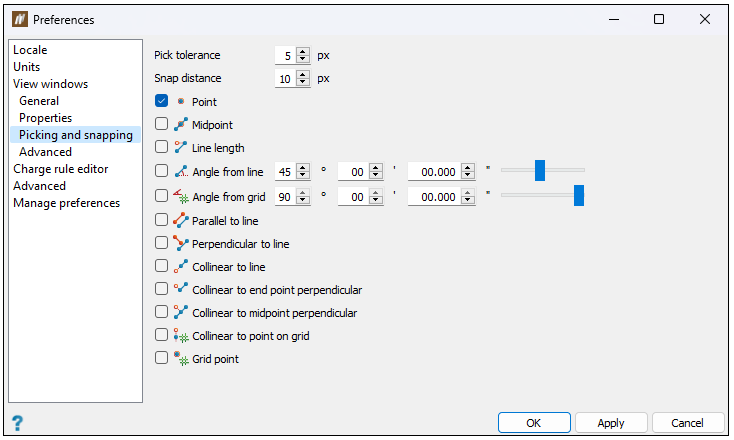
To configure these settings, specify the following:
-
Pick tolerance: Set the maximum distance in pixels from a point to pick it with the mouse pointer.
-
Snap distance: Set the maximum distance in pixels from a point at which snapping will occur.
-
Snap targets: Select targets to activate by default. With the angle targets, also set the required snapping angles.
After setting the required properties, click OK to apply them in your view and close the Preferences panel, or click Apply to apply your settings and stay in the Preferences panel.
Note: These settings will only take effect in new views. Close any existing views and reopen them to see the changes.
Advanced
The Advanced subtab contains several performance settings.
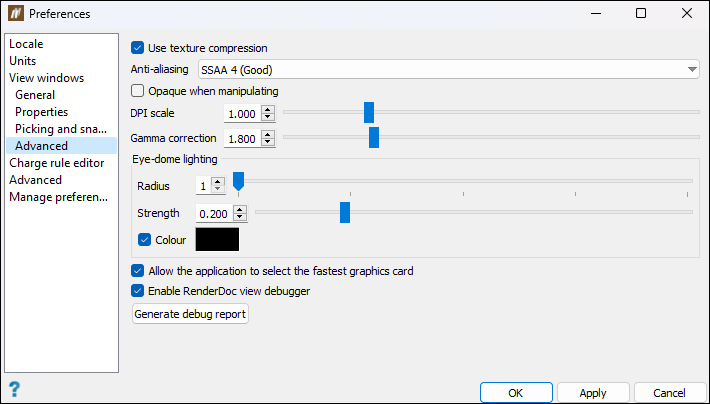
To configure these settings, specify the following:
-
Use texture compression: Compress image data before sending to the GPU. Select if processing very large images.
-
Anti-aliasing: Improve view quality by rounding sharp edges by select the desired option from the drop-down. You can also turn off anti-liasing by selecting None (Fastest), which can help to improve performance, but can also reduce the quality of the objects in the viewer.
-
Opaque when manipulating: Select the checkbox to increase performance (by suspending translucency) when manipulating views.
-
DPI scale: Resize geometry
-
Gamma correction: Adjust to improve display precision where pixel errors occur.
-
Eye-dome lighting: Adjust eye-dome lighting parameters as required.
-
Radius: Increase the radius to extend the reach of the shading effect.
-
Strength: Adjust the strength of the shading effect.
-
Colour: Select and choose a shading colour from the palette. Deselect to shade with the background colour.
-
-
Allow the application to select the fastest graphics card: Select if Windows settings default to a slower card.
-
Enable RenderDoc view debugger: Select to enable capturing frames generated by BlastLogic Help.
-
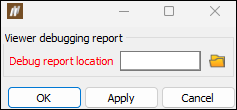
Generate debug report: Click the button to generate and save the debug report under the specified location.
After setting the required properties, click OK to apply them in your view and close the Preferences panel, or click Apply to apply your settings and stay in the Preferences panel.
Note: These settings will only take effect in new views. Close any existing views and reopen them to see the changes.
Charge rule editor
The Charge rule editor tab contains the default settings for external charge rule editing environments. For more information on charge rules, see Create Charge Rule.
To configure this tab, select either the Built-in or External editor radio button.
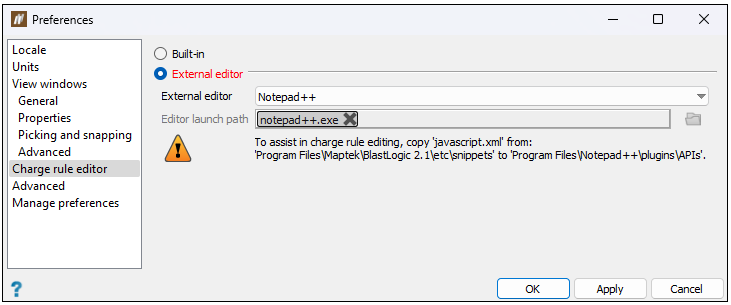
Note: BlastLogic supports only Notepad++ and Visual Studio Code as external editors.
After selecting the required editor, click OK to apply it and close the Preferences panel, or click Apply to apply it and stay in the Preferences panel.
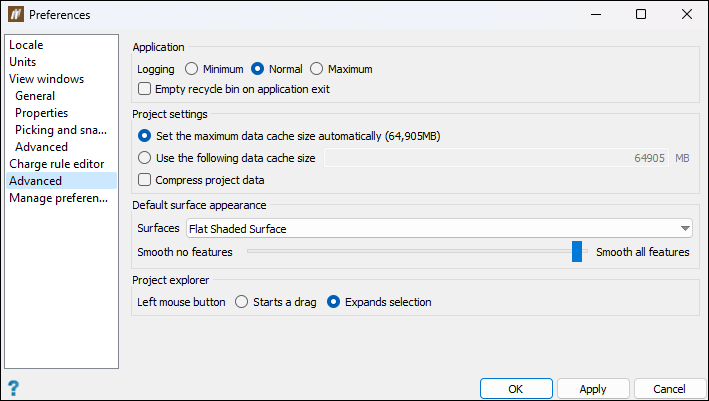
Advanced
The Advanced tab contains application and project settings.
Configure these settings by specifying the following:
-
Application. Allows you to specify how BlastLogic logs your data. The logged data assists with fault diagnosis when you contact Maptek(see Request Support for more information). Hover over these options (Minimum, Normal, Maximum) for the information on the extent of data to be recorded.
-
Empty recycle bin on application exit. Select to clear the BlastLogic Recycle bin when closing the application.
-
Project settings. Set the data cache memory allocation to either use the maximum data cache size automatically, or to use the specified data cache size. Optionally, select Compress project data if you need to save drive space. This setting will only take effect after restarting the application.
NoteIt can be beneficial to decrease the cache size when:
- Other applications are running and need more memory.
- Running multiple copies of the program concurrently.
- Your computer runs out of memory.
It can be beneficial to increase the cache size when Cache is full error messages appear.
-
Default surface appearance. Set the default look of the surface appearance.
-
Surfaces: Determine how new surfaces will appear by selecting from the following:
-
Smooth Shaded Surface
-
Flat Shaded Surface
-
-
Smooth no features or Smooth all features: Adjust the level of feature smoothing between nothing smoothed and everything smoothed. When set halfway, flat areas are smoothed, but sharp features remain crisp.
-
-
Project explorer. Choose how the left mouse button behaves by selecting one of the following radio buttons:
-
Starts a drag: Click and hold on an object to drag that object to new locations.
-
Expands selection: Drag over multiple objects to select them.
-
After setting the required properties, click OK to apply them in your view and close the Preferences panel, or click Apply to apply your settings and stay in the Preferences panel.
Note: These settings will only take effect in new views. Close any existing views and reopen them to see the changes.
Manage preferences
The Manage preferences tab allows you to reset the specified preferences back to the default state, as well as import and export the set configuration.

-
To reset a preference to its default settings, select the preference in the preference tree and click Reset selected to defaults.
-
To reset all the preference tabs to their default settings, select All in the preference tree and click Reset selected to defaults.
-
To import preferences, select Import from file. The file explorer will appear, allowing you to select the import file. Click Open to open the file. BlastLogic will query this import by displaying a Question panel. Click Yes to confirm the import.
-
To export preferences, select Export to file. The file explorer will appear, allowing you to select the file location. Click Save to save the file to the selected location.
