Step 1: Create Drill and Blast Groups
Before we start configuring our schedule, we need to define an attribute in the model that will allow us to specify the areas or groups of solids that should be drilled together and then blasted as a group.
In the example shown in the screenshot below, we want to drill and blast the bench in the areas marked as 1, 2, 3, and 4. The blasting and digging order is the same as the area number.
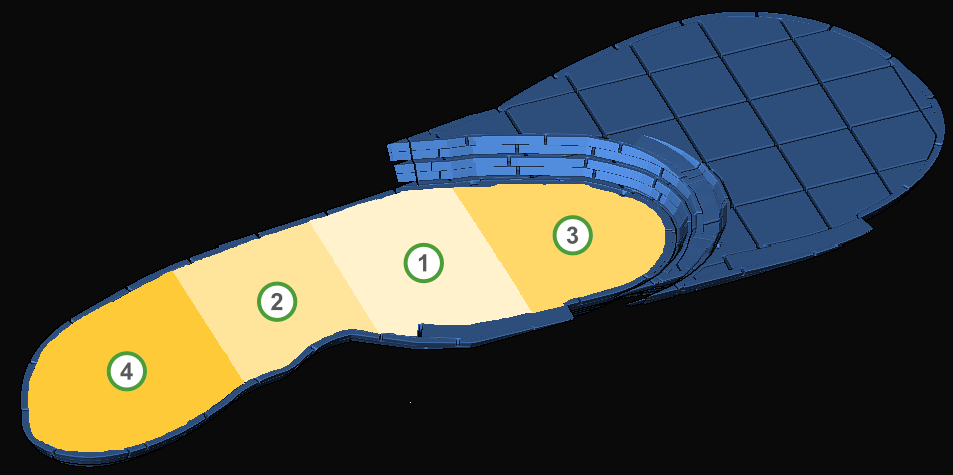
In the tutorial dataset, the attribute has been created for us already as part of the import transforms used to create the pit model. It is called DaB_Group and has been initialised to zero.
![]()
See also: Importing a Solid Model and Importing a Dynamic Solids Pit
Specifying aggregation behaviour
When selecting multiple solids, we want the DaB_Group attribute to show us the average value, not the sum of the value for all selected solids. This is not a required setting, but will make it easier to interact with. Therefore, we need to make sure that the DaB_Group attribute has the Average aggregation behaviour assigned instead of the default Sum aggregation.
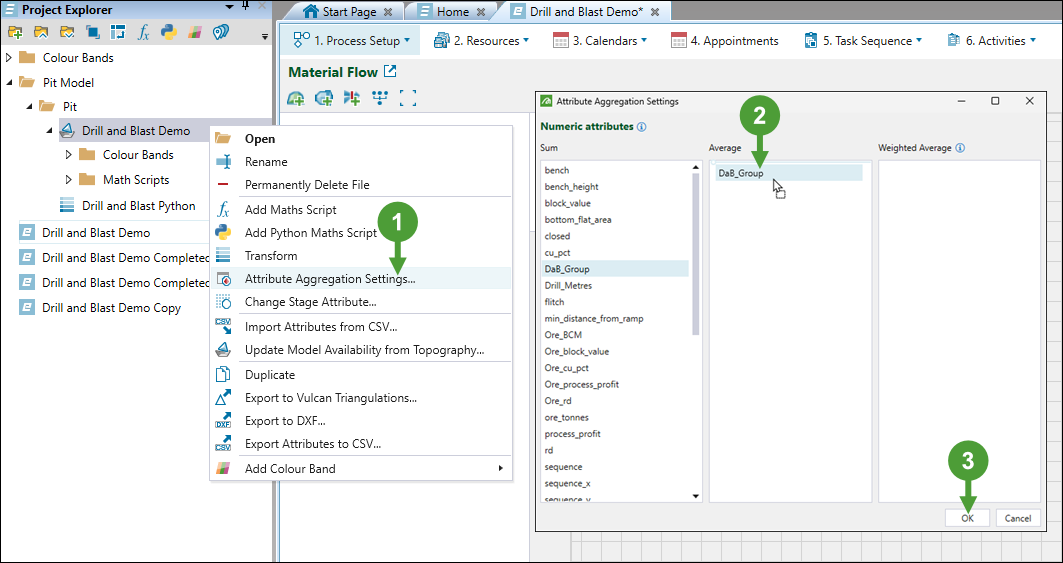
Work through the following steps to specify the aggregation behaviour:
Steps 1-3 are illustrated in Figure 1 below.
-
Right-click on the corresponding pit model in the project explorer and select
 Attribute Aggregation Settings... from the context menu.
 -
In the Attribute Aggregation Settings panel that appears, drag the DaB_Group attribute from the Sum to the Average column.
-
Click OK to apply the changes.
Defining blasting groups
Next, let's switch to the ![]() Viewer tab to define the blasting groups on flitch 140, as follows:
Viewer tab to define the blasting groups on flitch 140, as follows:
Steps 1-3 are illustrated in Figure 2 below.
-
Add the dynamic filters as shown in the image below to simplify the selection of solids.
-
Click
 Shrink Solids on the viewer toolbar to make it easier to identify each mining block.
 -
Switch to plan view to make the selection easier.
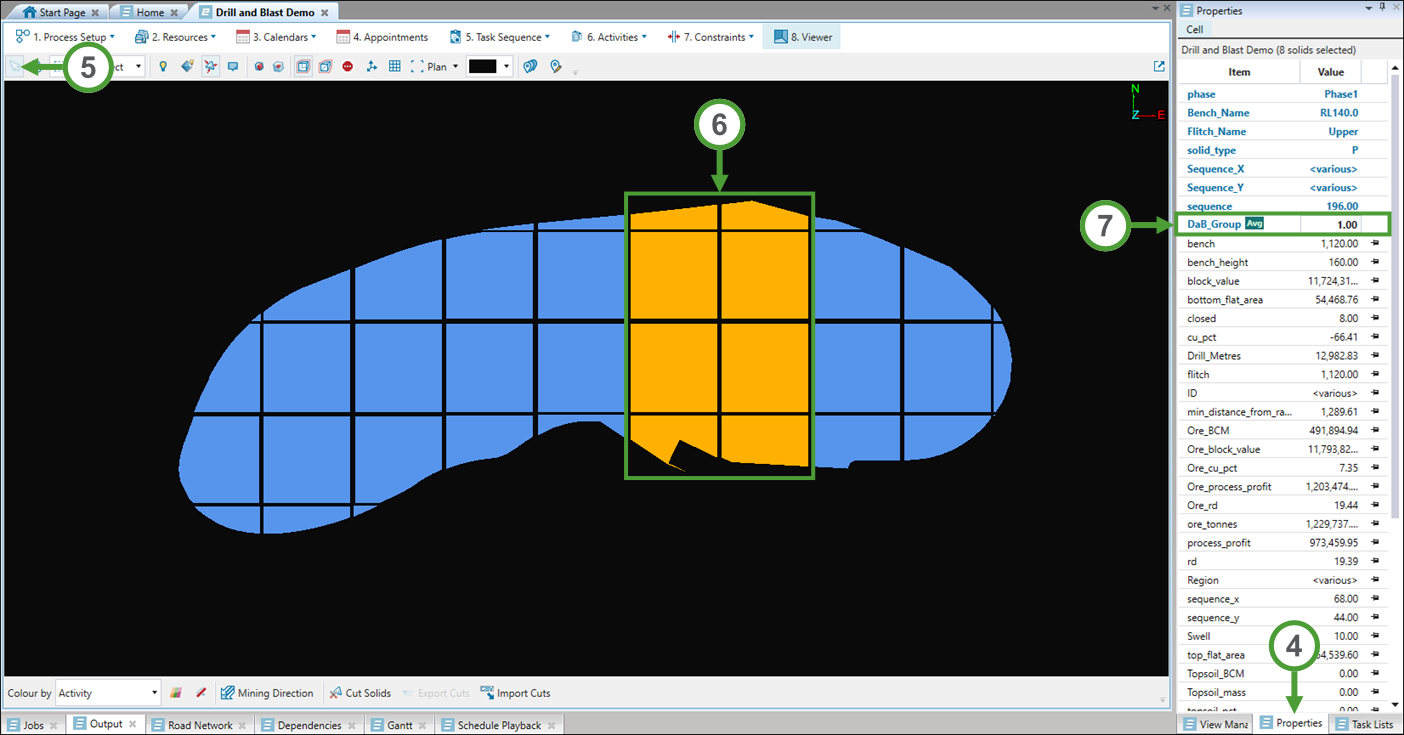
Steps 4-7 are illustrated in Figure 3 below.
-
Switch to the Properties tab.
-
Click
 (Interactive Mode) in the toolbar to enable the selection mode.
 -
Select the solids shown in the image below.
-
Change the value for the DaB_Group attribute to
1. -
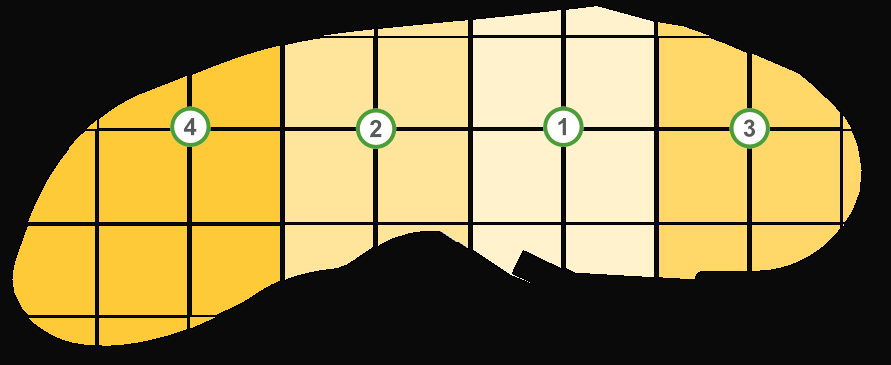
Repeat steps 6 and 7 to assign the values
2,3, and4to the DaB_Group attribute for other groups of solids, as marked in Figure 4 below.

See also: Dynamic Filters in Solids Viewer, Using the Solid Model Viewer, Viewer Properties in Solids
