Step 4: Create Task Lists
In this step of the tutorial, we will create task lists for each of the following activities:
-
Drilling
-
Blasting
-
Excavation
See also: Task lists in Epoch
Creating the drilling task list
First, we will carefully schedule the drills in the order we wish the bench to be drilled and mined. In this example, we will drill in the following order:
-
Ramp
-
Group 1
-
Group 2
-
Group 3
-
Group 4
Follow these steps to create a task list for production drills:
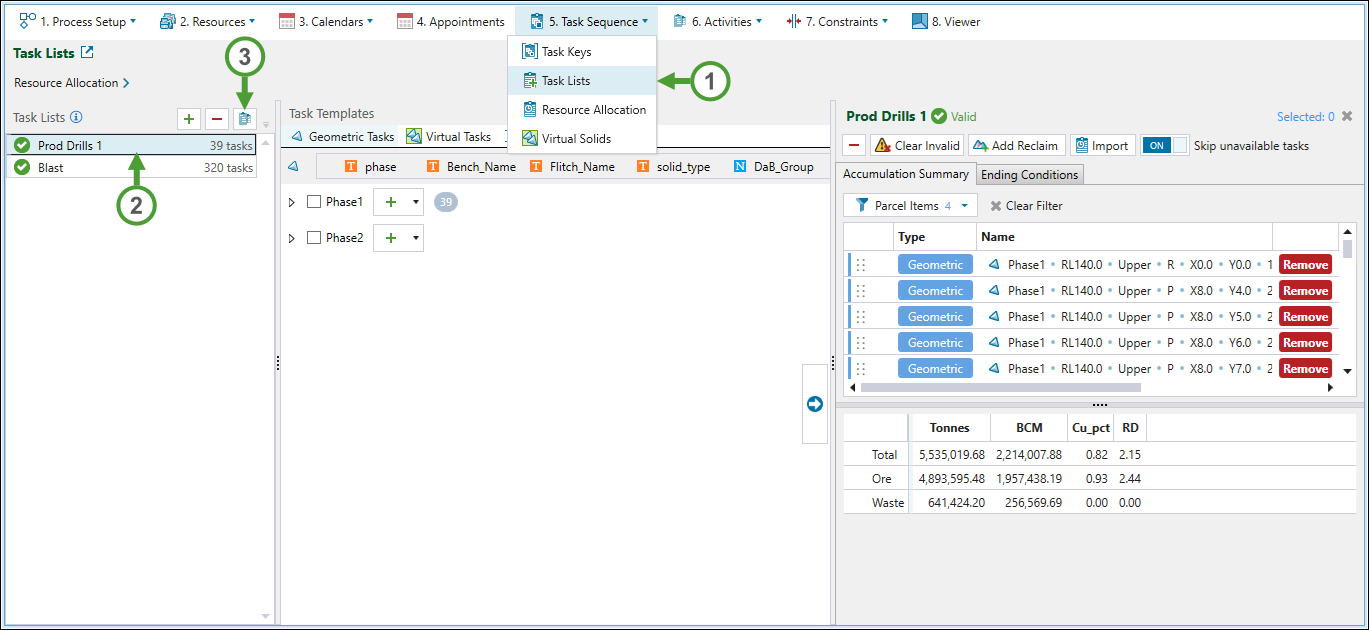
Steps 1-2 are illustrated in Figure 1 below.
-
Go to the
 Task Sequence tab and select
  Task Lists from the drop-down (see Figure 1).
 -
Click
 (Add task list) to add a new task list and name it
 Prod Drills 1. -
Go to the
 Geometric Tasks tab and reorder the list hierarchy by dragging DaBGroup to the position after solid_type.
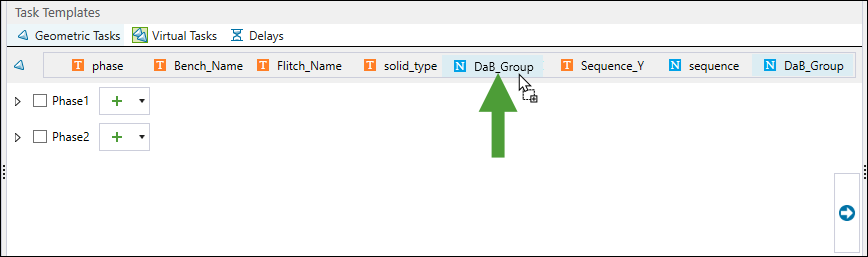
-
Expand the tree (Phase 1 > RL140.0 > Upper) and click
 (Add all tasks in this group to the selected task list) next to the R (Ramp) in the tree.
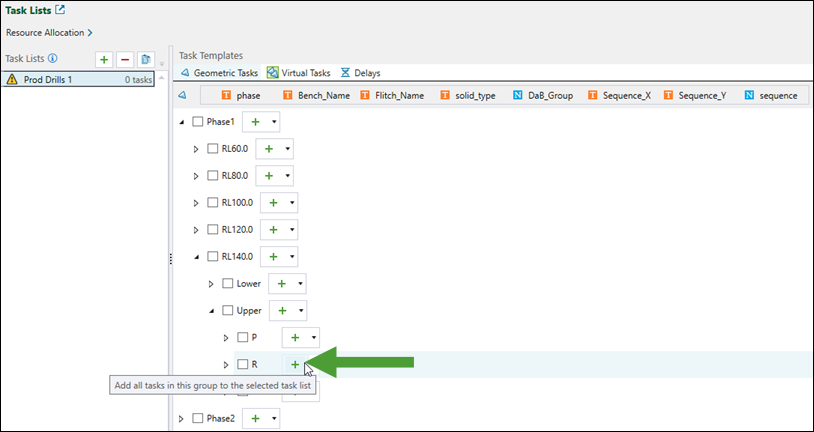
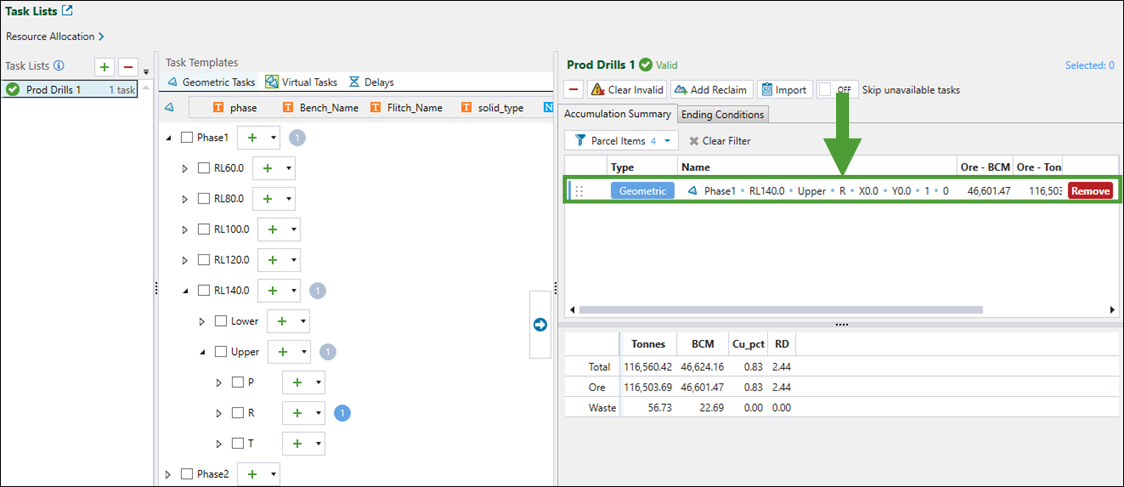
The ramp solid for the RL140 bench (upper flitch) will appear at the beginning of the task list.
-
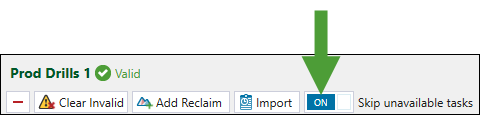
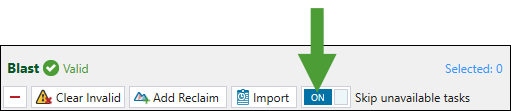
Turn on Skip unavailable tasks.
This will allow the drills to find a free task further down the list if the current task is blocked due to dependencies.
-
Expand the tree (Phase 1 > RL140 > Upper > P) and click
(Add all tasks in this group to the selected task list) next to the 1 level to add all of Blast Group 1 in the upper flitch of the RL140 bench to the list.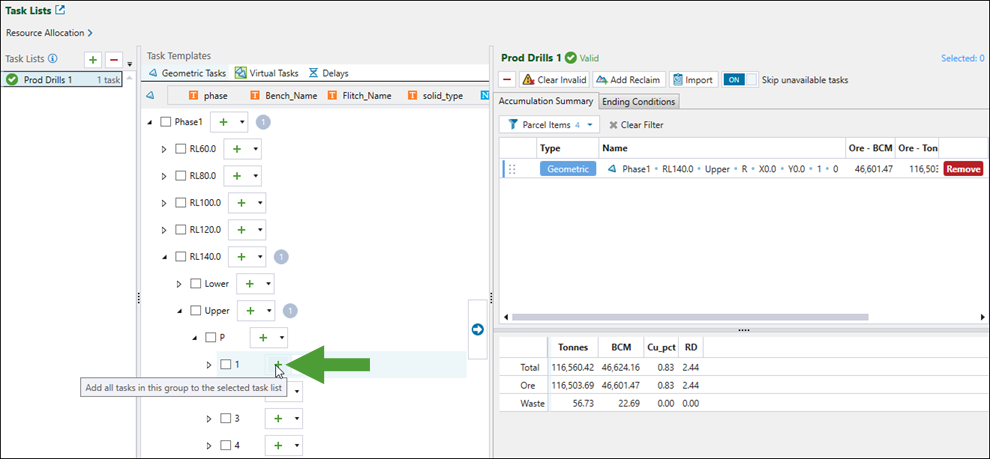
-
Add other levels the same way as level 1, in the following order:
-
Level 2.
-
Level 3.
-
Level 4.
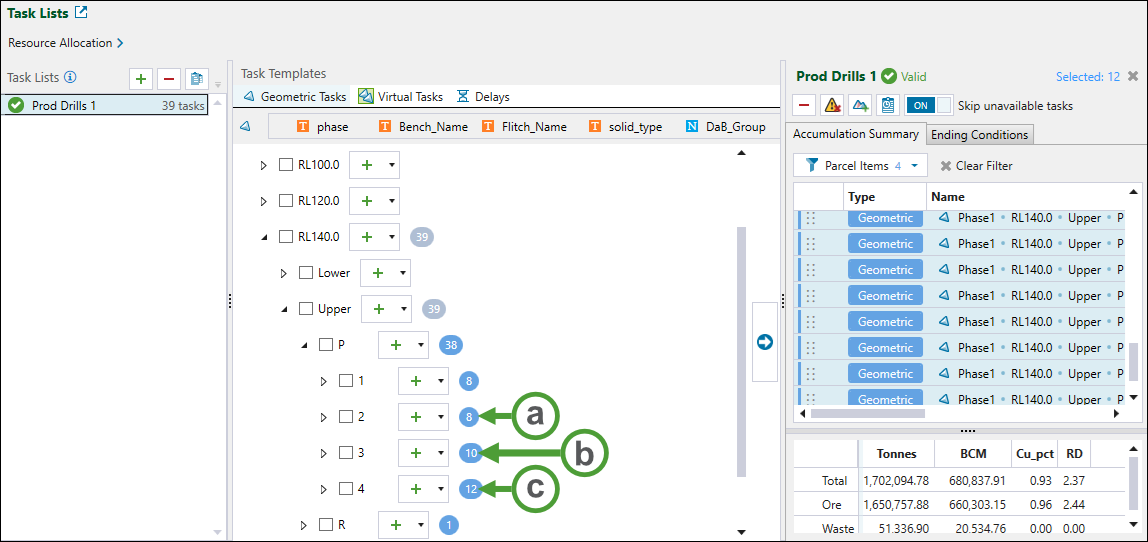
As the result of the above configuration, the drills are set to drill the upper flitch of the RL140 bench in the expected order (Ramp > Blast Group 1 > Blast Group 2 > Blast Group 3 > Blast Group 4).
-

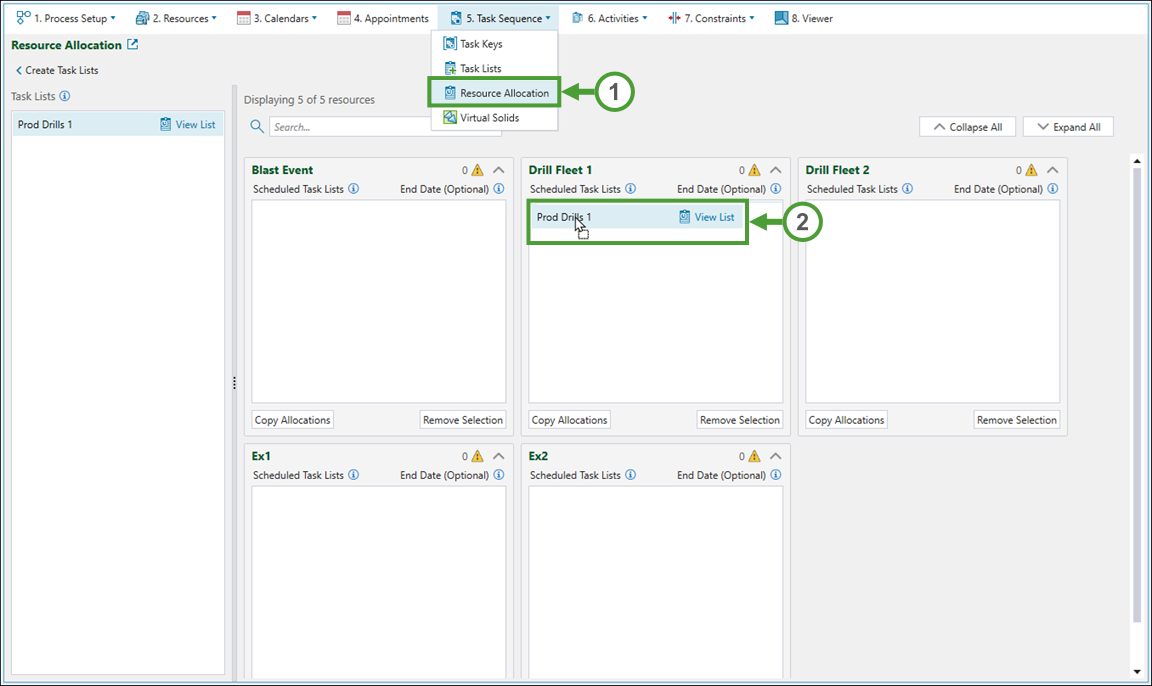
After configuring the task list for drilling operations, we need to assign it to a drill fleet in the ![]() Resource Allocation subtab, as follows:
Resource Allocation subtab, as follows:
-
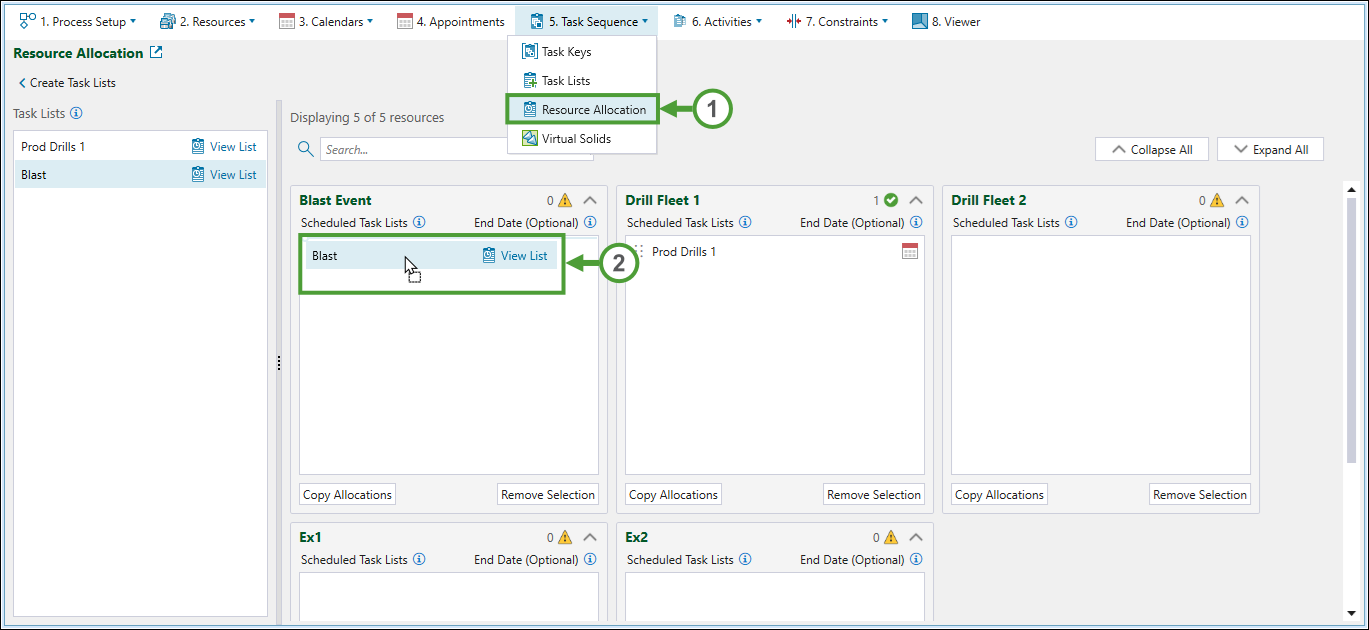
Go the
Task Sequence tab and select  Resource Allocation from the drop-down.
 -
Drag the created Prod Drills 1 task list to the Drill Fleet 1 field.
Creating the blasting task list
Since blasting can only occur after drilling is completed on all solids in a group (see Step 3: Set Dependencies for details), and the duration of the blast is quick (about 5 minutes), we can add all solids to the list in any order. As soon as a blast group is drilled, the solids constituting the group will be available in the task list and be blasted. The quick duration means that all drilled blast groups will be blasted at once, and the exact order will have little effect on the outcome. Blasting operations will therefore follow the production drill task list.
Follow these steps to create a task list for production drills:
-
Go to the
Task Sequence tab and select Task Lists from the drop-down. -
Click
(Add task list) to a new task list and name it Blast.
-
In the
Geometric Tasks tab, click (Add all tasks in this group to the selected task list) next to the Phase1 tree level.
-
Turn on Skip unavailable tasks.
Important: This step is critical: if you leave this function disabled, blasting will be forced to follow the list in order, waiting for the first solid in the list to be drilled—even if a blast group of solids further down the list has already been drilled and is free to be blasted.
After configuring the task list for blasting, we need to assign it to a blast crew in the ![]() Resource Allocation subtab, as follows:
Resource Allocation subtab, as follows:
-
Go the
Task Sequence tab and select Resource Allocation from the drop-down. -
Drag the created Blast task list to the Blast Event field.
Creating the excavation task list
To begin with, we can set the mining order to be the same as the drilling sequence by re-using the Prod Drills 1 task list for the excavator. After reviewing the results, we may need to make adjustments to optimise the sequence for haulage efficiency or grade control.
Follow these steps to create a task list for excavation:
Steps 1-3 are illustrated in Figure 2 below.
-
Go to the
Task Sequence tab and select Task Lists from the drop-down. -
Select the Prod Drills 1 task list.
-
Click the
 (Clone task list) button.
 -
Rename the new list to
Ex1.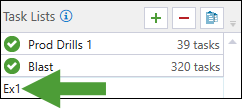
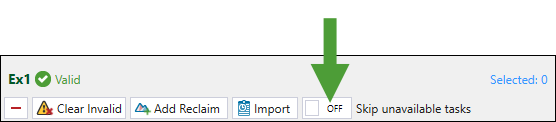
-
Turn Skip unavailable tasks OFF.
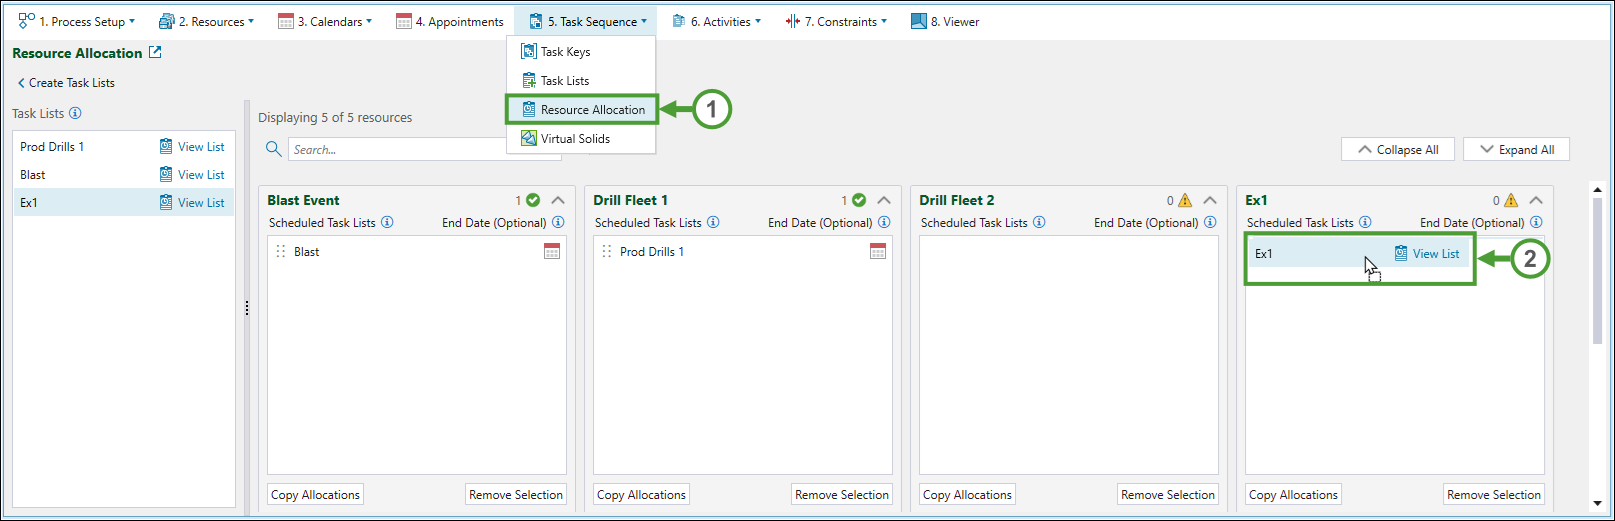
After creating the task list for excavation, we need to assign it to a crew in the ![]() Resource Allocation subtab, as follows:
Resource Allocation subtab, as follows:
-
Go the
Task Sequence tab and select Resource Allocation from the drop-down (see Figure 3 below). -
Drag the created Ex 1 task list to the Ex 1 field.