Crop
The Crop group tools on the Home tab enable you to delete or hide selected or unselected data from a view.
Cropped data in scans is hidden from view, and may be restored by clicking ![]() Show All (Shift+S) from the Filter group of the Position and Filter tab.
Show All (Shift+S) from the Filter group of the Position and Filter tab.
Data cropped from any other data type is deleted, and can only be restored by undoing by clicking the ![]() button or pressing Ctrl+Z.
button or pressing Ctrl+Z.
Tip: To hide data from non-scan objects, use the Filter by Attributes tool. See Filter by Attributes.

|
|
Delete (Alt+D) Hide or delete the selection. |
|
|
Crop (Alt+D) Hide or delete the unselected primitives. |
|
|
Crop a topology to an extruded polygon. See below. |
Delete and Crop
Select the data to hide or keep visible, then click the appropriate button, as follows:
-
Delete hides or deletes the selected data.
-
Crop hides or deletes the unselected data, keeping the selected data visible.
Polygon Crop
The Polygon Crop enables you to crop objects such as lines ![]() , loops
, loops ![]() , point sets
, point sets ![]() , edge networks
, edge networks ![]() ,
and surfaces
,
and surfaces ![]()
![]() . This will perform 'cookie-cutting' of the selected
objects.
. This will perform 'cookie-cutting' of the selected
objects.
-
Select the objects you wish to crop.
-
On the Home tab, in the Crop group, click
 Polygon Crop.
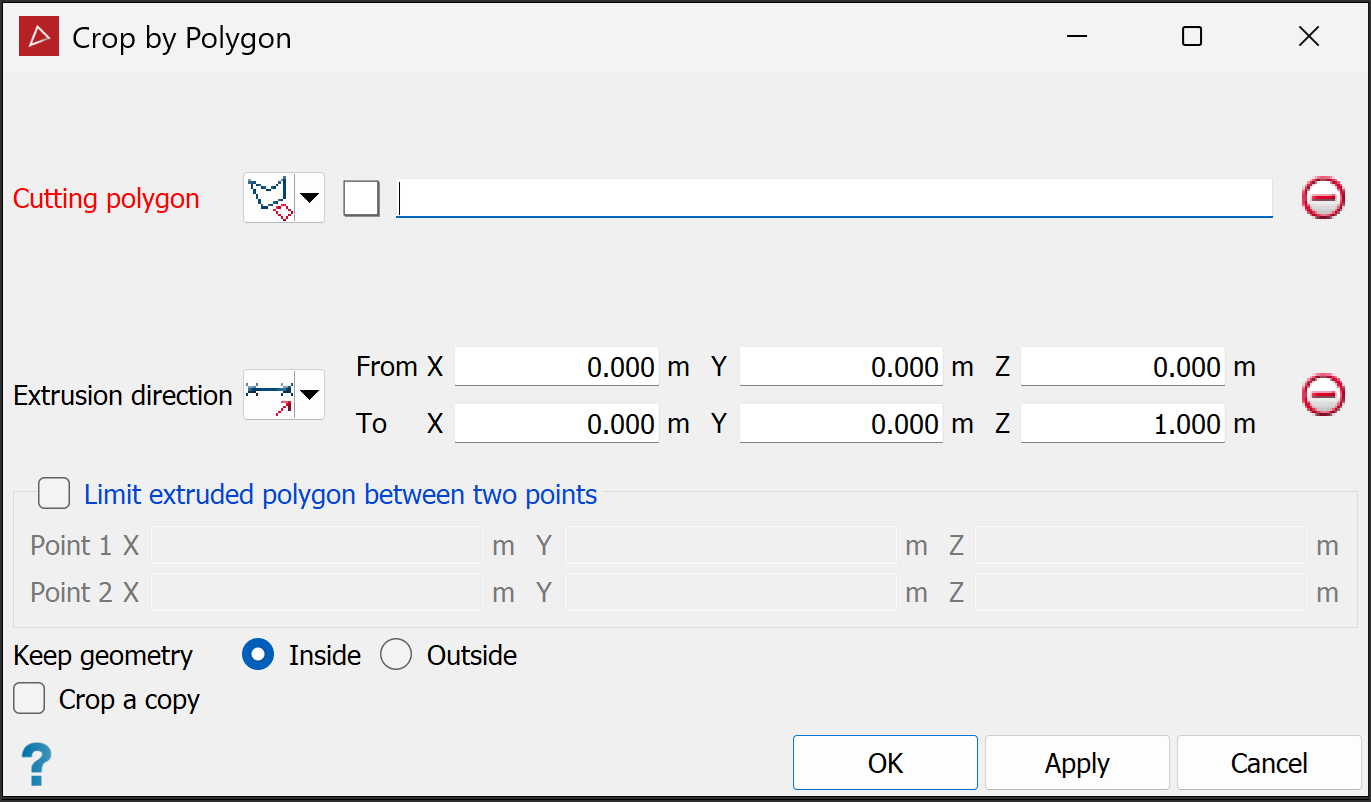
-
Create or select a polygon
 to
use as the cropping boundary. See Lines and Polygons.
to
use as the cropping boundary. See Lines and Polygons.Tip: Alternatively, you can draw the polygon before step 1.
-
Drag the polygon into the Cutting polygon field. The projected polygon boundary is displayed in grey.
-
Select the Extrusion direction of the cropping action using one of the following options:

Two points
Define the direction by specifying two points.

Facet
Make the direction perpendicular to a selected facet.

Axis aligned
Define the direction by an axis of the view window.

Bearing and inclination
Define the direction by a bearing and inclination angles.

Action plane axis
Define the direction by an axis of the action plane.

Polygon best-fit plane normal
Define the direction as the normal to a plane-of-best-fit to a polygon.
An extrusion of the polygon in the direction specified will appear.
-
Limit extruded polygon between two points limits the height and depth of the filter.
-
Choose the required Keep geometry option, whether to retain object fragments Inside or Outside the polygon.
-
Select Crop a copy to keep the original data and crop a copy of the data.
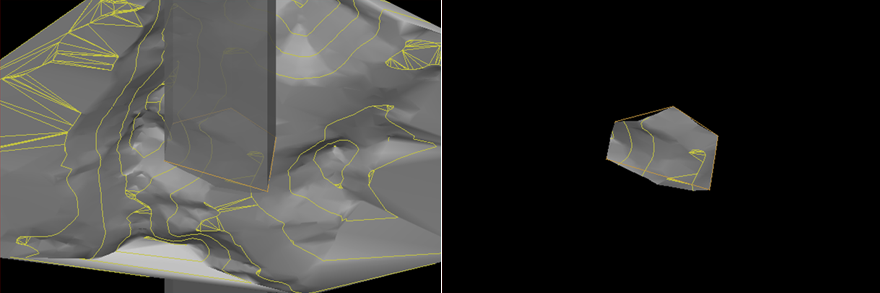
The original objects and extruded cropping polygon (left) and the cropped result, with Keep geometry > Inside selected (right).
