Create Textured Surface
The Create Textured Surface tool on the Photogrammetry tab enables you to create a photographic surface from the sparse and dense point clouds.
To create a textured surface ![]() , click
, click ![]() Create Textured Surface on the Photogrammetry tab, then follow the steps below.
Create Textured Surface on the Photogrammetry tab, then follow the steps below.
-
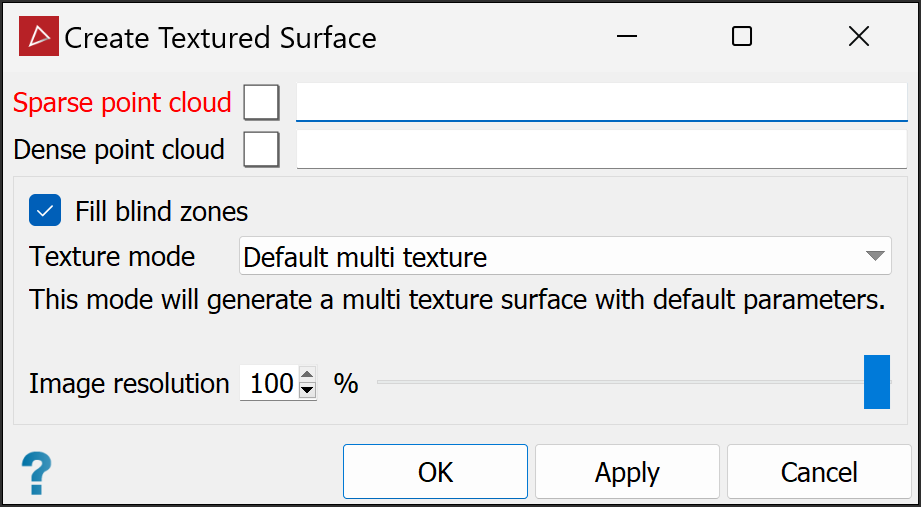
Select the corresponding sparse and dense point clouds in the project explorer.
These point clouds will be automatically added to the appropriate fields in the panel.
Tip: If you select a point cloud in the project explorer before clicking the textured surface tool, it will automatically be added to the appropriate point cloud field.
-
When Fill blind zones is selected, the textured surface tool will add points to fill in areas that are not visible to any cameras. Clear this option if you want these areas to remain unfilled.
-
Select the required Texture mode to determine the number and resolution of images overlaid on the surface.
Low facet count Generate a low resolution, single-texture surface to reduce storage size. Default single texture Generate a single-texture surface with default resolution parameters. For large projects, the single image could be excessively large. Default multi texture Generate a multi-texture surface with default resolution parameters. Each image will be limited to a maximum size based on the computer hardware capability. PointStudio will determine the number of images from the project size. High details Generate a high-resolution multi-texture surface. Note: This is the only texture mode available if you selected the Vertical structure category in the Create Dense Point Set tool.
-
Set the preferred Image resolution by either entering a value or dragging the slider.
Note: Lower image resolution results in lower quality but better processing speed and smaller output files.
-
Click OK or Apply.
The textured surface will be placed in the same container as the sparse and dense point clouds and displayed in the active view window.
